How hard is it to build a Miro-style collaboration app? Let's outline planning, features, tools, and steps needed to create a visual collaboration platform ready for remote teams.
Thinking about building a Miro-style collaboration app from scratch?
Yes, it is possible!
With the right plan, clear steps, and smart tools, a functional clone can take shape faster than expected.
Visual collaboration tools are booming. According to industry reports , Miro now supports over 90 million users across more than 250,000 organizations worldwide, underscoring the widespread adoption of visual collaboration tools as teams work remotely and in hybrid environments.
Let's walk through the full process of building an app like Miro.
Why Teams Wants a Miro-Style App?
Remote work is normal now. Hybrid teams are everywhere.
People want a shared space to brainstorm, plan, and organize ideas without friction. That is where a visual whiteboard app fits perfectly.
A Miro app clone gives teams:
- A shared infinite canvas: An infinite canvas removes space limits. Teams can keep adding ideas without running out of room. It feels natural, like thinking on a large wall rather than squeezing ideas into boxes.
- Real time collaboration: Real-time collaboration lets the whole team work together at the same time. Changes appear instantly. No refresh. No waiting. Everyone stays on the same page, even across different time zones.
- Simple tools for sketching ideas: Basic elements such as shapes, lines, and text help ideas flow quickly. No learning curve. Teams can sketch, rearrange items, and brainstorm without interrupting the conversation.
- Space to organize boards and projects: Boards help structure work. Teams can separate ideas by project, sprint, or goal. This keeps information easy to find and avoids mixing unrelated thoughts.
This type of product works for startups, students, designers, and large organizations. It fits many people and many goals.
How to Create a Micro App?
So, before jumping into detailed steps, it helps to understand how to create a micro app in general.
A micro app focuses on doing one thing well. It stays small, focused, and easy to maintain. That mindset works perfectly for a Miro-style product.
A good micro app usually starts with a single core idea. In this case, that idea is a shared canvas for teams to brainstorm and organize ideas.
Skip extra features early on. Focus on the main value.
The usual flow looks like this:
- Pick one strong problem to solve
- Define a small feature set
- Create a basic UI that feels intuitive
- Connect real-time collaboration early
- Test with a small group and collect feedback
This approach saves time and resources. It also helps the project stay flexible as ideas grow. Once the micro app feels stable, new features can be added without breaking the experience.
Here is a step-by-step guide to building the right mindset for developing a Miro-style app.
Step 1: Start With a Clear Plan
So, before touching code or tools, a plan matters. Not a huge document. Just a clean direction.
Questions to answer early:
- Who is the user?
- Is this for individuals or a team?
- Which features come first?
- What makes this clone different?
This step saves time later. It also helps manage scope and resources. A solid plan keeps the project focused and avoids random decisions.
Step 2: Define Core Features
Next, list what the app must do on day one. Not everything. Just the basics.
Core functionality usually includes:
- Infinite canvas for free movement
- Boards to organize work
- Shapes and text for visual ideas
- Real-time collaboration
- Share and link options
A Miro board-style layout works well here. Keep it intuitive. No clutter. People should be able to start and understand it quickly.
Step 3: Pick the Right Tech Stack
Then comes the technical side. This does not need to feel scary.
A typical stack includes:
- Frontend framework for the canvas
- Backend for real-time data sync
- WebSockets for real-time collaboration
- Database for boards and account data
Use npm to manage dependencies. It keeps packages clean and simple to update. A local development server helps test changes quickly before pushing anything live.
Step 4: Design the Canvas Experience
The canvas is the heart of the product. It needs to feel smooth and responsive.
Key points to focus on:
- Infinite zoom and pan
- Fast rendering
- Easy placement of items
- Clear focus on work
An infinite canvas gives people room to think. It should never feel tight or boxed in. This part shapes the full experience.
Step 5: Build Real Time Collaboration
Real-time collaboration allows:
- Multiple people editing together
- Instant updates across browsers
- Live cursors or pointers
This feature turns a simple app into a team product. Real-time interaction helps people brainstorm, review ideas, and move forward together without delay.
Step 6: Handle Accounts and Access
After that, handle sign-in and account flows.
Basic needs include:
- Sign up and sign in
- User profiles
- Access control for boards
- Share links
Keep it simple. Too many steps push people away. The app should feel accessible from the first click.
Step 7: Organize Boards and Projects
Then, help users organize their work.
Boards should:
- Sit inside a project
- Be easy to find
- Support search
- Load fast
A good organization keeps teams productive. It also helps manage large amounts of information without confusion.
Step 8: Test, Review, and Improve
Before launch, test everything.
Check:
- Browser compatibility
- Real-time sync accuracy
- Canvas performance
- Share and request flows
A short review cycle with feedback from real people helps polish the product. Small fixes here make a big difference later.
Feature Comparison
Not every feature needs to be built on day one. This table breaks down what the app needs at launch versus what can wait. It helps the team stay focused and avoid spreading effort too thin.
| Feature | Must Have | Nice to Have |
|---|---|---|
| Infinite canvas | Yes | No |
| Real-time collaboration | Yes | No |
| Shapes and text | Yes | No |
| Video chat | No | Yes |
| Templates | No | Yes |
Add features that support core work and collaboration. Additional items can be added later, once the product is stable and users enjoy it.
Launching Faster With Rocket.new
Rocket.new gets teams moving fast without drowning in setup headaches. When building a Miro app clone, speed and flexibility are everything, and Rocket.new delivers both.
Think of it as your shortcut to a solid, working product in record time.
Top Features:
- Ready-to-use app templates
- Built-in auth and account setup
- Real-time support for collaboration
- Clean UI structure with strong ux focus
Use Cases:
Startup teams: Quickly create a shared brainstorming space without weeks of setup.
Remote classrooms: Teachers and students share boards, ideas, and notes in real time.
Product planning teams: Visual planning, feedback collection, and roadmap sketches in one place.
Rocket.new works best when the goal is to move fast without losing clarity. It removes early friction so teams can focus on ideas, collaboration, and shaping a product people actually want to use.
👉Build Miro App Clone with Rocket
Security, Scale, and Long-Term Growth
Once the app is live, the work does not stop. This stage is about protecting user data, supporting more teams, and keeping the product stable as usage grows.
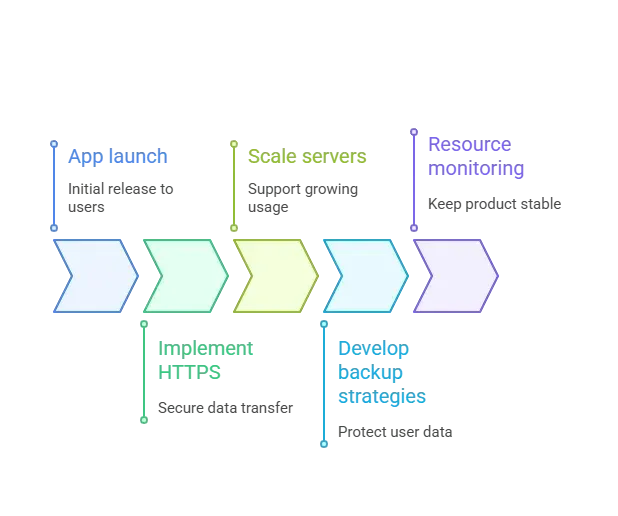
Growth usually comes faster than expected. A little planning here helps keep the app stable as more users, boards, and projects accumulate.
How to Build a Miro App That People Actually Use
Building a Miro app clone is not about copying pixels. It is about helping teams work better together. Focus on real-time collaboration, a smooth infinite canvas, and simple organization. Keep the experience human. Keep the tools friendly. That is where success usually lives.
A good product also listens. Watch how people use the app, notice where they pause, and adjust based on real behavior. Small improvements over time often matter more than big feature drops.
Table of contents
- -Why Teams Wants a Miro-Style App?
- -How to Create a Micro App?
- -Step 1: Start With a Clear Plan
- -Step 2: Define Core Features
- -Step 3: Pick the Right Tech Stack
- -Step 4: Design the Canvas Experience
- -Step 5: Build Real Time Collaboration
- -Step 6: Handle Accounts and Access
- -Step 7: Organize Boards and Projects
- -Step 8: Test, Review, and Improve
- -Feature Comparison
- -Launching Faster With Rocket.new
- -Top Features:
- -Security, Scale, and Long-Term Growth
- -How to Build a Miro App That People Actually Use