
What helps you start building for iOS? See the core stages for planning, designing, coding, and refining iOS apps, offering steady guidance and clear progress from concept to release for you.
So, how do you actually create an iOS app from scratch?
It is simpler than most people expect.
You begin with a clear idea, set up Xcode on your Mac, design a clean user interface, write some Swift code, test it carefully on the iOS simulator and a real device, and then submit it through App Store Connect. That’s the real journey behind every app you see in the App Store.
And here’s why it matters. According to Apple, developers have earned over $320 billion through the App Store since 2008, highlighting the massive opportunity in the mobile app ecosystem.
That’s not just a number. It shows how powerful the iOS platform is for creators. So if you’ve been thinking about building your own app, now is a great time to start.
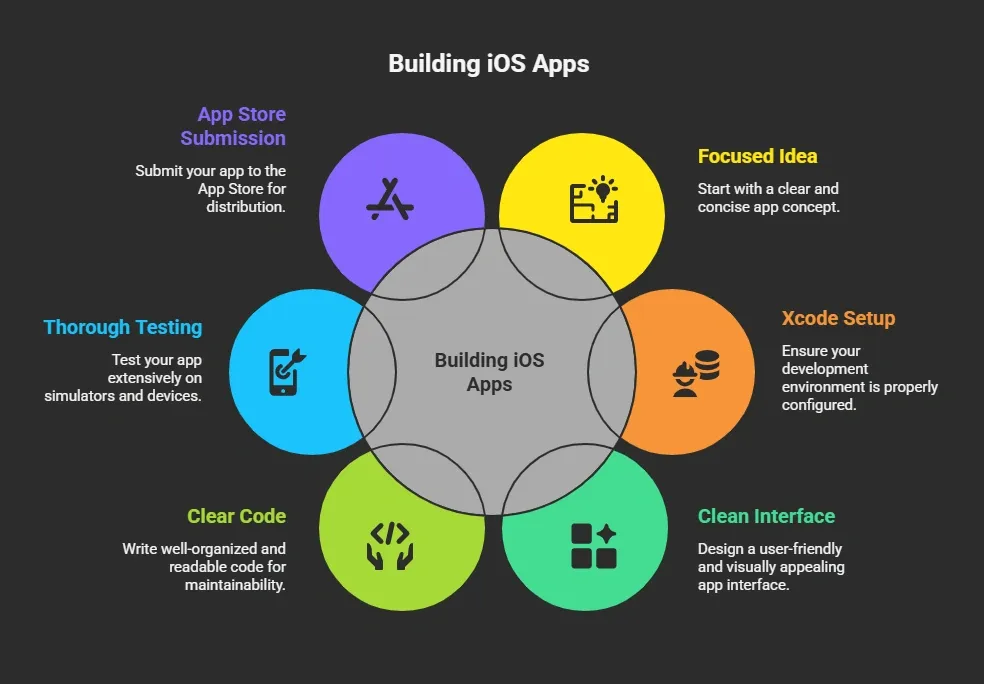
The Key Steps to Building an iOS App
Building an app might sound complex at first, but when you break it down into clear stages, it becomes much more manageable.
From shaping your idea to publishing the final product on the App Store, each stage plays an important role in creating a functional and user-friendly app.
Let’s walk through the key steps involved in building an iOS app from scratch.
Step 1: Start With a Clear App Idea
Before you open Xcode or touch any code, pause for a moment. Every iOS app starts with an idea. And surprisingly, it does not have to be complicated.
In fact, your first app should be simple. Many successful iPhone app projects started small. A habit tracker. A notes tool. A basic task manager. Nothing fancy. Just useful.
So instead of trying to build the next social network, focus on solving one clear problem. Look at existing apps in the app store. Notice how many of them do one thing really well.
Ask yourself:
- Who are your users?
- What problem does this iOS application solve?
- Why would someone download this app?
Once you answer those questions, your direction becomes clearer. A simplified version of your big vision is perfect for your first project. It keeps your learning process manageable and far less stressful.
Step 2: Set Up Your Mac and Download Xcode
Now that your idea feels solid, let’s move into action.
To develop iOS apps, you need a Mac. iOS development runs on mac os, so that’s your starting point.
Next, open the Mac App Store and search for Xcode. Click download and install the latest version. Keeping Xcode updated helps you avoid issues when submitting to the App Store later.
After installation:
- Launch Xcode
- Sign in with your Apple account
- Let it install any additional components
Xcode is your main tool for iOS app development. It includes the iOS SDK, the iOS simulator, a graphical interface builder, debugging tools, and device testing support.
At first, Xcode might feel overwhelming. That’s completely normal. Spend some time clicking around. Familiarity builds confidence.
Step 3: Create a New Project
Once you’re comfortable, it’s time to create something real.
Open Xcode and click “Create a new project.” Choose the App template under iOS. This creates your Xcode project.
You’ll need to enter:
- App name
- Organization identifier
- Interface option
- Programming language
Most beginners choose Swift because Swift code is cleaner and easier to read than Objective-C. Objective-C is still used in older iOS apps, but Swift is widely adopted for modern iOS development.
After clicking Create, your project opens. It may look basic, but congratulations, you just created your first app foundation.
Step 4: Get Comfortable Inside Xcode
At this point, you’ll see several panels on your screen. Don’t rush past this stage.
On the left, you’ll find the project navigator. In the center, you’ll see the code editor. On the right, there’s the inspector panel.
You’ll notice files such as:
- AppDelegate
- SceneDelegate
- ViewController
- Assets
These other files help manage how your iOS application launches and behaves.
Take a few minutes to navigate through everything. Click files. Read comments. The more you explore, the more natural the interface feels. This is part of your learning journey in iOS development.
Step 5: Design a Clean and Intuitive User Interface
Now comes the creative part.
Your app’s user interface plays a huge role in how users feel. If the layout looks cluttered, users leave. If it feels intuitive and clean, they stay longer.
Open your storyboard or SwiftUI file. This is where you create your graphical interface.
You can drag and drop:
- Buttons
- Labels
- Images
- Text fields
The graphical interface builder inside Xcode makes it easier to design visually before writing code.
As you design, think about simplicity. Clear navigation. Logical screen flow. Comfortable spacing. Good app design is not about adding more. It’s about keeping things focused.
Here’s a quick comparison:
| Feature | UIKit | SwiftUI |
|---|---|---|
| Approach | Traditional | Modern |
| Style | Structured | Declarative |
| Used In | Many existing apps | New ios apps |
Both are valid choices. For your first app, choose one and stick with it so your learning process stays smooth.
Step 6: Write the Code That Brings It to Life
Once your interface looks good, it’s time to make it functional.
Open your ViewController file. This is where programming begins.
You’ll write code to:
- Respond to button taps
- Update labels
- Navigate between screens
- Handle user input
Without code, your app is just a static layout.
If you’re new to programming, don’t worry. Follow a tutorial. Search on Google for beginner ios development guides. There are many free resources that walk you through building a small app step by step.
As you practice, things start clicking. The learning process becomes less intimidating and more rewarding.
Step 7: Add Data Using Core Data
Sooner or later, your app will need to store information.
That’s where Core Data comes in.
Core Data allows you to:
- Save information
- Fetch stored records
- Update entries
You can enable Core Data when creating your new project or add it later.
Once set up, you define entities and attributes, then write code to store and retrieve data. Core Data works well for both small apps and larger iOS application projects.
Step 8: Test in the iOS Simulator
Now let’s talk about testing. And yes, this step matters more than most people think.
Click the Run button in Xcode. The iOS Simulator opens automatically.
The iOS simulator allows you to test:
- Different iPhone models
- iPad layouts
- Screen rotation
- Various iOS versions
Instead of quickly checking and moving on, take your time. Tap every button. Try unusual inputs. Rotate the screen multiple times. Testing helps you catch layout issues and navigation problems before real users find them.
And trust me, it’s better when you find them first.
Step 9: Test on a Real Device
After testing in the iOS simulator, connect your iPhone or iPad to your Mac.
Select your real device in Xcode and click Run.
Testing on a real device reveals things the simulator cannot. You’ll notice actual performance, touch responsiveness, and how your app behaves in real-world conditions.
Open the app. Close it. Switch to another app. Come back. Rotate the device. Test again.
The more you test on a real device, the more confident you’ll feel before submission.
Step 10: Create an Apple Developer Account
Now that your app works properly, it’s time to prepare for publishing.
Enroll in the Apple Developer Program.
Once approved, you gain access to:
- Certificates
- Provisioning profiles
- App Store Connect
- Developer services
App Store Connect is where you manage your iOS app listings. It replaced iTunes Connect, though many developers still mention the older name.
Step 11: Prepare for the App Store
Inside Xcode:
- Select a generic iOS device
- Archive your project
- Validate
- Upload
Then open App Store Connect.
Here, you’ll:
- Add screenshots
- Write your description
- Add keywords
- Set pricing
- Provide privacy details
Think of this as presenting your app to the world. Keep the description clear and simple so users immediately understand its value.
Community Insight
On Reddit’s r/iOSProgramming, a developer once shared:
“The best way to learn iOS development is to build small projects and ship them. Don’t wait for the perfect idea.”
That advice keeps many developers moving forward. Build something. Publish it. Improve the next version.
How Rocket.new Supports iOS App Developers?
Rocket.new provides developers with a structured workspace for building and testing apps with reduced setup delays.
Rocket.new now offers Rocket Mobile, a flexible mobile dashboard built for checking projects anywhere. This version keeps your workflow available off your Mac and supports fast updates as you move through daily tasks.
Key features include:
- Mobile Dashboard for viewing project details from any phone
- Fast Notifications for build updates and changes
- Simple Project Switching that keeps navigation quick
- Clean Design that mirrors the main workspace
- Helpful Status Checks for builds, services, and tasks
Rocket Mobile keeps your workflow active even on busy days and provides helpful visibility across your app development workflow.
How to Build Apps for iOS With Confidence
So when people ask how to build apps for iOS, the answer isn't mysterious.
Then repeat the process with your next project.
With every app you create, your confidence grows. Your skills sharpen. And your ideas become easier to turn into real, working iOS apps.
Table of contents
- -The Key Steps to Building an iOS App
- -Step 1: Start With a Clear App Idea
- -Step 2: Set Up Your Mac and Download Xcode
- -Step 3: Create a New Project
- -Step 4: Get Comfortable Inside Xcode
- -Step 5: Design a Clean and Intuitive User Interface
- -Step 6: Write the Code That Brings It to Life
- -Step 7: Add Data Using Core Data
- -Step 8: Test in the iOS Simulator
- -Step 9: Test on a Real Device
- -Step 10: Create an Apple Developer Account
- -Step 11: Prepare for the App Store
- -Community Insight
- -How Rocket.new Supports iOS App Developers?
- -How to Build Apps for iOS With Confidence