
Want to build an iPhone app without confusion? Let's walk through every step, from planning features and designing a user interface to development, testing, and launching, including tools like Rocket Mobile for faster builds.
What makes someone finally decide to build an iPhone app?
A clear goal mixed with solid motivation.
According to Statista, the Apple App Store has more than 1.6 million apps, and that number continues to grow steadily. Within that massive space, new creators still rise every day with fresh ideas.
Let's break the entire process into clear steps from concept to store release.
Start With a Clear App Idea
A sharp app idea always sits at the center of a strong project.
Every iPhone app starts with a single intention, even when the final result evolves. Many creators start with a sketch or a simple outline. That makes it easier to see what works.
Step back and compare your concept with competing apps to identify opportunities to stand out. Looking at similar or existing apps helps identify common patterns.
The goal is not to copy anything. The goal is to understand what users already expect.
Here’s a quick way to shape your idea with simple questions:
- What problem does the app solve?
- How will users interact with it on iOS devices?
- What part of the experience matters most?
This stage helps you avoid bloated plans. A clear vision also makes the next steps feel smoother because you always know what you’re building toward.
Do Some Competitive Market Research
The market is active, and creators release new mobile apps on every major store each day. Spending a little time reviewing cross-platform and other mobile apps gives you clues about what works.
So, browse a mix of categories.
Then write notes.
Next, compare your notes with your original idea.
People often look for:
- Patterns in pricing
- Gaps in features
- Requests from users
- Complaints repeated across reviews
This helps you position your app more clearly. A bit of competitive market research also gives you a sense of how crowded your category feels. That doesn’t mean you step away from the idea. It just means you shape it more intentionally.
This stage also helps you prepare for a later marketing plan. When you know what people want, you can talk directly to those needs.
Choose Your Development Tools
Most creators use a Mac running macOS when working with Apple platforms. Xcode remains the heart of iOS development. It supports building iOS apps for iPhone, iPad, and other Apple devices.
If you want to develop iOS apps with fewer coding tasks, an app builder is a good option. Many app builder tools enable users to build apps quickly with templates and drag-and-drop landing page editors. An app template provides a stable foundation, so you can focus on your idea without worrying about the design structure.
Common development tools include:
- Xcode
- Swift is the main programming language
- UI Kits based on Apple’s Human Interface Guidelines
Some teams also plan hybrid apps to handle cross-platform needs, especially when they also maintain Android apps. A cross-platform app workflow keeps everything under one structure, which can speed things up.
Your development tools shape your entire app development journey. Choose tools that match your time, skill level, and long-term plans.
Plan the User Interface
The user interface determines how well real users interact with your product. Clear screens and simple layouts improve comfort. People avoid apps that feel confusing or cluttered. That’s why Apple’s Human Interface Guidelines offer solid direction for any creator.
- Focus on clarity.
- Use spacing that helps people move through each screen.
- Add a tab bar if you have multiple major sections.
- Match familiar patterns found in high-quality apps.
Apple wants every app to feel natural across all Apple platforms. So keep the structure clean. That helps the viewing experience feel calm, even with many features.
Then consider how your user interface will support your app's landing page later. A strong, steady identity builds trust at first glance.
Map Out Your App Features
Before anyone writes code, list the app features you want.
Short lists make the app development process far easier. Long lists create stress and delay.
 People often want everything in the first version, but it's better to start with a simplified one. You can release updates later based on user feedback, changes in app store ratings, or requests from real users.
This list should feel light. A good plan leaves room for new ideas after the app launches.
Pick Your Programming Language
Swift is the primary programming language for Apple platforms. It’s clean, simple, and pleasant to use. Some creators use Objective-C for older projects, while most new projects use Swift.
Cross-platform development introduces languages that support hybrid app development. Some teams follow this path to share code between iOS and Android versions. That helps people create apps with less repeated work.
The main factors when choosing a programming language include:
- Your long-term goals
- Your experience
- The number of Apple devices you want to support
- The type of mobile app you’re creating
Pick one language and stay consistent. That keeps your code base easy to update. You can always expand in the future.
Move Into the Development Process
Once the plan is clear and the tools are ready, the development process becomes a routine cycle. You build a feature, test it, adjust it, and move on.
Here’s a simple flow:
- Build each screen in order
- Connect your logic
- Add your navigation
- Handle in-app purchases if needed
- Run tests after each addition
The development process rarely feels perfect. Small bumps appear, but that’s normal. Just stay consistent. Fix issues as soon as you find them. That keeps your project from slowing down.
App development works better in steady phases rather than big jumps. Short cycles make progress feel reachable.
A Quick Look at Setup Options
Here is a friendly table that compares three common build paths:
| Method | Skill Level | Speed | Flexibility | Notes |
|---|---|---|---|---|
| Native Swift | Medium | Moderate | High | Strong for high quality apps |
| Hybrid Apps | Low-Medium | Fast | Medium | Helpful for cross platform needs |
| App Builder | Low | Very Fast | Low-Medium | Works well for a fast own app |
Each option helps you build apps in different ways. New creators often start with an app builder to gain confidence. Later, they shift toward native setups as their skills grow.
Prepare for Beta Testing
Beta testing adds real-world perspective. Even the best developer can miss tricky details. Real users often spot things that creators overlook.
So, release a test version.
Then ask for thoughts.
Next, study the patterns in the responses.
Common groups for gathering valuable feedback include:
- Friends
- Online testers
- Facebook groups
- Members from a pre launch email list
Keep the process friendly and calm. Tell testers you want honest thoughts, not sugar-coated compliments. Beta testing is always helpful before submitting to the Apple App Store or iOS App Store.
User feedback almost always leads to better decisions. It’s simple, practical, and often eye-opening.
A Bit of Community Insight
Communities offer guidance in real-time. A helpful voice on Reddit once said:
“Ship your app when it feels slightly early. Real feedback beats guessing in your head.”
That mindset keeps the project moving. Shipping earlier lets you adjust based on results instead of assumptions.
Prepare the App for Launch
Before you send your build to the app store, polish your project.
Review the icon, layout, colors, and anything that feels rough.
Ensure the app complies with Apple’s guidelines. Apple’s Human Interface Guidelines help you understand what they expect. Include a privacy note describing how you handle sensitive data. Add clean screenshots, a short description, and details about your in-app purchases.
Your marketing plan might include an app landing page too. That page generates early interest and helps users quickly understand the value. Many creators use drag-and-drop landing tools to make this painless.
Then double-check your build. Review each screen on multiple Apple devices to keep the experience smooth.
Submit to the Apple App Store
When everything feels ready, send the build through Xcode.
Fill out the forms. Choose categories. Upload screenshots. Provide your notes.
The review may take a few days. Stay patient during this part.
After the app launches, closely review the app store rating and user feedback. Small bug fixes help the experience stay healthy. Releasing bug fixes in early builds builds trust.
Your app grows by staying active inside the app store.
Further Reading: How to Deploy Apps on iPhone: A Step-by-Step Guide
How Rocket.new Helps Build and Ship Faster
Rocket Mobile for App Creators
Rocket.new is not only a desktop tool for building apps. With Rocket Mobile, creators can work on projects directly from their phone whenever ideas arise. That means no waiting for a Mac or laptop. You can shape your own app idea while commuting, sitting in a café, or relaxing on the sofa.
This fits smoothly with the earlier steps since you can move through each part of the app development journey from refining an app idea to adjusting user interface details right from your iOS device.
How Rocket Mobile supports your project
- Build Anywhere: Start, edit, or tweak your app on your phone without switching devices.
- One Prompt to Full App: Describe your idea once, and Rocket generates a full mobile app structure including screens, logic, and navigation.
- Figma Import and Code Generation: Bring in designs or describe layouts and Rocket converts them into a working mobile app through its builder flow.
- Integrations Ready: Connect with backend tools, databases, authentication systems, and APIs during or after testing.
- Testing on the Go: Preview the app in real time, adjust screens, and refine flows without extra tools.
Rocket Mobile keeps the workflow fluid. It supports ongoing edits throughout the day, which makes progress feel natural. With Rocket Mobile, you carry your development tools in your pocket and can build apps in a steady, flexible rhythm.
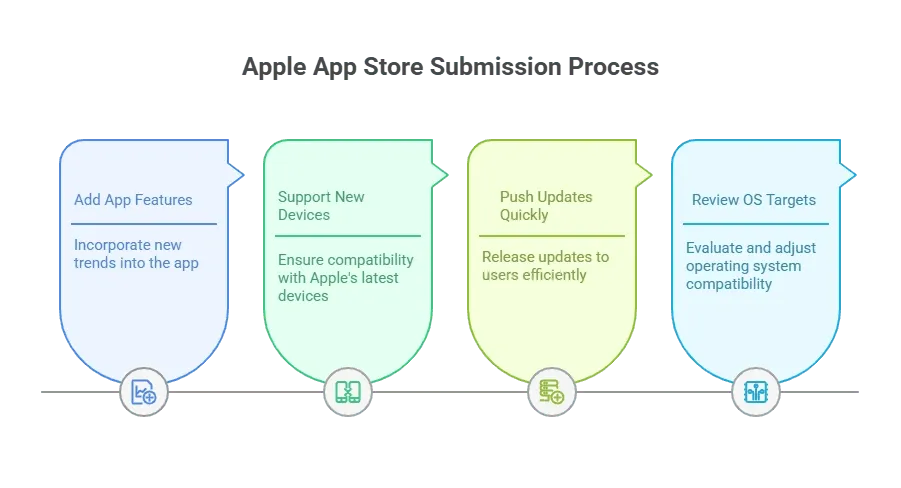
Keep Improving After Launch
After release, the real work begins.
Watch how users interact. Look for patterns in the comments. Stay open to new requests.
The best apps grow through steady updates, not rushed pushes.
Things to watch after launch:
- New Apple devices
- Changes in app store ranking
- New requests from real users
- Minor bug fixes
- New parts of your operating system targets
These steps help your project stay relevant.
Build Confidence With Steady Progress
Growth comes from simple steps followed with consistency. A clear plan, a friendly development cycle, and steady updates help any creator move forward. Over time, the process of building an app on iPhone becomes predictable and comfortable. Every new release adds strength, and each improvement adds clarity
Table of contents
- -Start With a Clear App Idea
- -Do Some Competitive Market Research
- -Choose Your Development Tools
- -Plan the User Interface
- -Map Out Your App Features
- -Pick Your Programming Language
- -Move Into the Development Process
- -A Quick Look at Setup Options
- -Prepare for Beta Testing
- -A Bit of Community Insight
- -Prepare the App for Launch
- -Submit to the Apple App Store
- -How Rocket.new Helps Build and Ship Faster
- -Rocket Mobile for App Creators
- -Keep Improving After Launch
- -Build Confidence With Steady Progress


