
Ready to launch your site without server headaches? Netlify deployment with Rocket.new moves projects from local builds to live websites quickly, handling connections, files, and updates seamlessly.
Netlify deployment sounds technical. It isn’t.
Deploying a website should not feel like pushing code into the void and hoping it works.
You build in your local development environment. You test. You tweak. Then you want it live.
So how do you move from your laptop to a live website in minutes?
That’s where Rocket.new steps in. It connects your project, manages your files, and pushes updates smoothly.
You focus on building. It handles the heavy lifting. From development to publication, the process stays clean and simple. No complicated setup. Just clear steps and a working site on the internet.
Why Netlify?
Choosing the right platform to host your website can save you hours of debugging and late-night fixes. Netlify is built for modern web development, keeping the deployment process simple while still giving developers real control.
Netlify is a hosting platform for web apps that provides automatic builds, HTTPS, and a global CDN. It works smoothly for static websites, documentation sites, and even full-stack apps.
Here’s what makes it stand out:
- Automatic builds: Every time you push code, Netlify can build and deploy your site without manual steps.
- Global CDN: Your files are served from multiple locations worldwide, so users get faster load times.
- Built-in HTTPS: Every site gets secure HTTPS by default. No extra configuration.
- Deployment history: You can view previous versions and easily track changes.
- Rollback support: If something breaks, you can restore a stable version in seconds.
- Environment variables: Manage API keys and settings safely without exposing them in code.
Compared to GitHub Pages, Netlify offers greater control over your site’s settings, deployment flow, and advanced features such as form handling and serverless functions.
How to Set Up Your Project in Rocket.new?
Before you deploy anything, take a minute to slow down. A clean setup saves time later. If your foundation is messy, deployment becomes messy too. So let’s get the basics right.
Before deployment, make sure you have:
- A Rocket.new account
- A Netlify account
- Your website files ready (HTML, CSS, JS, etc.)
Rocket.new acts like your personal deployment assistant. You can store files, configure environment variables, and manage code changes directly from your development environment without jumping between too many tools.
Follow these steps:
- Create a new site on Rocket.new.
- Connect your GitHub repository to enable continuous deployment.
- Ensure your HTML file and assets are properly organized in your project folder.
This setup prepares your static sites or static websites for a smooth publish process. When everything is structured correctly, you spend less time fixing errors and more time building your next version.
How to Connect Netlify to Rocket.new?
Before you deploy your website, you need to connect Rocket.new with Netlify. This process takes only a few minutes and is done directly from the Rocket.new dashboard.
Let’s go step by step.
Step 1: Connect via Account Settings
Start from the Rocket.new homepage.
Follow these steps:
- Click the Profile icon in the top-right corner
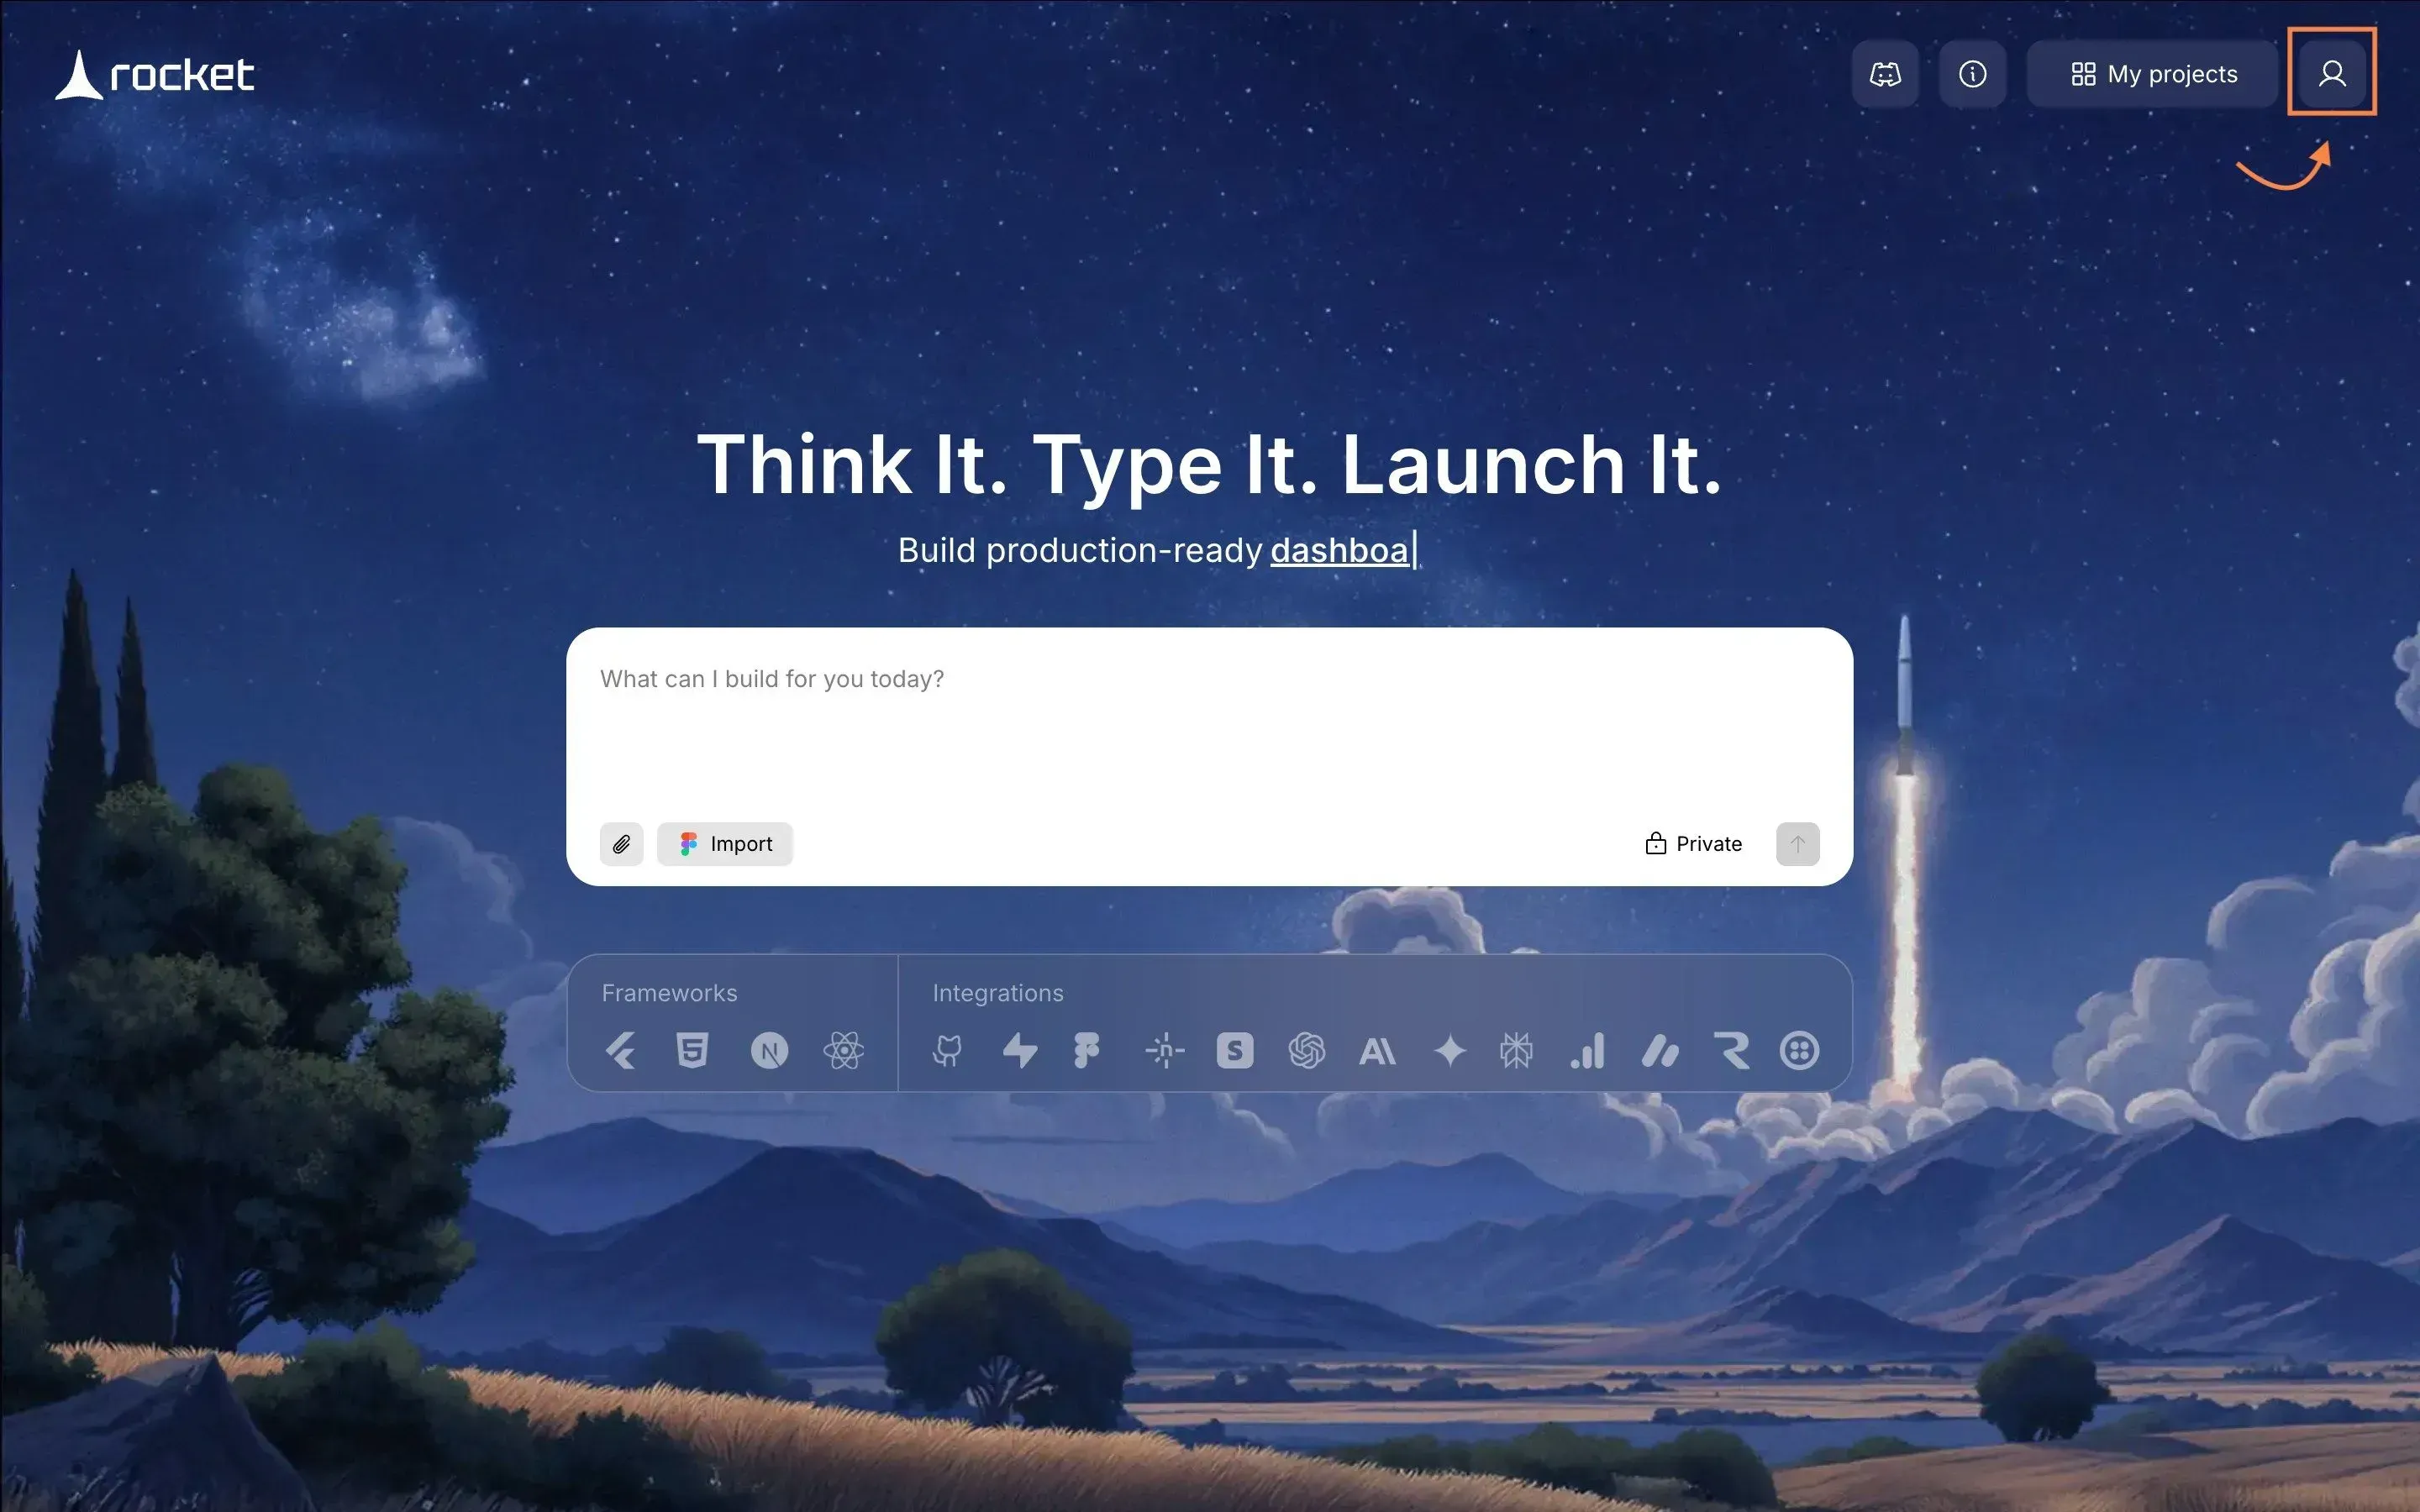
- Select Account Settings
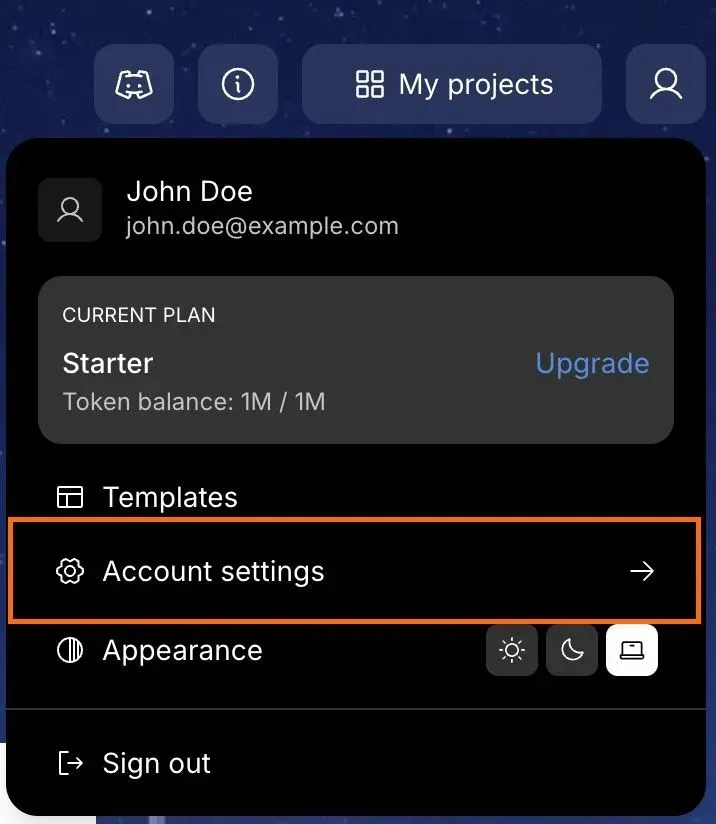
- In the popup panel, click the Integrations tab on the left
- Find Netlify in the list
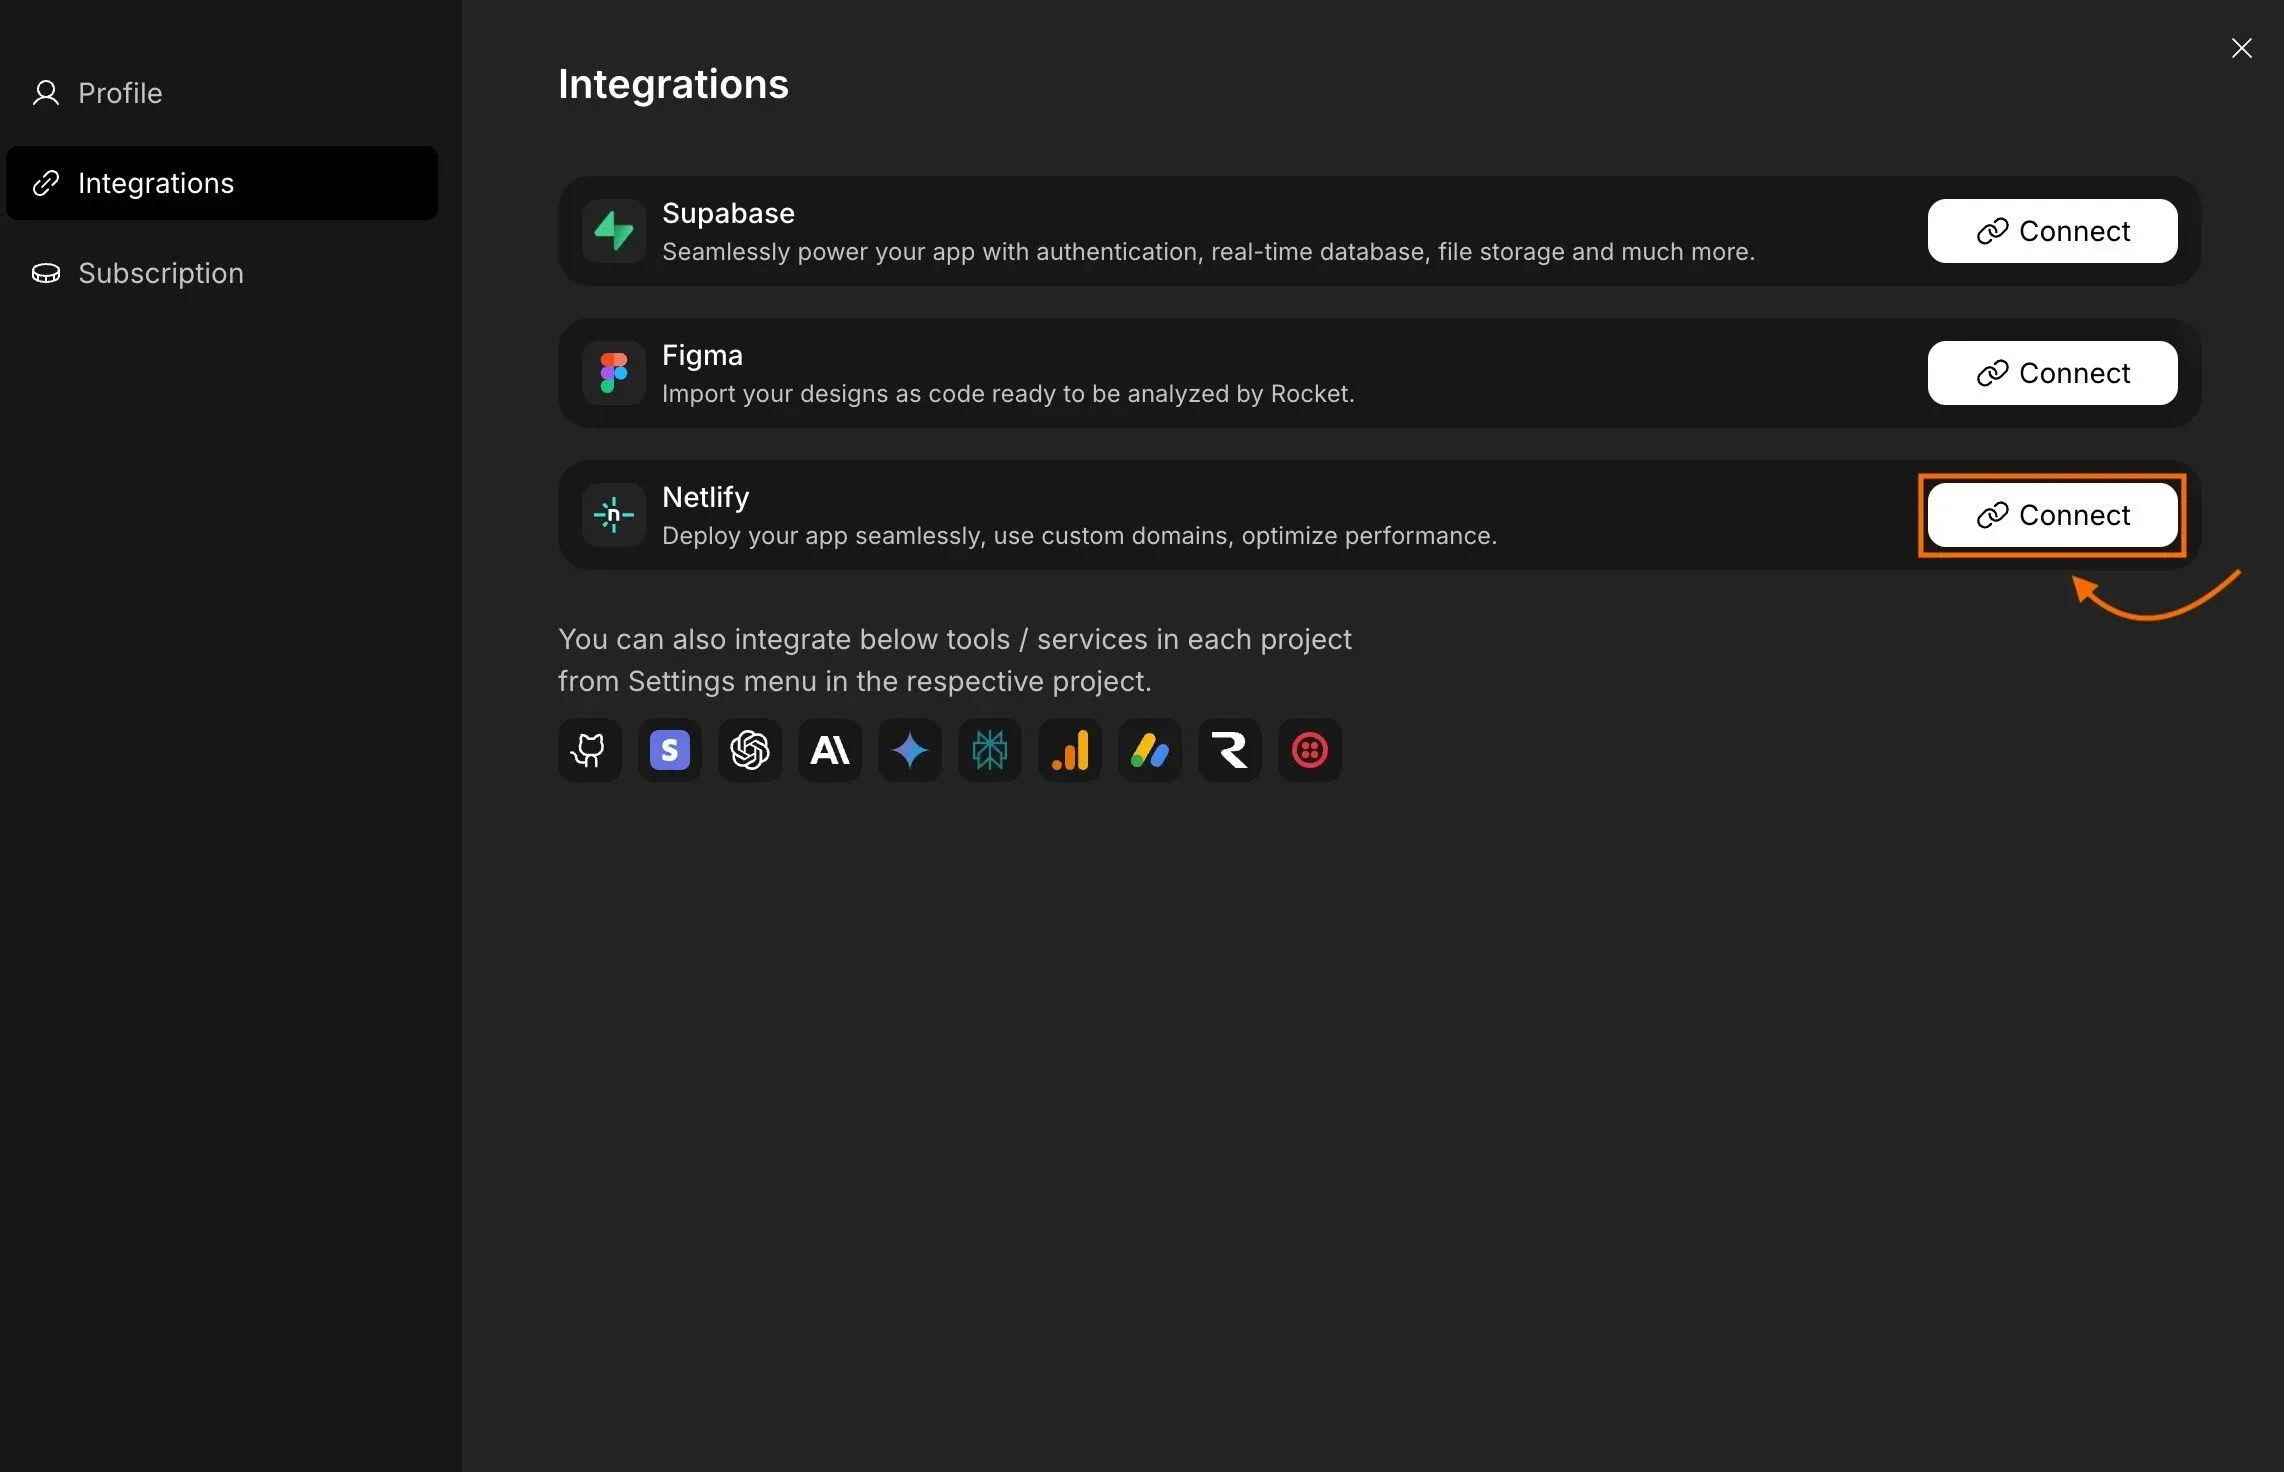
- Click Connect
This method is recommended if you want to review deployment settings before publishing your site.
Step 2: Authorize Your Netlify Account
After clicking Connect, you will be redirected to Netlify’s secure authorization page.
Complete the authorization:
- Sign in to Netlify (if not already logged in)
- Review the permission details
- Click Authorize
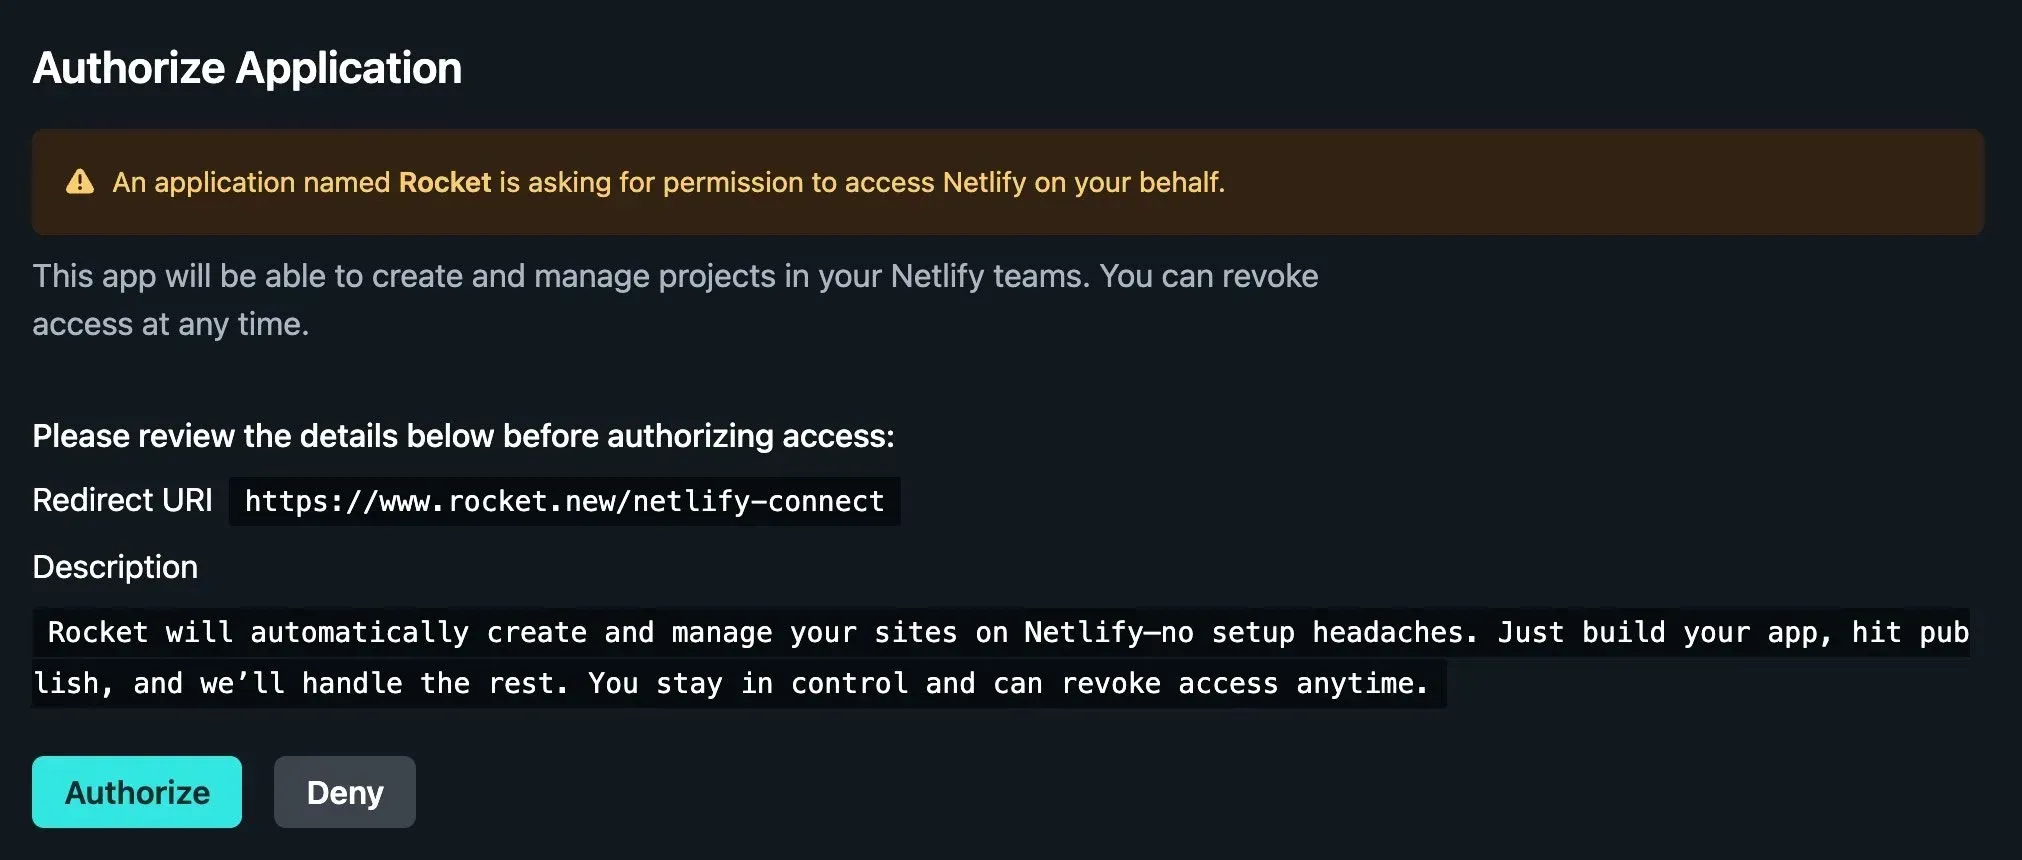
Permissions You Grant:
- Create and manage sites in your Netlify teams
Once approved:
- You’ll see a success confirmation
- You will be redirected back to Rocket
- Netlify will now appear as connected
Your account is now linked. Rocket can deploy your projects directly to Netlify.
Switching or Disconnecting Your Netlify Account
Need to change accounts? No problem.
Follow these steps:
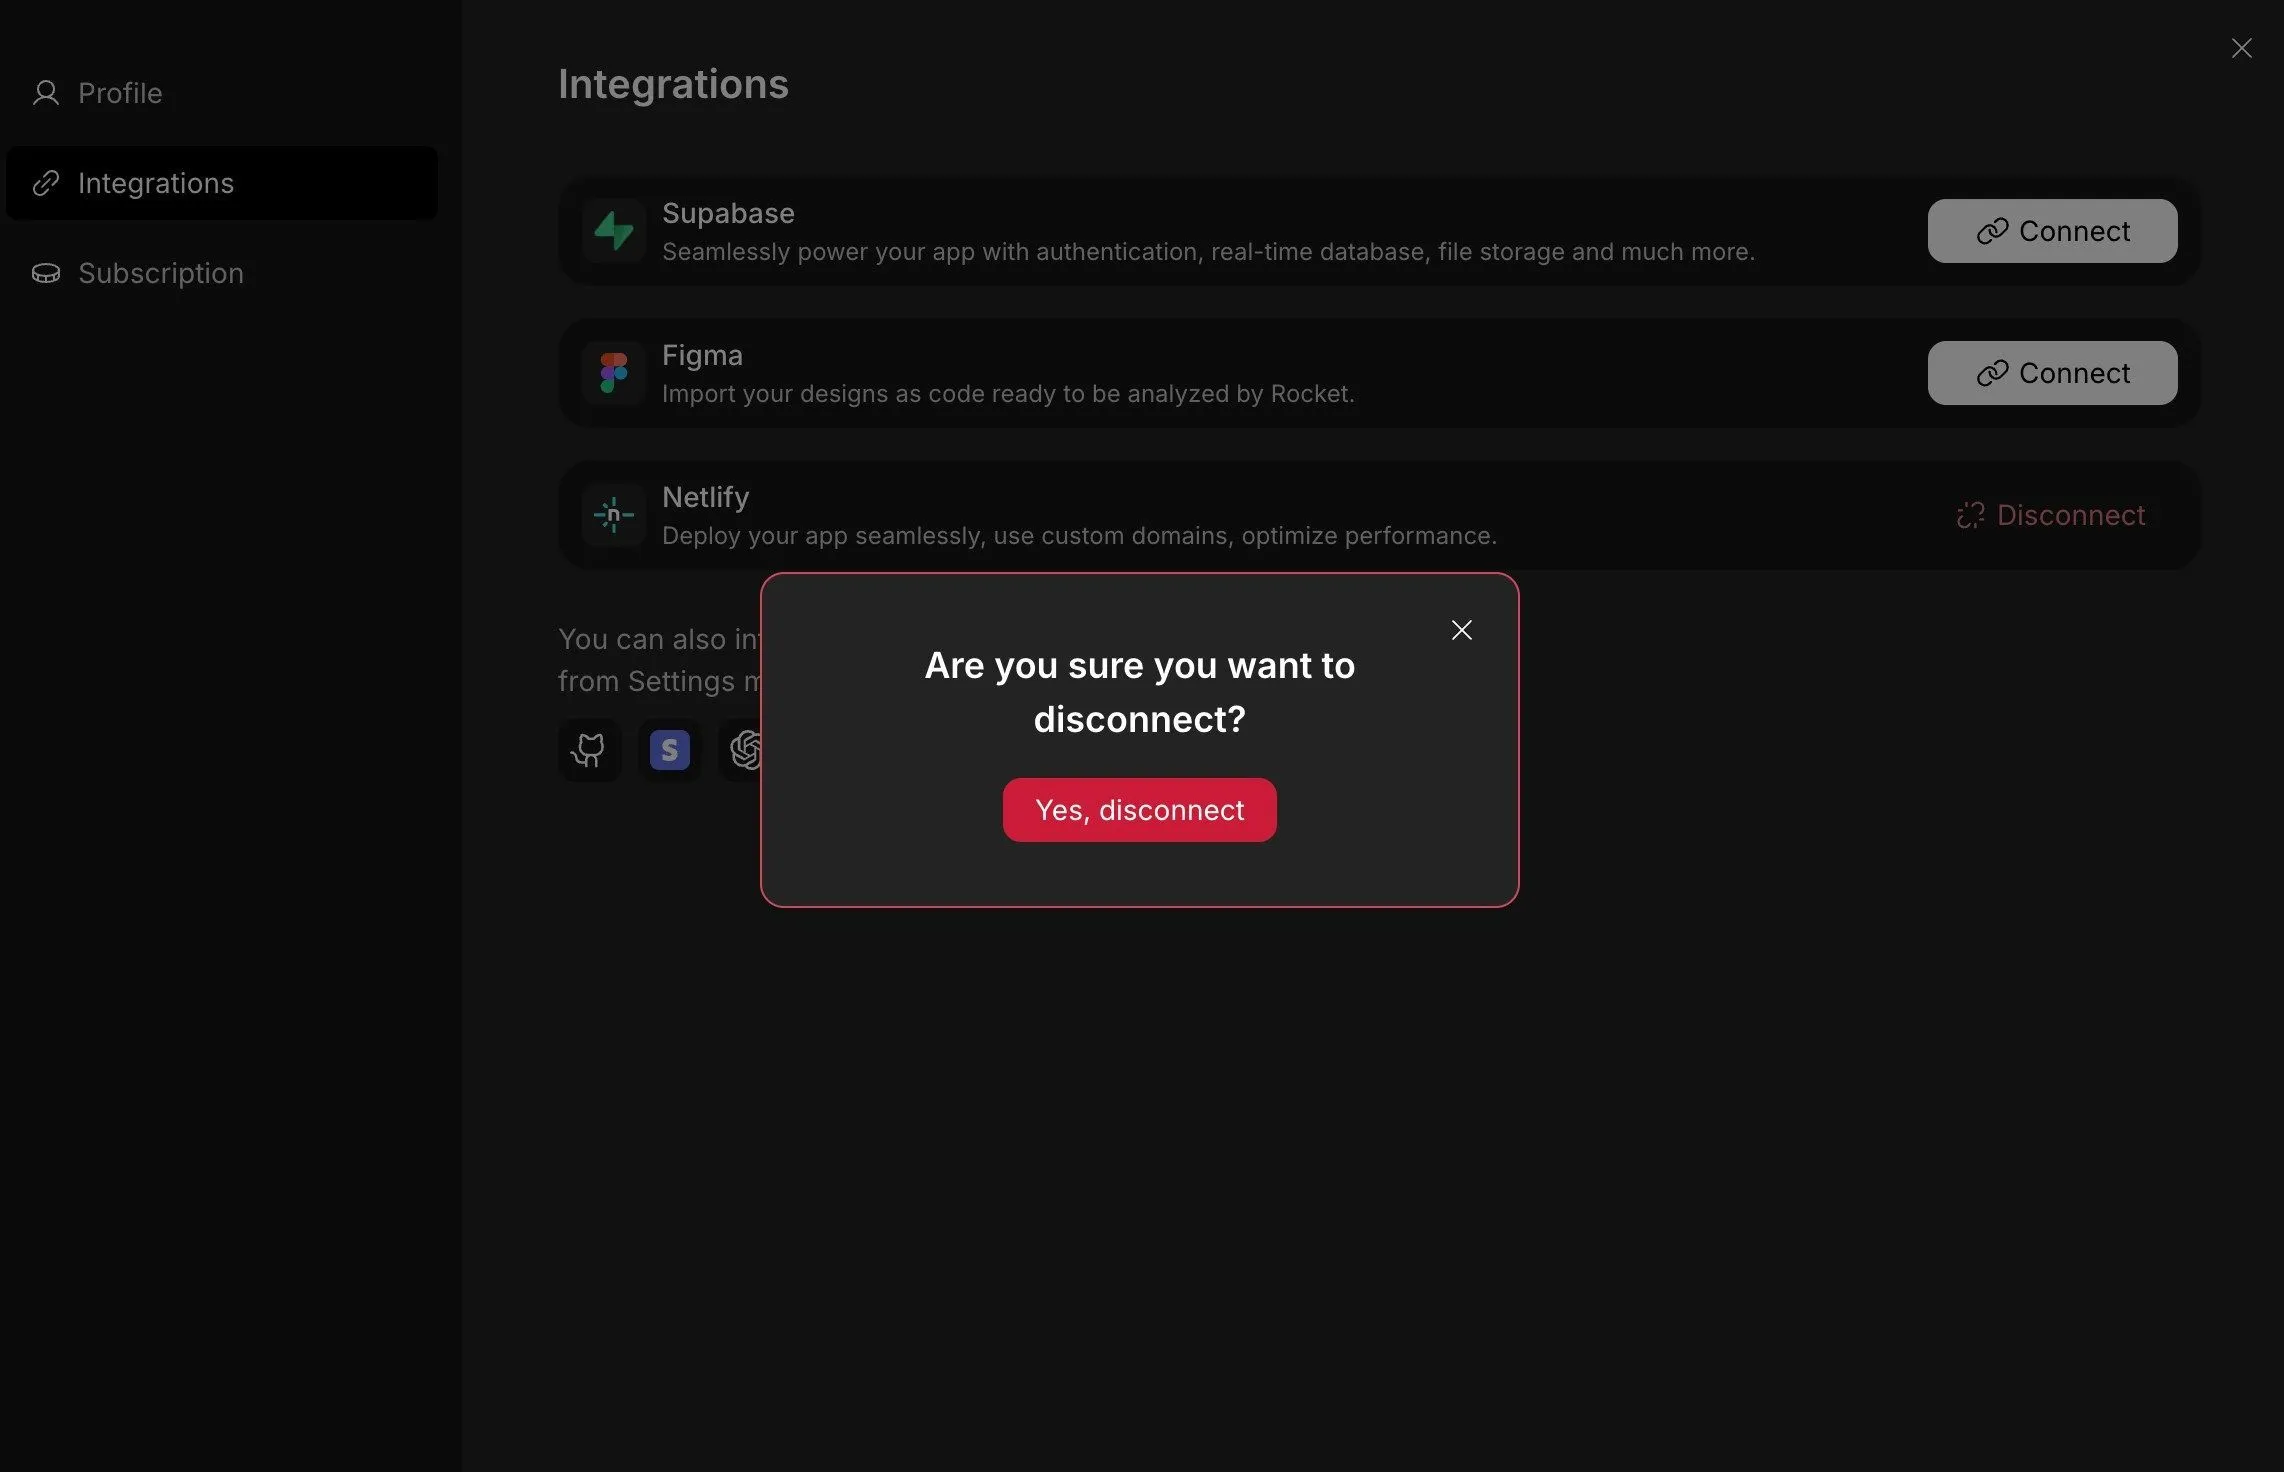
- Go to Account Settings → Integrations
- Click Disconnect next to Netlify
- In the popup, click Yes, Disconnect to confirm
- Or click Cancel to keep the connection
After disconnecting, simply repeat the connection process to link a different Netlify account.
This gives you flexibility if you manage multiple teams or projects.
You’re Connected
Netlify is now successfully linked to Rocket.new.
You can:
- Deploy your apps in seconds
- Access deployment history
- Manage rollbacks
- Monitor your site through the Netlify dashboard
No extra configuration required.
You’re ready to publish to the web whenever you want.
Comparing Deployment Methods
Before choosing how to deploy your website, it helps to look at the options side by side.
Different deployment methods offer different levels of control, automation, and flexibility. Below is a simple comparison to help you decide which option best fits your project.
| Method | Pros | Cons |
|---|---|---|
| GitHub Pages | Free, simple | Limited control, less analytics |
| Netlify via Rocket.new | Quick, beginner friendly, full continuous deployment | Requires account setup |
If you’ve been dragging files manually or updating your site through trial and error, switching to a structured deployment workflow feels like an upgrade.
Pick the method that best matches your project size, team needs, and the level of control you want over your live environment.
References & Resources
If you want to go deeper or verify specific steps, the following resources provide official guidance and real-world context.
These links help you understand both the technical setup and how others are building and deploying projects with Rocket.new and Netlify.
-
Rocket.new Documentation: Netlify Integration
Official guide explaining how to connect, authorize, and manage Netlify deployments inside Rocket.new.
-
Netlify Official Website & Platform Stats
Learn more about Netlify’s hosting platform, features, infrastructure, and global CDN capabilities.
These resources give you both the official documentation and practical examples, so you can confidently deploy, monitor, and manage your website without guessing your way through the process.
From Manual Uploads to Smart Deployment
Deploying a website manually can be frustrating. You upload files, refresh the page, notice something broke, and repeat the process. Version tracking becomes messy. Rollbacks are unclear. Managing multiple static sites or new sites starts to feel harder than building them. The problem is not your code. It’s the deployment method. Without structured workflows, your live environment becomes difficult to control.
Rocket.new, connected with Netlify, solves that problem with a cleaner system. You deploy in a few clicks, track versions, manage continuous updates, and control everything from one dashboard. No random file dragging. No guessing which version is live. The takeaway is simple: build confidently, deploy smartly, and let your workflow support your creativity rather than slow it down.
Table of contents
- -Why Netlify?
- -How to Set Up Your Project in Rocket.new?
- -How to Connect Netlify to Rocket.new?
- -Step 1: Connect via Account Settings
- -Step 2: Authorize Your Netlify Account
- -Complete the authorization:
- -Permissions You Grant:
- -Switching or Disconnecting Your Netlify Account
- -You’re Connected
- -Comparing Deployment Methods
- -References & Resources
- -From Manual Uploads to Smart Deployment