How are Notion-style apps built from scratch? See how to plan, choose the right tech stack, design a unified workspace, and meet the growing demand for flexible productivity software.
How do people actually build an app like Notion?
Well, it’s less “magic” and more methodical.
You plan features, pick your tech, and make an intuitive interface that keeps everything in one connected workspace.
Notion started as a simple idea: replace messy sticky notes, scattered docs, and other tools with a single, flexible app.
The productivity software market is expected to reach over $153 billion by 2030, underscoring the demand for apps that simplify note-taking and manage projects efficiently.
Let’s break down exactly how to build a Notion-style app.
Why Notion Stands Out?
Notion isn’t just a productivity app. It’s an AI-powered workspace that combines:
- Note taking
- Task management
- Project management
- Meeting notes
- Personal to-dos
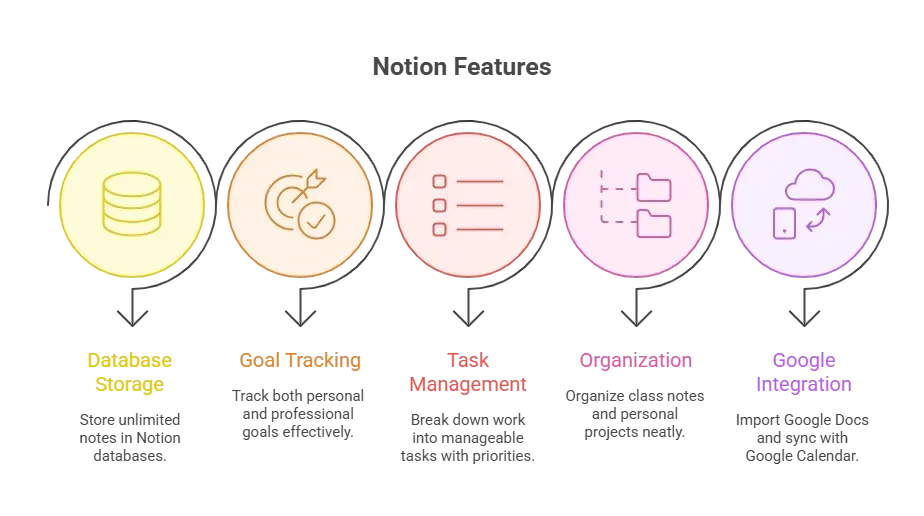
The real secret? Notion’s flexible building blocks let users mix pages, tables, and lists in a way that feels effortless.
How does the Build Process Come Together?
Building an app like Notion works best when the process stays simple and structured. Instead of rushing into development, it helps to break everything into clear steps that guide the build from idea to launch.
These steps cover core features, platform choices, technical decisions, and real user needs, all while keeping the focus on a single connected workspace.
Follow them in order, adjust as feedback comes in, and the app starts to come together in a natural, manageable way.
Step 1: Outline Core Features
Before coding, get a clear picture of what your app needs to do. Defining core features early ensures every part of your Notion clone serves a real purpose.
- Pages and Blocks – Users can write notes and build pages freely.
- Databases – Flexible notion databases to track tasks, projects, and meeting notes.
- Task Management – To-do lists, upcoming tasks, and ways to track progress.
- Tags and Labels – Add priority labels or status tags.
- Collaboration – Real-time editing and sharing, because nobody works alone.
- Templates – Customizable templates created for both students and next-generation startups.
Think of this as the backbone of your app. Get it right, and everything else falls into place.
Step 2: Choose Platforms
Decide where users will interact with your app the most. Choosing the right platform first helps you focus development and reach users effectively.
- Web apps – fast, easy to update, and accessible anywhere
- Desktop apps – for offline work and heavier workflows
- Mobile apps – because everyone wants more productivity on the go
Start simple. Launch the web first, then expand.
Step 3: Pick the Right Tech Stack
The technology you choose determines your app’s speed, flexibility, and scalability. Picking the right stack early saves headaches later.
- Frontend: React, Vue, or Angular for dynamic UIs
- Backend: Node.js, Python, or .NET for handling project updates and personal projects
- Database: PostgreSQL or MongoDB to support notion databases and linked tables
- Real-time updates: WebSockets or Firebase for live task management
If writing code from scratch feels overwhelming, there’s a fun shortcut…
Step 4: Find the App Builder
Rocket.new - Build Faster
Want a Notion clone prototype without coding? Rocket.new is an AI-powered workspace that can turn simple descriptions into working apps.
Top Features:
- AI-Powered App Creation – Turn simple descriptions into full apps instantly. Frontend and backend are included.
- Automatic Backend & Database – Databases, authentication, and APIs are generated automatically.
- Ready-to-Deploy Code – Get production-ready apps for web or Windows with exportable code.
- Templates for Speed – Pre-built templates let you launch apps much faster.
- Figma & Visual Editing – Import Figma designs and convert them into live app components.
- Multi-Platform Support – Apps run on web and mobile with user accounts and integrations.
Step 5: Build Notion Databases
Databases are the heart of a Notion-style app. Flexible, linked, and easy-to-use databases let users manage all types of content efficiently.
- Track projects, catch and personal projects
- Link tasks to pages and boards
- Create multiple views: table, board, calendar
- Filter by priority labels, due dates, or status
Make the database flexible but simple. Nobody wants to feel trapped under too many menus.
Step 6: Design a User-Friendly Interface
A clean interface ensures users focus on productivity rather than figuring out the app. Intuitive design is more valuable than fancy graphics.
- Left sidebar: navigation and pages
- Main area: write notes, to-do lists, or meeting notes
- Top bar: search, global actions, and quick project management tools
Pro tip: intuitive interface > fancy graphics. People want fewer tools that actually work.
Step 7: Collaboration Features
Collaboration makes your app more than just a personal tool. Real-time teamwork keeps students and startups engaged.
- Real-time editing on pages
- Commenting for meeting notes
- Sharing links with permissions
- Activity feeds to track progress
This makes your app more than a personal tool; it becomes a one connected workspace for everyone.
Step 8: Add Productivity Enhancements
Extra features make users feel your app goes the extra mile. Small touches can boost engagement and efficiency.
- Sync with Google Calendar and Google Docs
- Offer study planner templates for students
- Add AI support to simplify writing notes or auto-generate content
- Drag-and-drop tasks for manageable tasks
- Powerful filters for upcoming tasks and task management
These help users do more with fewer tools, increasing productivity.
Step 9: Test With Real Users
User testing reveals what works and what doesn’t. Observing real behavior improves app design before launch.
- Students wanting to organize class notes and school year planning
- Teams tracking project updates and meeting notes
- Solo users managing personal projects and personal to-dos
Ask them to try as many notes as they want, priority labels, and status tags. Watch how they use a single connected workspace; their actions reveal what needs to be tweaked.
Step 10: Polish and Launch
Finalize your app with a focus on usability, performance, and cross-platform support. A gradual launch ensures smooth adoption.
- Make mobile-friendly layouts
- Add onboarding tips for students worldwide
- Offer templates for personal and professional goals
- Include AI features for auto-summarizing meeting notes
- Ensure syncing works with Google Docs and Google Calendar
Launch gradually. Start with the web, then expand to Windows apps and mobile.
Ultimately, the goal is simple. Build an app that feels easy, stays flexible, and helps people get things done without friction. Keep it focused, and everything else falls into place.
Community Insight
On LinkedIn, a product manager shared their experience while discussing modern workspace tools:
“Teams using a Notion-like app saw nearly a 30% reduction in time spent switching between other apps and tracking project updates. Having one connected workspace really changed how the team worked day to day.”
Feedback like this makes the picture clear. People don’t want more tools on top of other tools. They want fewer tools that handle daily work in one place.
Build Your Own Notion App Today
Creating a Notion app means balancing features, UI, and flexibility. With notion databases, meeting notes, task management, and one connected workspace, your app can help students, teams, and next-generation startups stay organized.
Tools like Rocket.new speed prototyping, while real testing ensures your app is usable and fun. Focus on simplicity, test often, and keep productivity in mind, then your app won’t just work, it will stick.
Table of contents
- -Why Notion Stands Out?
- -How does the Build Process Come Together?
- -Step 1: Outline Core Features
- -Step 2: Choose Platforms
- -Step 3: Pick the Right Tech Stack
- -Step 4: Find the App Builder
- -Rocket.new - Build Faster
- -Step 5: Build Notion Databases
- -Step 6: Design a User-Friendly Interface
- -Step 7: Collaboration Features
- -Step 8: Add Productivity Enhancements
- -Step 9: Test With Real Users
- -Step 10: Polish and Launch
- -Community Insight
- -Build Your Own Notion App Today