
Want to launch your own marketplace website? This blog explains how to build a scalable platform using Rocket.new, covering setup, listings, payments, user roles, and backend configuration.
Can you build a marketplace without a full dev team?
It used to take months of planning, hiring, and complex development. Now the process looks very different.
According to Statista, worldwide retail ecommerce sales have passed $5 trillion. So what does it actually take to turn your idea into a live platform?
If you are researching how to create marketplace website projects efficiently,Rocket.new helps streamline the process. With visual building features, database control, and payment integrations, you can design, manage, and launch your marketplace faster and with greater confidence.
In this guide, you will follow a clear, technical path from setting up your account to launching your website.
Marketplace Architecture and Core Business Mechanics
A marketplace is different from a basic eCommerce store. You are not just selling products. You are connecting buyers and sellers while managing payments between them.
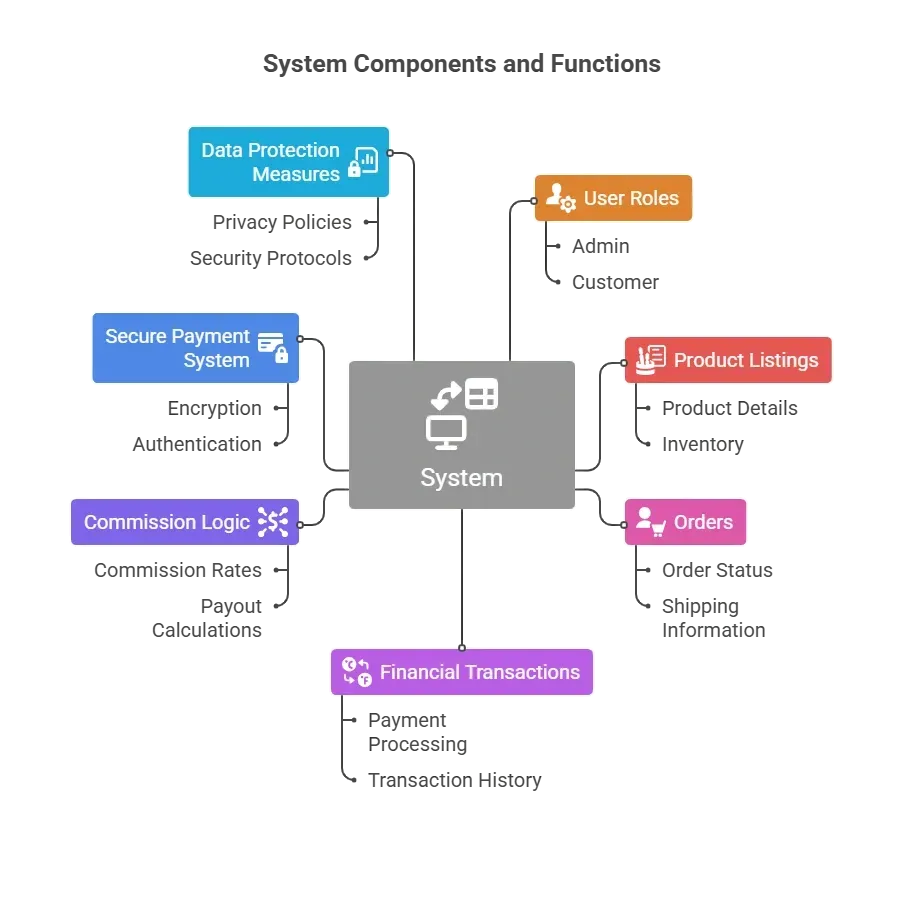
If payments fail or security is weak, your business's reputation suffers. So we build it right from the beginning.
How to Build Your Marketplace with Rocket.new?
Now that you understand the structure of a marketplace and the role of a secure payment system, it’s time to move from theory to execution.
Below is a structured, practical roadmap that walks you through building your marketplace using Rocket.new. These steps cover everything from project setup and user roles to database configuration, secure payment integration, split payments, and deployment.
Step 1: Sign in to Rocket.new
Every build starts with access. Before configuring roles, payments, or database logic, you need secure entry into the platform.
Your account controls administrative permissions, project settings, and payment configurations, so treat this step seriously.
What to do
- Go to Rocket.new
- Click Sign Up or Log In
- Verify your email
- Access your dashboard
Make sure your account email is secure because it controls project access and administrative permissions.
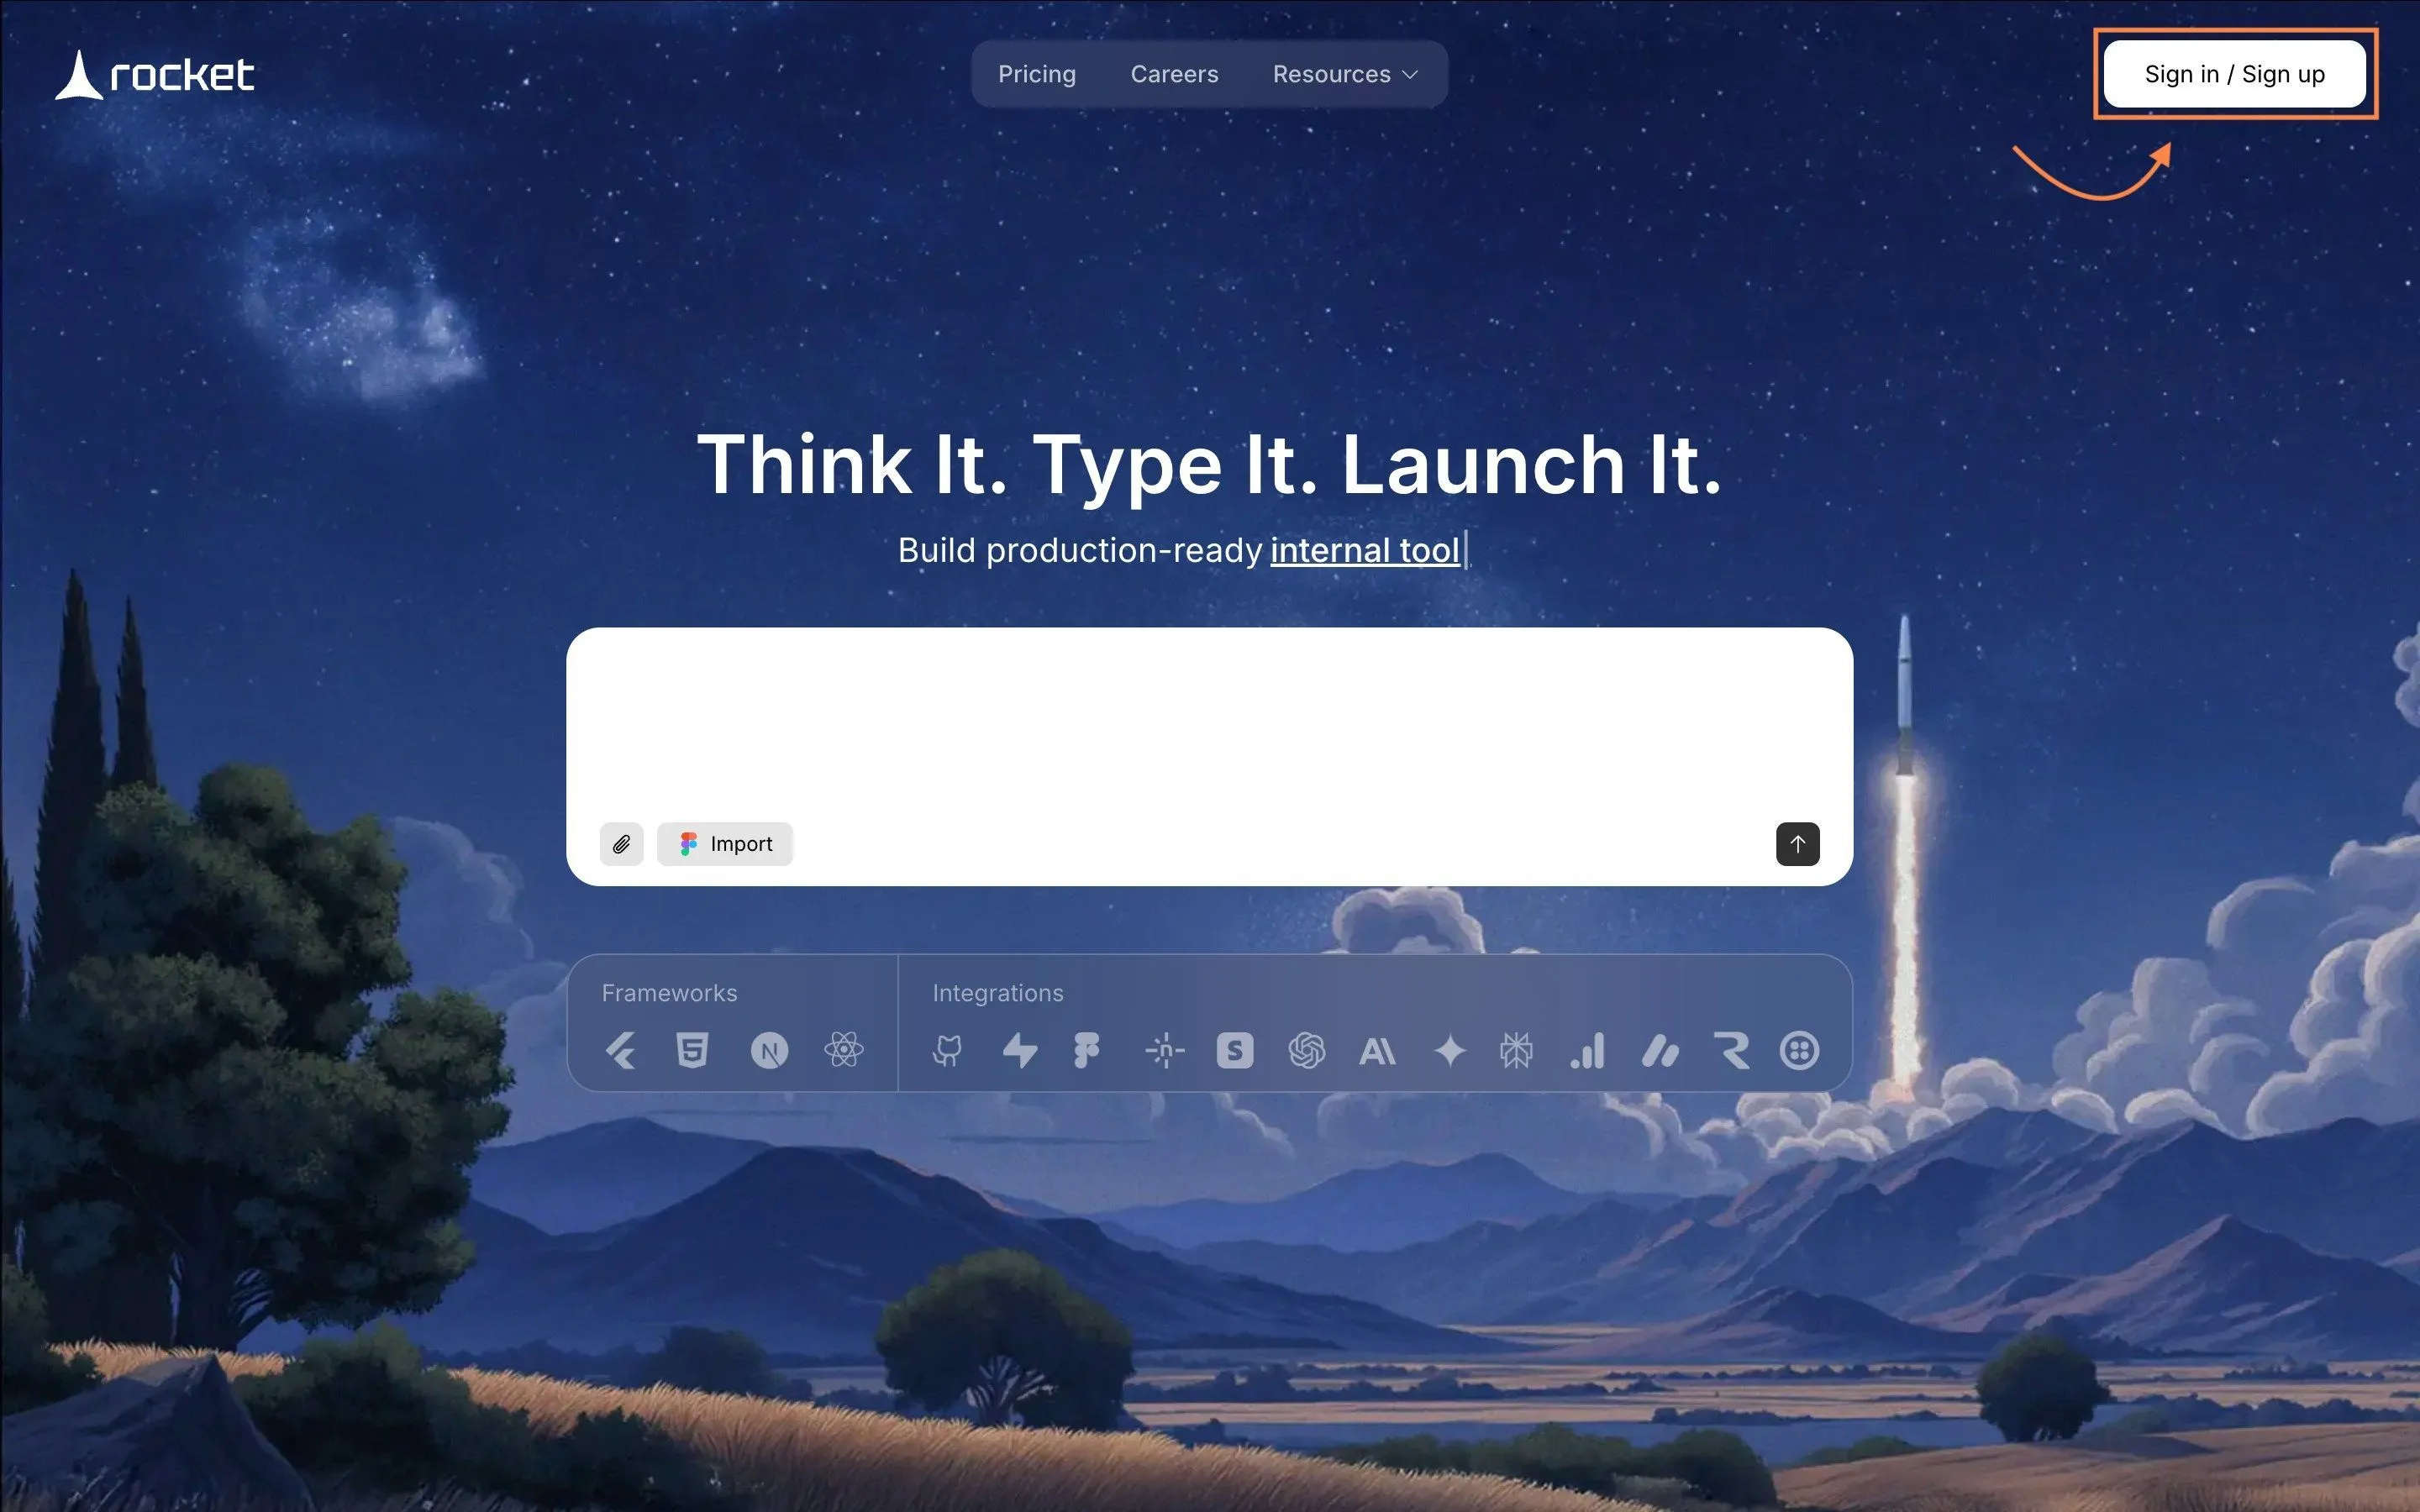
This step gives you administrative control. Without proper account setup, you cannot securely configure roles, payments, or database logic.
Step 2: Choose a Template or Describe Your Website
Now you define the foundation of your marketplace. The structure you select will influence your layout, workflows, and data logic.
Rocket.new lets you start with prebuilt templates or generate a project with a prompt.

What to do
- Click “Create New App”
- Select Web Application
- Choose:
- Marketplace template
- E commerce template
- Or start from blank
- Alternatively, enter a prompt like:
- “Build a multi-vendor marketplace with secure checkout and seller Website”
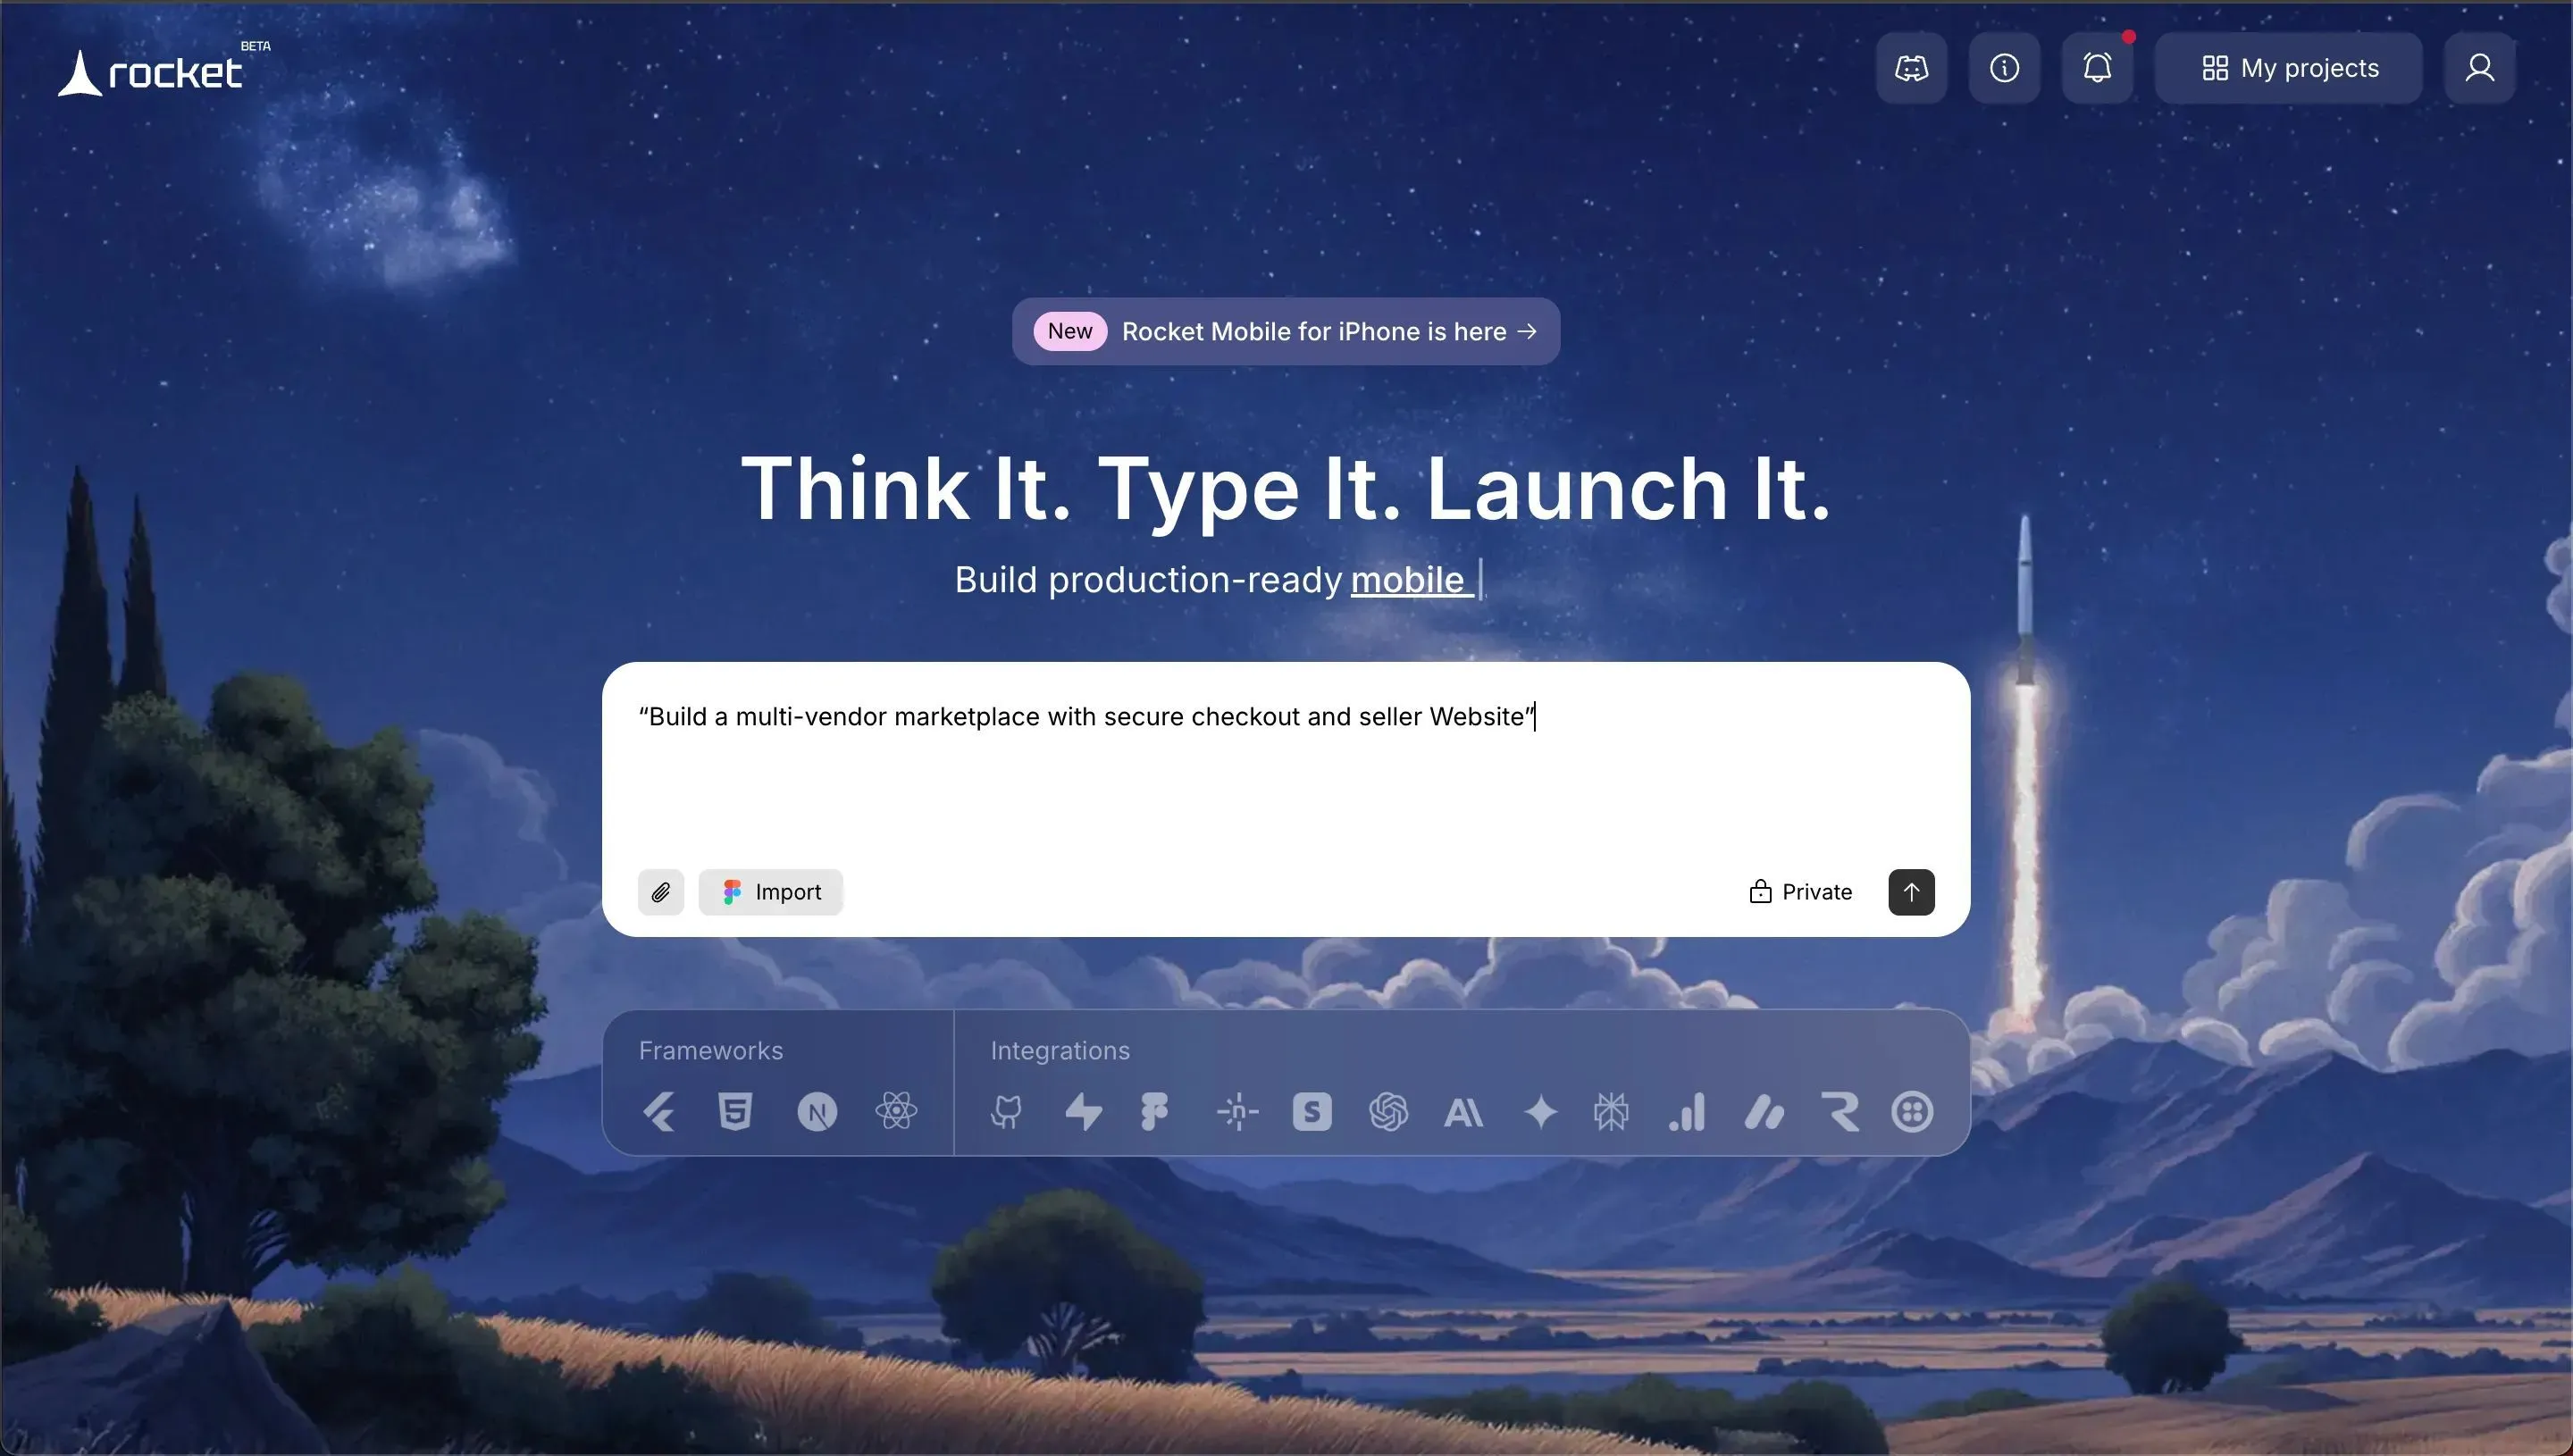
Using prebuilt templates reduces build time, especially for small business founders.
This step determines your base layout and data structure. Choose wisely because it affects your workflow later.
Step 3: Define User Roles and Access
A marketplace connects multiple users. Access control prevents unauthorized access and protects sensitive information.
What to do
Go to Authentication → Roles
Create:
- Buyer
- Seller
- Admin
Assign permissions:
- Buyers: View products, place orders
- Sellers: Add products, view own orders
- Admin: Full control over users and payments
This prevents unauthorized access to financial transactions and payment information.
Without structured roles, your marketplace becomes vulnerable. Clear access levels protect users and your business.
Step 4: Enable Secure Authentication
Authentication is your first security layer. Weak login systems invite security threats. Strong authentication methods protect user accounts and maintain payment security.
A secure payment system begins with secure user access. If attackers gain access, financial transactions become vulnerable.
What to do
Enable:
- Email and password login
- Email verification
- Two factor authentication
- Multi factor authentication
- One time code or one time password
If available, enable biometric authentication, such as fingerprint scanning, for mobile access.
Multi-factor authentication prevents unauthorized access and strengthens your payment system's secure architecture.
Strong authentication methods protect accounts, prevent suspicious activity, and maintain payment security.
Step 5: Create Database Structure
Your marketplace runs entirely on structured data. Products, users, orders, and payments depend on a properly configured backend.
Rocket.new uses Supabase as its database layer, which means your data is powered by PostgreSQL while you manage everything visually inside the builder.
What to Create: Create collections
Users: Name, Email, Role
Products: Title, Description, Price, Seller ID
Orders
- Buyer ID
- Product ID
- Payment status
- Order status
Cart
- User ID
- Product ID
- Quantity
This supports complex applications while keeping control simple.
A clean database structure allows smooth financial transactions and accurate payment tracking.
Step 6: Configure the Secure Payment System (Using Stripe)
Now your marketplace connects to real money. This step builds the core secure payment system that will handle all payments between buyers and sellers.
Incorrect configuration at this stage can damage your business's reputation and expose financial transactions to security threats.
Stripe acts as your payment processor and connects your platform to financial institutions. It handles secure transactions, tokenization, and compliance so your payment system's secure architecture remains protected.
What to do
Go to Settings → Integrations → Stripe
Follow the Rocket.new documentation:
Then configure the following:
- Connect your Stripe account
- Add API keys (Publishable key and Secret key)
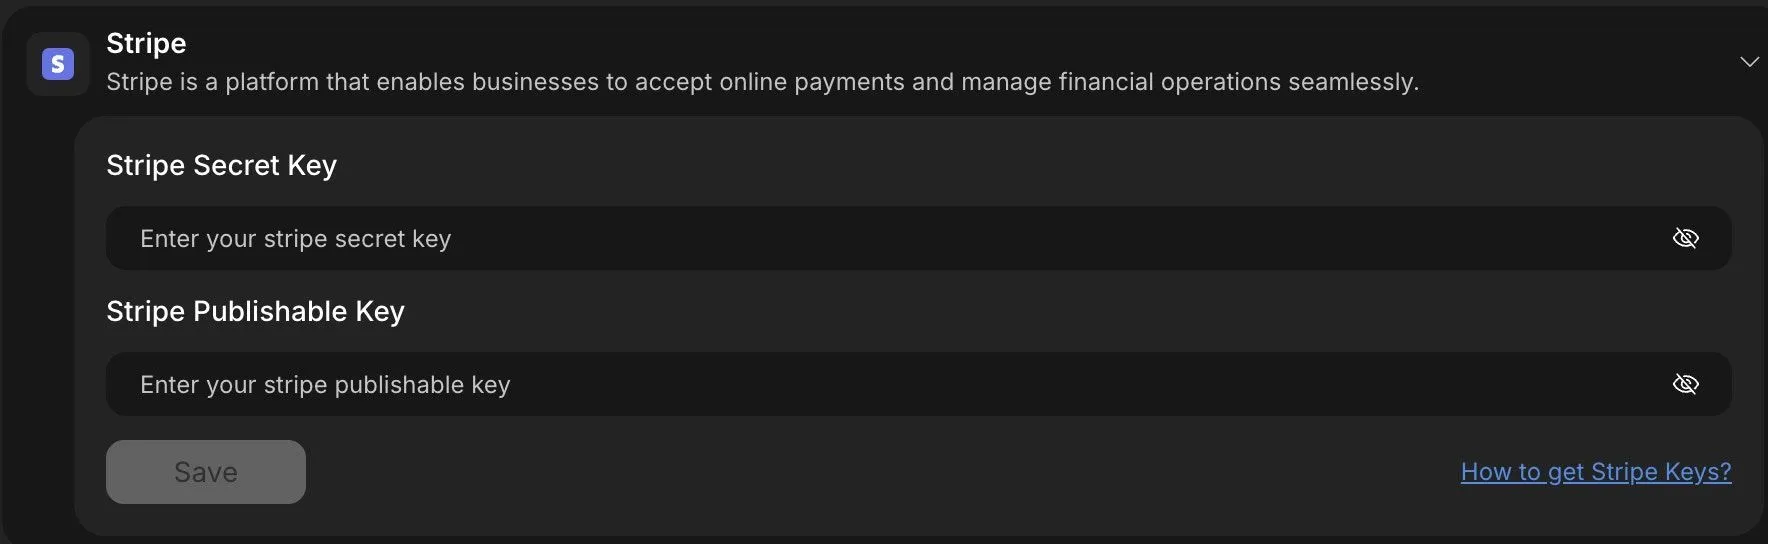
- Add webhook URL from Rocket.new into Stripe dashboard
- Enable test mode before going live
Inside Stripe Dashboard:
- Create a webhook endpoint
- Select events like:
- payment_intent.succeeded
- payment_intent.payment_failed
Never store credit card numbers or customer's card details manually inside your database. Stripe tokenizes payment information and automatically protects sensitive data.
By integrating Stripe correctly, your payment system remains PCI DSS-compliant and supports secure transactions without exposing sensitive information.
This step ensures payments are processed safely while your payment system secure configuration protects users and maintains trust..
A secure payment system ensures funds move safely between users and protects your business's reputation.
Step 7: Set Up Payment Flow Logic
Payment flow defines how transactions move inside your platform. If the workflow is wrong, orders may be marked paid without confirmation.
Workflow Logic
- Create payment intent
- Redirect to payment gateway
- Confirm payment
- Update order status
- Trigger e mail notifications
Only mark orders as paid after confirmation from the payment processor webhook.
This prevents payment fraud and fake confirmations.
A correct payment flow ensures secure transactions and safe payment processing.
Step 8: Encrypt and Protect Sensitive Data
Encryption protects sensitive data from attackers attempting to gain access. Payment security depends on encryption and continuous monitoring.
What to Enable
- HTTPS
- Data encryption
- Encryption keys
- Fraud detection systems
- Suspicious activity monitoring
Encryption protects the original data and prevents attackers from gaining access.
Step 9: Set Up E-Mail Notifications
Users expect confirmation after payments and order updates. Silence creates confusion. Automated email notifications improve transparency and trust.
What to Configure
Go to Notifications Settings
Create automated email notifications for:
- Order confirmation
- Payment confirmation
- Refund updates
- Seller payout confirmation
You can integrate Resend or similar email services for reliable delivery. Clear communication keeps users informed and strengthens your business credibility.
Step 10: Test Secure Transactions Before Launch
Never launch without testing real payment scenarios.
Test Cases
- Successful payment
- Failed payment
- Refund
- Split payment
- Suspicious activity detection
Verify:
- Order status updates correctly
- Webhook works
- Payment system secure logs are accurate
Test digital wallets and contactless payments if enabled.
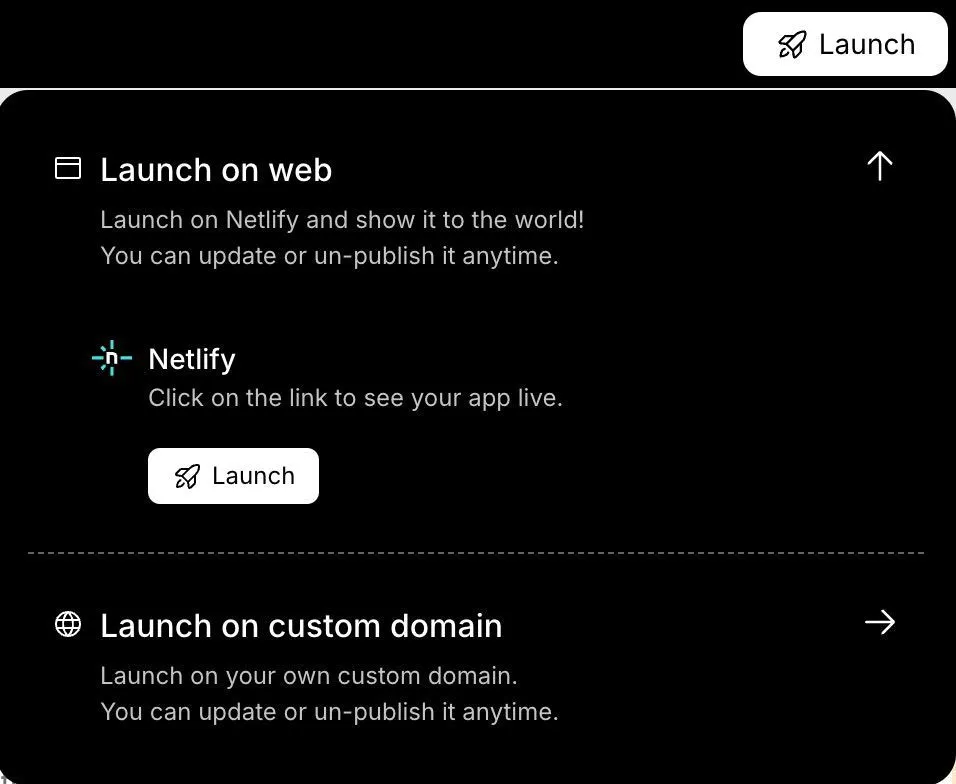
Once you check all the functionalities are working properly, you can hit the Launch button from your building screen in the rocket.new to make your website live
Testing protects you from early payment fraud, broken workflows, and costly financial mistakes.
Why Rocket.new Works for Marketplace Builders?
Choosing the right platform determines how fast and safely you can launch your marketplace. The wrong stack slows development and complicates payments.
Rocket.new reduces technical friction while still giving you control over database structure, secure payment system configuration, and user management.
Rocket.new combines:
- No code platforms simplicity
- Low code customization
- Secure payment system integration
- PCI DSS compliant payment gateways
- Scalable financial transactions management
For a small business or startup founder, this approach delivers speed without compromising payment security or compliance.
You stay focused on growing users, refining your business model, and improving the customer experience, rather than debugging payment processor APIs or managing infrastructure.
Bringing It All Together
Building a marketplace is complex because you’re not just managing products; you’re handling users, transactions, financial data, and trust. Without proper payment security, authentication, and compliance, even a small mistake can damage your platform’s credibility.
Rocket.new simplifies this process by combining no-code simplicity with low-code flexibility, built-in secure payment system integration, and PCI DSS-compliant gateways like Stripe. It allows you to structure roles, manage orders, and configure secure financial transactions without having to build everything from scratch.
The takeaway is simple: you can launch faster without compromising security. With the right structure and payment protection in place, your marketplace is not just functional, it’s scalable, compliant, and built to earn user trust.
Table of contents
- -Marketplace Architecture and Core Business Mechanics
- -How to Build Your Marketplace with Rocket.new?
- -Step 1: Sign in to Rocket.new
- -What to do
- -Step 2: Choose a Template or Describe Your Website
- -What to do
- -Step 3: Define User Roles and Access
- -What to do
- -Step 4: Enable Secure Authentication
- -What to do
- -Step 5: Create Database Structure
- -Step 6: Configure the Secure Payment System (Using Stripe)
- -What to do
- -Step 7: Set Up Payment Flow Logic
- -Workflow Logic
- -Step 8: Encrypt and Protect Sensitive Data
- -What to Enable
- -Step 9: Set Up E-Mail Notifications
- -What to Configure
- -Step 10: Test Secure Transactions Before Launch
- -Test Cases
- -Why Rocket.new Works for Marketplace Builders?
- -Bringing It All Together