
Want to improve product search in your WooCommerce store? Learn how to build custom product filters, implement AJAX filtering, and optimize performance for better user experience and conversions.
Many WooCommerce stores fail to convert visitors, even with great products. The issue is often poor organization and weak navigation, not pricing or design.
Shoppers want fast results. They do not want to scroll through endless listings. They expect to sort by price, category, size, or color in seconds.
What happens when they cannot quickly narrow their choices?
They leave.
That is why product filters for WooCommerce matter. Clear filters give shoppers control and keep your catalog structured. They make browsing simple and focused.
Let's learn how to plan, create, and customize filters using Rocket.new. We will cover layout planning, widget setup, and advanced controls inside the WordPress editor to help you build a store that feels organized and easy to use.
Why Product Filters Matter for a WooCommerce Store?
When customers visit your website, they do not want to scroll endlessly. They want control.
Product filters allow users to sort by price, categories, attributes, and more. This shortens the search process and improves how products are displayed on the page.
According to Baymard Institute’s product list and filtering UX research, only 16% of major eCommerce sites offer a strong filtering experience, indicating that most stores struggle with filtering usability. This often leads to user frustration and abandonment.
So yes, filters are not optional.
WooCommerce Filter Setup Requirements
Before building product filters, make sure your WordPress setup is ready. A proper foundation prevents display issues and saves time during configuration.
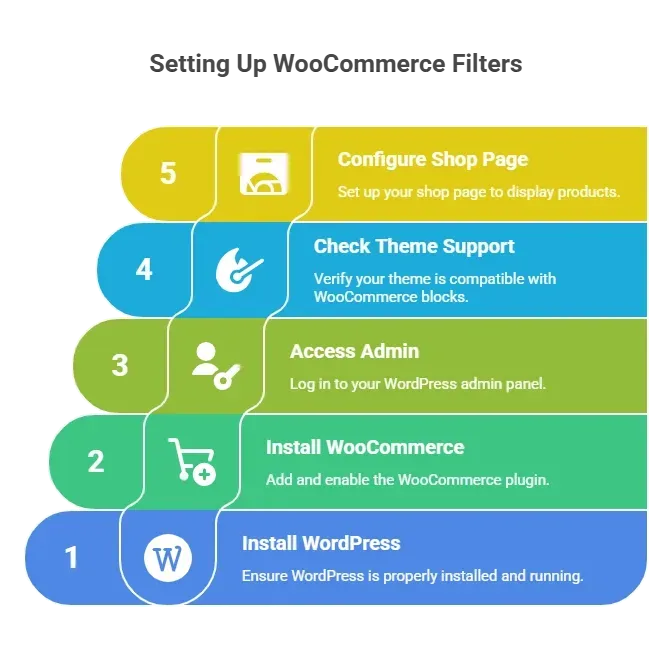
Navigate to the admin panel and confirm WooCommerce settings are active. Also, verify that your WooCommerce product listings are properly assigned to categories and attributes.
Once these basics are in place, you’re ready to start building your filter structure inside the editor.
Step 1: Install a Filter Plugin
To create advanced product filters, you need a dedicated plugin that extends WooCommerce filtering capabilities. The default setup works, but a specialized filter plugin gives you better control and flexibility.
Including:
- Philta XL
- Default WooCommerce product filter
- Third-party filter plugin tools
For this example, we will reference Philta XL as it supports advanced filter parameters.
How to Install?
- Go to wp admin
- Navigate to Plugins > Add New
- Search for Philta XL
- Click install
- Activate the plugin
Once installed, you will see new filter components inside the WordPress editor.
Step 2: Configure WooCommerce Attributes
Attributes power most product filters, so this step lays the foundation for your filtering system. Without properly configured attributes, your filter options will not display correctly.
Go to:
WooCommerce > Products > Attributes
Create attributes like:
- Color
- Size
- Brand
- Sound Type
- Frequencies range
Yes, even something like a vengeance sound pack can use frequency-range filters. If you sell sound libraries, frequency and sound parameters matter.
Click Edit after creating each attribute, then set the terms.
Save your changes.
Step 3: Assign Attributes to WooCommerce Products
Creating attributes alone is not enough; they must be attached to each WooCommerce product. This connects your filter logic to actual products displayed on the shop page.
In the product data section:
- Select attributes
- Add terms
- Mark them as visible
- Save
Repeat this process for all relevant products.
Without proper attribute setup, your filter will not display options.
Step 4: Add Product Categories and Tags
Categories structure your store, while tags refine product grouping. A well-organized category system improves filter accuracy and overall navigation.
Navigate to:
Products > Categories
Create main categories and sub-categories.
Add product tags where needed.
Example:
If selling audio plugins:
- Category: Sound Packs
- Tag: vengeance sound
- Attribute: Frequencies
These elements help the filter plugin read available data.
Step 5: Create the Filter Layout Using WordPress Editor
Now it is time to place your filter on the page using the WordPress editor. This is where layout decisions affect how users interact with your store.
If using block theme:
- Click edit
- Add available blocks
- Insert WooCommerce product filter block
The WordPress editor allows you to create and customize blocks visually.
Check block settings on the right side.
Enable:
- Price filter
- Attribute filter
- Category filter
You can display filters on the left side or above products.
Step 6: Using WooCommerce Widgets
If your theme relies on widgets rather than blocks, filters can be added via the widget area. WooCommerce widgets still provide reliable filtering for many store layouts.
Go to Appearance > Widgets.
Add a filter widget to the sidebar.
WooCommerce widgets allow you to add:
- Price filter widget
- Categories widget
- Attribute widget
Drag and drop into the sidebar. Save. Widgets still work in many theme setups.
Default Widgets vs Advanced Plugin Filters
WooCommerce comes with default widgets. They work, but they are limited.
A dedicated filter plugin provides:
- Multi select checkbox list
- Ajax filter without page reload
- Dropdown style options
- Selected filters display
- Hide empty parameters
Default widgets do not provide the same level of control.
Step 7: Configure Price Filter
Price is often the first filter customers use while searching. Setting clear price ranges makes product discovery faster and more practical.
In your filter plugin settings:
Set:
- Min price
- Max price
- Step range
You can choose between slider or dropdown. Display price filter prominently. Customers care about price.
Step 8: Advanced Filtering by Sound and Frequencies
For niche stores like digital sound libraries, advanced parameters matter. Filtering by sound type or frequencies gives customers precise control over results.
Add filters for:
- Frequencies range
- Sound type
- File format
This creates detailed information layers for users.
Example:
A customer searching for vengeance sound packs in 808 frequencies range can filter quickly.
That saves time.
Step 9: Enable AJAX Filtering
AJAX filtering updates products without reloading the entire page. This keeps users on the same page and creates a smoother browsing experience.
Enable AJAX in plugin settings. This reloads products displayed without refreshing the whole page.
Users stay on the same page. That feels modern.
Step 10: Customize the Filter Appearance
A filter should match your website design and not look out of place. Customizing layout and display settings keeps your store visually consistent.
Click the filter block. Open block settings.
Customize:
- Title
- Layout
- Colors
- Display style
You can hide or reorder specific filter elements. Save after editing.
Step 11: Control Filter Behavior
Filter logic determines how selected options interact with each other. Choosing the right combination method affects how accurately results are displayed.
Configure:
- Combination logic (AND / OR)
- Multi select
- Checkbox list style
- Dropdown display
This affects how product filters behave.
Example:
Selecting multiple categories can either narrow results or broaden them.
Choose based on store logic.
Step 12: Test the Filter Process
Before going live, test every filter parameter carefully. A small configuration mistake can prevent products from displaying correctly.
Navigate to the shop page.
Try:
- Filtering by categories
- Filtering by price
- Selecting multiple attributes
Observe:
- Are products displayed correctly?
- Are selected filters shown?
- Does the filter respond fast?
Fix issues in the editor if needed.
Step 13: Optimize for Mobile
Mobile users expect compact and easy-to-use filters. Adjusting the layout for smaller screens improves usability and keeps navigation clean.
Edit the page in the WordPress editor.
Check responsive preview.
Move the filter to the top or collapse it into a toggle menu if needed.
Many stores place filters on the left side on desktop and in the top dropdown on mobile.
Step 14: Use Rocket.new for Rapid Custom Filter Development
If you need custom filter behavior, Rocket.new can speed up development. It helps structure UI components and connect them to WooCommerce data efficiently.
It allows developers to create structured filter components faster.
For example, if building a custom WooCommerce product filter logic:
- Use Rocket.new to scaffold UI components
- Connect with WooCommerce API
- Create custom filter behavior
Rocket.new speeds up development cycles.
SEO Considerations for Filter Pages
Filtering improves user experience, but it can also create SEO complications if not handled correctly. Every filter parameter can generate a new page URL, and search engines may treat them as separate pages.
Filters can create duplicate page URLs.
Configure plugin to:
- Use noindex for filter parameters
- Prevent unnecessary indexation
- Keep canonical URL clean
This protects site structure.
Performance and Caching
Filters improve search results, but heavy filter logic can slow loading if not configured properly. Speed still plays a major role in how users experience your store.
Heavy filter logic can slow site speed.
Use:
- Caching plugin
- Optimized hosting
- Lightweight theme
Avoid loading too many unnecessary filter elements.
Common Issues and Fixes
Even a properly configured filter setup can encounter minor technical issues. Most problems are simple and usually linked to configuration, cache, or layout conflicts.
Filter Not Displaying
Check: Attributes assigned, Product categories set, Plugin enabled:
Products Not Updating
Clear cache.
Re-save permalinks.
Check AJAX enabled.
Layout Breaking
Edit theme CSS. Adjust block settings.
Layout issues often happen due to theme conflicts or incorrect widget placement.
If something feels off, go step by step instead of changing everything at once. Most filter problems are small configuration gaps, not major system failures.
Building Better Product Filters for WooCommerce
Creating product filters for WooCommerce requires more than just adding a widget to the shop page and hoping it works. You need clear planning, the right plugin, properly structured attributes, and a layout that makes sense for your users. Every filter element should serve a purpose, not just fill space in the sidebar.
Start with well-defined product categories and attributes. Then choose a filter plugin that lets you control parameters such as price, multi-select options, and AJAX behavior. Use the WordPress editor to position filters logically, either on the left or above the displayed products. Keep the interface clean and avoid adding unnecessary filter elements that confuse customers.
When configured properly, product filters simplify searching, improve product display, and guide customers smoothly through your store without friction.
Table of contents
- -Why Product Filters Matter for a WooCommerce Store?
- -WooCommerce Filter Setup Requirements
- -Step 1: Install a Filter Plugin
- -How to Install?
- -Step 2: Configure WooCommerce Attributes
- -Step 3: Assign Attributes to WooCommerce Products
- -Step 4: Add Product Categories and Tags
- -Step 5: Create the Filter Layout Using WordPress Editor
- -Step 6: Using WooCommerce Widgets
- -Default Widgets vs Advanced Plugin Filters
- -Step 7: Configure Price Filter
- -Step 8: Advanced Filtering by Sound and Frequencies
- -Step 9: Enable AJAX Filtering
- -Step 10: Customize the Filter Appearance
- -Step 11: Control Filter Behavior
- -Step 12: Test the Filter Process
- -Step 13: Optimize for Mobile
- -Step 14: Use Rocket.new for Rapid Custom Filter Development
- -SEO Considerations for Filter Pages
- -Performance and Caching
- -Common Issues and Fixes
- -Filter Not Displaying
- -Products Not Updating
- -Layout Breaking
- -Building Better Product Filters for WooCommerce