Most Figma files never ship. The design-to-code gap kills momentum, inflates costs, and delays products that were ready weeks ago. This blog covers every step of the Figma to web app process: file preparation, tool selection, conversion, deployment, and the mistakes that break output before it starts. Whether you are a solo founder, designer, or agency team, you will find a clear path from approved design to live product.
Why do so many Figma files sit untouched after approval?
According to Figma's design statistics report, 91% of developers and 92% of designers believe the handoff process could be improved. That figure tells you something is broken in how teams move from design to code.
The problem is not talent or work ethic. It is translation loss. A Figma design captures visual intent precisely: spacing, components, auto layout relationships, and responsive behavior. When developers try to recreate that in code manually, things break at every layer.
The Four Root Causes of Handoff Failure
Auto layout rules get lost when developers manually rebuild flexbox containers instead of reading the Figma file's layout data directly.
Components lose their reusability because a clean Figma component becomes a one-off piece of code that cannot be shared across screens.
Responsive breakpoints disappear since Figma shows a fixed viewport and leaves developers to guess how content adapts across screen sizes.
Spacing tokens get approximated: 24px padding becomes 20px or 28px because the developer eyeballed it from the screen rather than reading the file.
The Business Cost of Handoff Failure
The gap is not just a workflow inconvenience. It has measurable business impact. When a delivered product looks different from the approved design, client relationships suffer and revision cycles multiply.
In fact, validating designs before development can reduce iteration cycles by 25%, effectively avoiding significant developer rework costs, according to a UserTesting Forrester study. As a result, startups and product teams that eliminate the handoff ship faster, iterate more frequently, and reach users sooner.
For a deeper look at how spacing decisions survive the build process, this guide on preserving spacing decisions is one of the most practical resources a team can read before starting a conversion.
How to Prepare Your Figma File for Conversion
Before converting any Figma design into a working web application, the file itself needs to be build-ready. A messy file produces messy code. Think of it like cooking: better ingredients, better results.
According to Rocket's official Figma design guidelines, Rocket identifies screens that are either a frame placed directly on the page, or inside a section placed directly on the page. Frames nested inside groups or other elements are not detected correctly.
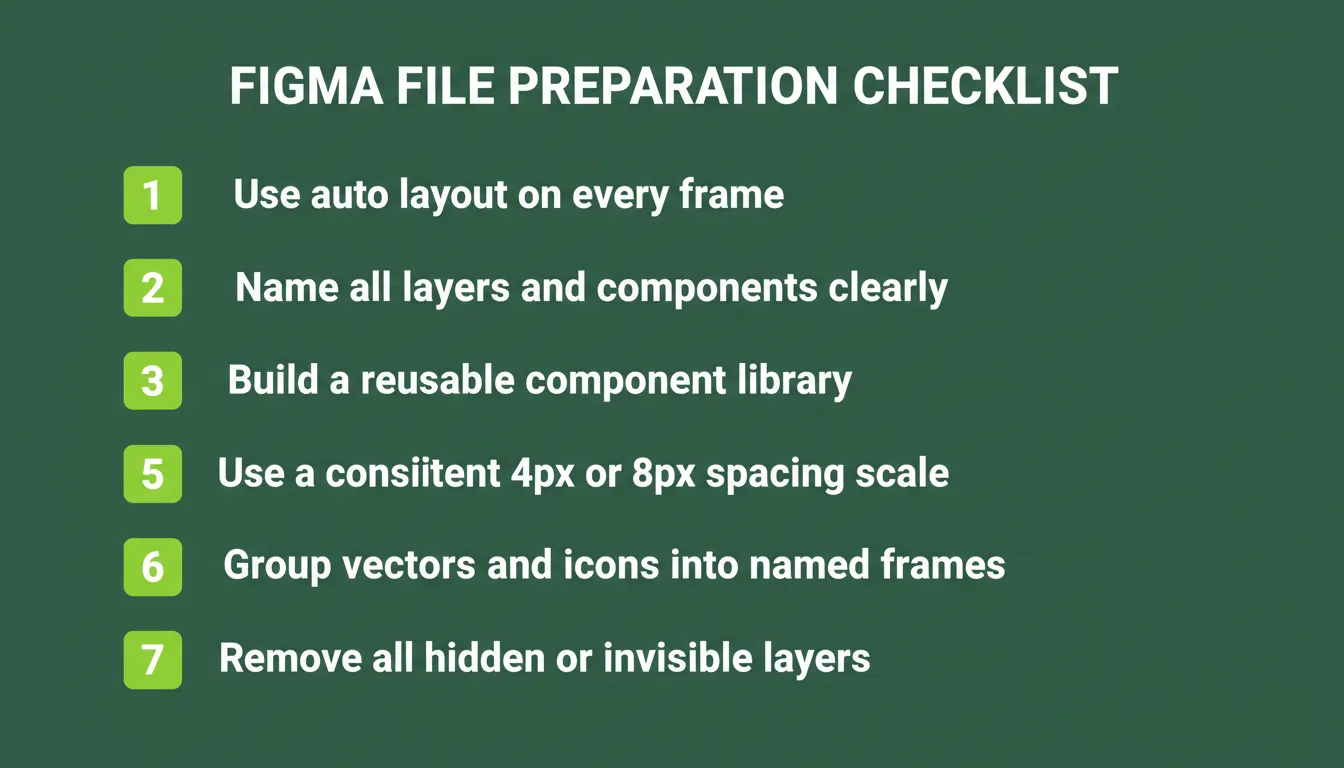
Seven preparation rules that determine whether your Figma file converts cleanly.
The Seven Non-Negotiable File Preparation Rules
1. Use auto layout on every frame. Auto layout tells the conversion tool how elements should be arranged, spaced, and resized. Without it, the tool reads absolute pixel positions and generates brittle code that breaks at different screen sizes.
2. Name your layers and components clearly. "Frame 427" tells a code generator nothing. "Hero Section" or "Pricing Card," on the other hand, maps directly to meaningful component names in the generated code. Descriptive names produce readable, maintainable output.
3. Create reusable components for repeated elements. Buttons, inputs, cards, and navigation bars should exist as Figma components, not duplicated frames. When the source file is structured this way, the generated code outputs clean, shared modules rather than duplicated blocks.
4. Set constraints and responsive rules. Apply constraints to every element inside each frame so the output adapts from desktop down to mobile widths. Without constraints, the conversion tool cannot determine how elements should reflow.
5. Use a consistent spacing scale. Multiples of 4px or 8px work well. Consistent spacing produces Tailwind CSS classes that read as intentional design tokens. Mixed arbitrary values, by contrast, create code that cannot follow a consistent design system.
6. Group vectors and icons into named frames. Per Rocket's guidelines, related vectors should be grouped into a single grouped vector for icons and visuals. Scattered individual paths export poorly and may need manual cleanup after import.
7. Remove invisible and hidden components. Per Rocket's official guidelines, hidden elements are not included during import. Delete or archive anything not meant to appear in the final product.
Frame Size Requirements
| Frame Type | Height | Width |
|---|---|---|
| Mobile screens | Greater than 200px | 200px – 800px |
| Web screens | Greater than 200px | 992px – 2500px |
Important: Image-only frames are not supported. Frames must contain design elements — text, components, or shapes — alongside any images.
Figma File Audit: Build-Ready vs. Not Build-Ready
| Indicator | Build-Ready | Not Build-Ready |
|---|---|---|
| Frame naming | "Hero Section", "Nav Bar" | "Frame 427", "Group 12" |
| Layout method | Auto layout on all frames | Absolute positioning |
| Spacing | Consistent 4px/8px scale | Mixed arbitrary values |
| Components | Shared, reusable library | One-off duplicated elements |
| Responsive rules | Constraints set per element | Fixed pixel dimensions only |
| Vectors | Grouped into named frames | Scattered individual paths |
| Hidden layers | None | Multiple unused hidden layers |
Running a quick audit against this table before conversion saves hours of cleanup afterward.
What Tools Convert Figma Designs into Live Code?
The market for design-to-code tools has grown quickly. Each platform handles conversion differently, and output quality varies significantly depending on how much of the pipeline the tool covers.
Understanding the Two Categories of Tools
There are two fundamentally different types of Figma-to-code tools, and confusing them leads to poor tool selection decisions.
Code export tools read your Figma file and produce downloadable code. You get a zip file. You still need to set up hosting, configure a database, add authentication, and manage deployment yourself. Builder.io, Anima, and Locofy fall into this category.
Full-pipeline builders take your Figma file as the starting point for a complete build. The output is a working, deployed web application, not a code folder. Rocket falls into this category.
Tool Comparison: Figma to Web App Converters
| Tool | Output | Deploys Live? | Responsive | Full Stack? | Backend Included? |
|---|---|---|---|---|---|
| Builder.io | React, Vue, HTML | No (code download) | Partial | No | No |
| Anima | HTML, CSS, React | No (code download) | Yes (with auto layout) | No | No |
| Locofy | Next.js, React Native | No | Yes | No | No |
| Webflow | HTML/CSS (visual) | Yes | Yes | Partial (CMS only) | No |
| Framer | React | Yes | Yes | No | No |
| Rocket | Next.js, Flutter | Yes, one-click publish | Yes | Yes | Yes |
Most tools stop at code generation. That gap between "generates code" and "ships a working web application" is where most teams lose time. AI-powered builders close it by treating the Figma file as the starting input for a complete build pipeline, not just an export target.
How to Choose the Right Tool for Your Situation
Different tools serve different needs. If you need a front-end prototype to drop into an existing codebase, Builder.io or Anima export clean React or HTML. If you need a marketing site with a CMS, Webflow handles that well, though it requires manual design recreation rather than Figma import.
For a full-stack web application with authentication and a database, Rocket is the only tool in this comparison that goes from Figma file to deployed full-stack app without leaving the platform.
How Rocket Converts Figma Files into Deployed Web Applications
Rocket generates web applications that are ready to share with clients and users immediately. That distinction matters when you are trying to ship a live product, not just create a code folder that sits on your desktop.
Per Rocket's Figma connector documentation, Figma connects via OAuth with no API key needed. Figma import is available on web only and is not supported in the Rocket mobile app. One Figma account can be connected per Rocket workspace; to switch accounts, disconnect and reconnect from workspace Settings.
What You Can Build From a Figma File
According to Rocket's official Figma connector page, four distinct output types are supported:
Design to code — import any Figma frame and get a fully coded version with responsive layouts. Rocket matches your layers, spacing, and styling automatically.
Component library handoff — turn your Figma component library into reusable code components with variant support. Named components in Figma become named, reusable components in the generated codebase.
Prototype to production — import a clickable Figma prototype and get a working multi-page app with real navigation and route transitions. Click-through connections in your Figma prototype are mapped to page routes and navigation links in the generated app.
Marketing pages — convert Figma marketing designs into pixel-perfect, responsive code for desktop, tablet, and mobile.
How to Connect Figma to Rocket
Per Rocket's connector documentation, there are two ways to connect:
Option 1 — From the import flow (fastest): Click the + button at the lower left of the chat input and select "Add from Figma." A popup appears asking you to connect. This is the quickest path if you are starting a new import immediately.
Option 2 — From workspace Settings: Click your workspace name in the top-left, select Settings, then open the Connectors tab. Click the Figma card and click Connect. Connecting from Settings makes Figma available to all tasks in the workspace without reconnecting each time.
After clicking Connect, Figma opens an authorization screen. Sign in if prompted, review the permissions, and click Allow access. A green dot appears next to Figma when the connection is active.
The Five-Step Import Process
Per Rocket's Figma connector documentation, the import process follows five steps:
- Copy your Figma link — in Figma, open your file and click Share, then Copy link to get the URL.
- Open the Figma import — in Rocket, click the + button at the lower left of the chat input and select "Add from Figma."
- Select frames — paste your Figma URL and select the frames you want to import.
- Import design — click Import. Rocket generates production-ready code from your selected screens.
- Refine in chat — use chat to add interactivity, connect data sources, or refine layouts.
What Rocket Reads From Your Figma File
Upload your Figma file and Rocket reads every component, auto layout rule, spacing token, and design hierarchy from the file structure. The output is structured, production-grade code, not a rough approximation.
Specifically, Rocket extracts and converts:
- Component hierarchy — each named Figma component becomes a reusable React or Flutter component with proper props and state management
- Spacing and typography tokens — map directly to Tailwind CSS utility classes, keeping the design system consistent throughout
- Auto layout rules — translate to CSS flexbox and grid with correct breakpoints for mobile, tablet, and desktop
- Color styles — become design tokens applied consistently across the generated codebase
- Prototype flows — click-through connections in Figma are mapped to page routes and navigation links in the generated app
Important Tips From Rocket's Official Documentation
Per Rocket's Figma connector page, these tips directly affect output quality:
File organization affects output quality. Well-named layers, proper auto layout, and consistent spacing produce better code. Flattened images or ungrouped elements may need manual cleanup after import.
Prototype flows map to routes. Click-through connections in your Figma prototype are mapped to page routes and navigation links in the generated app.
Complex animations may need refinement. Rocket handles standard transitions, but advanced Figma animations may need adjustment after import.
What Every Generated Application Includes
Per Rocket's Build documentation, every product ships with SEO-ready structure, WCAG accessibility compliance, GDPR coverage, and performance optimization by default. These are the baseline, not optional extras.
After deployment, you get staging and production environments, full version history, and one-click rollback. Built-in analytics track visitors, conversions, accessibility, and Core Web Vitals from day one.
The 25+ Integrations That Connect Into Every Build
Per Rocket's Connectors documentation, Rocket integrates with 25+ services out of the box. Authenticate once and these services flow into every build:
| Category | Integrations |
|---|---|
| Payments | Stripe, Razorpay, PayPal |
| Databases and CMS | Supabase, Airtable, Strapi, Directus, Webflow |
| Email and Messaging | Mailchimp, Brevo, MailerLite, SendGrid, Twilio, Resend |
| Analytics | Google Analytics, Mixpanel |
| AI | OpenAI, Anthropic, Gemini, Perplexity |
| Forms and Scheduling | Typeform, Tally, Calendly |
| Productivity and CRM | Linear, Notion, Airtable, HubSpot, Confluence, Google Workspace |
| Design and Dev | Figma, GitHub, Netlify |
Why Next.js and Flutter Are the Output Frameworks
Next.js is used for web applications because it ships with server-side rendering, static generation, API routes, and SEO optimization built in. Flutter is used for mobile applications because a single codebase produces native iOS and Android apps with real design systems, dark and light theming, and fluid navigation.
For a full breakdown of the reasoning behind these choices, this guide on converting Figma designs to production code covers the technical pipeline in detail.
The Figma to Web App Conversion Workflow
The diagram below shows how a Figma file moves through each stage of the AI-powered conversion pipeline to become a live, deployed web application.
Step-by-Step: From Figma File to Live Web App
Step 1: Audit and Prepare Your Figma File
Run through the preparation checklist above. The most important items are auto layout on every frame, consistent layer naming, and a uniform spacing scale. A 30-minute audit here saves hours of generated code cleanup later.
Step 2: Connect Figma to Rocket
Per Rocket's Figma connector documentation, Figma connects via OAuth with no API key needed. Click the + button at the lower left of the chat input and select "Add from Figma," or go to workspace Settings, then Connectors, then Figma, then Connect. Connecting from Settings makes Figma available to all tasks in the workspace.
Step 3: Copy Your Figma File URL
In Figma, open your file and click Share, then Copy link to get the URL. You need view or edit access to the file. Per Rocket's documentation, prototype links are not valid. Always use the file or frame URL, not the prototype preview link.
Step 4: Select Frames and Import
In Rocket, click + then Add from Figma, paste your Figma URL, and select the frames you want to import. Choose your tech stack — Next.js for web, Flutter for mobile — and click Import. Rocket generates production-ready code from your selected screens.
Step 5: Connect Backend Services
If your app needs user authentication, a database, or API integrations, connect Supabase through the connector panel. This wires up login flows, data storage, and real-time updates without writing backend code. You can also connect Stripe for payments, Mailchimp for email, and 25+ other services from the same panel.
Step 6: Refine and Publish
Use chat to add interactivity, connect data sources, or refine layouts. When the app looks right, click publish. Per Rocket's launch documentation, custom domain setup, SSL, and CDN configuration are all handled automatically.
Rocket Pricing Plans
Rocket uses a credit-based system. One credit balance covers Build, Solve, and Intelligence. All pricing information below is sourced directly from Rocket's official pricing page.
| Plan | Price | Credits/Month | What's Included |
|---|---|---|---|
| Free | USD 0 | 20 (one-time) | Build: websites, landing pages, web apps, mobile apps |
| Pro | USD 25/mo | 100/month | Build: websites, landing pages, web apps, mobile apps |
| Rocket | USD 50/mo | 250/month | Build + Consultant-grade Solve + Competitive intelligence |
| Booster | USD 250/mo | 1,500/month | Build + Solve + Intelligence + SSO, data localisation, premium support |
Annual billing saves 20% across all paid plans. All paid plans include unlimited team members. Credit add-ons are available for purchase separately and do not expire while your subscription is active. Unused subscription credits roll over month-to-month on monthly plans.
Real-World Use Cases: Figma to Web App in Practice
Use Case 1: SaaS Founding Team, No Developer
A two-person founding team designs their SaaS dashboard in Figma over two weeks. Instead of hiring a front-end developer, they upload the file to Rocket. Within an afternoon, they have a working Next.js application with Supabase authentication, a live database, and a deployed URL to share with early beta users.
Why it works: Rocket reads the Figma component hierarchy and maps it directly to reusable React components. The backend scaffolding is automatic, so the team ships without a developer handoff.
Use Case 2: Agency Client Delivery
A digital agency designs a client's e-commerce site in Figma. Rather than spending three weeks in development, they use Rocket to convert the approved design directly into a deployed web application. The client sees a live, interactive version within 24 hours of design approval.
Why it works: Revision cycles happen in the editor using chat commands rather than back-and-forth developer tickets. As a result, the agency delivers faster and keeps the client relationship intact by showing progress immediately.
Use Case 3: Product Designer Validating an Idea
A product designer with an idea for a productivity tool sketches it in Figma, applies auto layout, names the components, and uploads the file. They get a working prototype with real interactivity, not a clickable mockup, in under an hour.
Why it works: Per Rocket's documentation, prototype flows in Figma map directly to routes in the generated app. The designer can share a live URL with potential users and collect real feedback before writing a single line of custom code.
Use Case 4: Enterprise Team Replacing the Handoff
An enterprise product team has a design system in Figma and a backlog of internal tools to build. Instead of routing every tool request through a development queue with a four-week lead time, they use Rocket to convert approved Figma designs into deployed internal tools directly.
Why it works: Per Rocket's Build documentation, Rocket builds internal dashboards, customer portals, compliance tools, and OKR trackers, not just customer-facing apps. The design-to-deployment cycle shrinks from weeks to hours.
Common Mistakes When Converting Figma Designs
Even with good tools, certain patterns cause consistent failures in the Figma to web app conversion process. Knowing these in advance helps you avoid the frustrating back-and-forth of fixing broken output.
Structural Mistakes
Skipping auto layout entirely forces the AI to guess layout relationships from absolute positions, producing code that breaks at different screen sizes. This is the single most common cause of poor conversion output.
Using unnamed or flat layer hierarchies produces generic div names and no clear parent-child structure in the generated code. The output is technically correct but unmaintainable.
Designing only for one viewport creates responsive gaps the tool cannot fill on its own. Design at minimum a desktop and mobile breakpoint before converting.
Content Mistakes
Ignoring text overflow scenarios. Figma designs typically show short placeholder text. Real content, however, breaks fixed-width containers. Test your text containers with longer strings before converting.
Using rasterized images for icons. Per Rocket's guidelines, PNG or JPG icons produce blurry output at different screen densities. Use SVG vectors grouped into named frames instead.
Leaving elements outside the frame. Per Rocket's official guidelines, all components and visual elements must be placed inside the screen's frame. Elements placed outside are ignored during import and may cause visual gaps.
Process Mistakes
Using a prototype link instead of a file URL. Per Rocket's Figma connector documentation, prototype links are not valid. Always use the file or frame URL from Figma's Share menu.
Converting before the design is final. Every design change after conversion requires a re-import or manual code edit. Finalize the design before converting.
The teams that ship fastest share a consistent pattern: they prepare their Figma file properly, choose a tool that handles the full pipeline from design through deployment, and publish without a separate GitHub repository or hosting workflow.
Figma to Web App vs. Figma to Mobile App
Many teams need both a web app and a mobile app from the same Figma design. Understanding the key differences helps you plan the conversion correctly.
Key Differences at a Glance
| Dimension | Figma to Web App | Figma to Mobile App |
|---|---|---|
| Output framework | Next.js (React) | Flutter |
| Deployment | Web hosting, custom domain | App Store, Google Play, or PWA |
| Responsive behavior | CSS breakpoints for viewport widths | Platform-specific screen sizes |
| Navigation pattern | URL-based routing | Stack/tab navigation |
| Backend connectivity | REST APIs, Supabase | Same REST APIs, Supabase |
| Time to live | Minutes (web hosting) | Hours to days (app store review) |
| Iteration speed | Instant redeployment | App store re-submission required |
Mobile App Distribution Options
Per Rocket's mobile launch documentation, there are three distribution methods for Flutter apps built in Rocket:
| Method | Speed | Audience | Cost |
|---|---|---|---|
| Web preview link | Instant | Anyone with link | Free |
| APK download | Minutes | Android testers | Included with paid plan |
| Google Play Store | Days to weeks | Public | USD 25 one-time (developer account) |
| Apple App Store | Days to weeks | Public | USD 99/year (developer account) |
The Recommended Sequencing Strategy
For most teams, build the web app first. Web apps deploy in minutes, not days. You can share a live URL with users immediately, collect real feedback, and iterate before committing to the app store submission process.
Once the core product is validated on web, generate the mobile app from the same Figma file. The design system, component structure, and backend connections carry over. You are extending what already works, not starting over.
The Figma to Web App Workflow Has Changed
The gap between a finished Figma design and a live web application keeps shrinking. With the right file preparation and a tool that handles the full pipeline, you can go from approved design to a published site ready for real users in hours rather than weeks.
The engineering overhead that used to stand between a design and a live product is no longer necessary. 1.5 million people across 180 countries have tried Rocket. Start building on Rocket.new and ship what you have already designed, with no developer handoff, no separate hosting, and no waiting.
Table of contents
- -The Four Root Causes of Handoff Failure
- -The Business Cost of Handoff Failure
- -How to Prepare Your Figma File for Conversion
- -The Seven Non-Negotiable File Preparation Rules
- -Frame Size Requirements
- -Figma File Audit: Build-Ready vs. Not Build-Ready
- -What Tools Convert Figma Designs into Live Code?
- -Understanding the Two Categories of Tools
- -Tool Comparison: Figma to Web App Converters
- -How to Choose the Right Tool for Your Situation
- -How Rocket Converts Figma Files into Deployed Web Applications
- -What You Can Build From a Figma File
- -How to Connect Figma to Rocket
- -The Five-Step Import Process
- -What Rocket Reads From Your Figma File
- -Important Tips From Rocket's Official Documentation
- -What Every Generated Application Includes
- -The 25+ Integrations That Connect Into Every Build
- -Why Next.js and Flutter Are the Output Frameworks
- -The Figma to Web App Conversion Workflow
- -Step-by-Step: From Figma File to Live Web App
- -Step 1: Audit and Prepare Your Figma File
- -Step 2: Connect Figma to Rocket
- -Step 3: Copy Your Figma File URL
- -Step 4: Select Frames and Import
- -Step 5: Connect Backend Services
- -Step 6: Refine and Publish
- -Rocket Pricing Plans
- -Real-World Use Cases: Figma to Web App in Practice
- -Use Case 1: SaaS Founding Team, No Developer
- -Use Case 2: Agency Client Delivery
- -Use Case 3: Product Designer Validating an Idea
- -Use Case 4: Enterprise Team Replacing the Handoff
- -Common Mistakes When Converting Figma Designs
- -Structural Mistakes
- -Content Mistakes
- -Process Mistakes
- -Figma to Web App vs. Figma to Mobile App
- -Key Differences at a Glance
- -Mobile App Distribution Options
- -The Recommended Sequencing Strategy
- -The Figma to Web App Workflow Has Changed