Deploying Next.js on cPanel requires choosing between static export (no Node.js needed) or a live Node.js server via cPanel's Node.js Selector. This guide covers both paths, environment variables, image fixes, PM2, and when to switch platforms.
Most developers search for this because they already have a cPanel hosting account and a Next.js project, and they just need the two to work together. That's a fair goal. What catches people off guard is that Next.js wasn't designed for traditional shared hosting. It was built to run on a live Node.js process, and most shared hosting plans weren't built with that in mind.
The good news is that there are two workable paths, and the one you take depends entirely on what your application actually does.
According to the shared hosting guide on DEV Community, a developer working with Namecheap cPanel noted that shared hosting "doesn't offer enough resources for NextJS apps, which suffocates the js app" and that's worth understanding before you begin, not after you're stuck.
Let's start with the question that determines everything else.
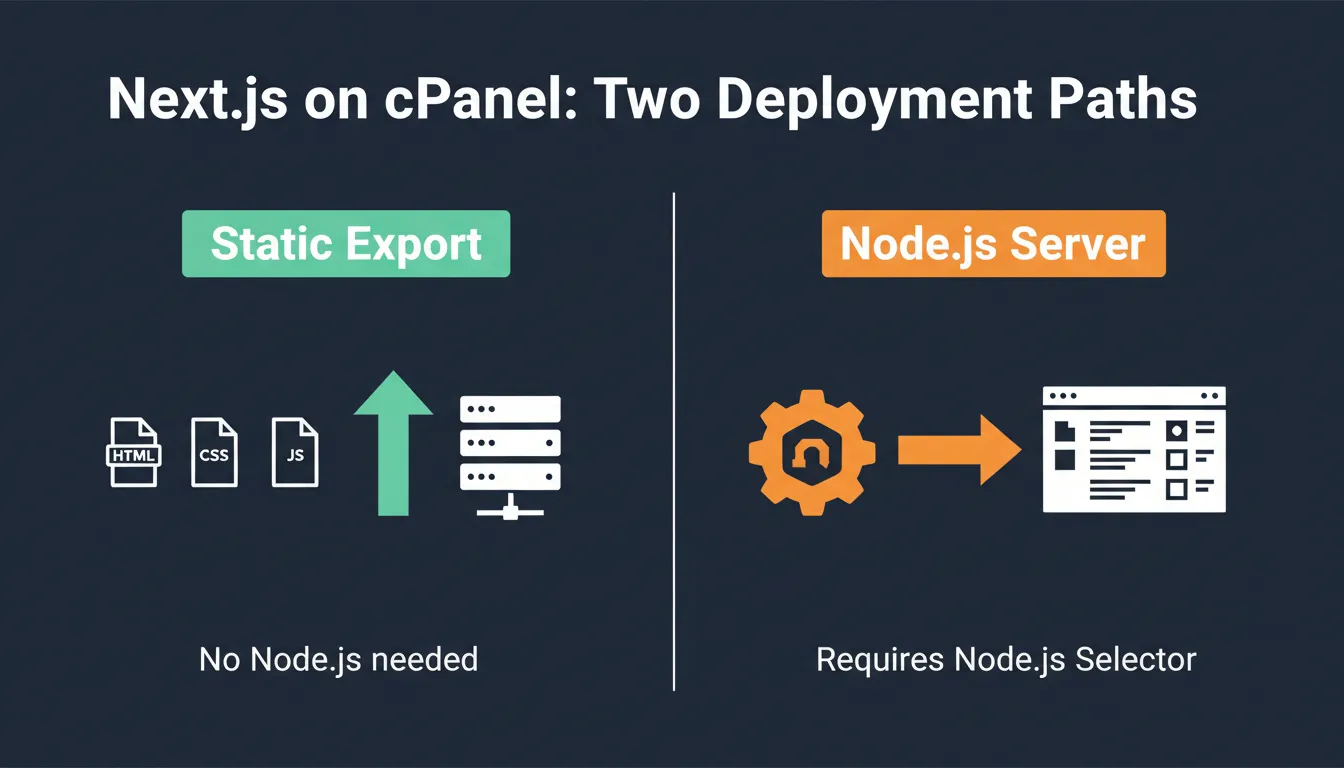
Choose your path before touching cPanel: static export needs no Node.js, the server path needs Node.js Selector
App Router vs Pages Router: Why It Changes Your cPanel Setup
Next.js ships with two architectures. If your project uses the app/ directory, you're on the App Router (introduced in Next.js 13, recommended since version 14). If it uses the pages/ directory, you're on the Pages Router, the older architecture, still widely used and fully supported.
Why this matters for cPanel: The App Router makes heavy use of React Server Components, Server Actions, and streaming responses. These features require a running Node.js server and work best on platforms designed for them. Deploying an App Router project on shared hosting works, but you'll lose some of these features depending on your hosting plan's resource limits.
The Pages Router is more forgiving on constrained environments. The custom server.js pattern shown throughout this guide works cleanly with Pages Router projects. For either architecture, the first question is whether your site actually needs server-side rendering at all.
Path 1: Static Export (The Simpler cPanel Option)
If your Next.js website is a marketing site, blog, portfolio, or documentation site, anything without real-time data, authenticated user sessions, or API routes that run server-side, you may not need a Node.js process at all.
Next.js supports a full static export that generates plain HTML, CSS, and JavaScript files in an out/ folder. You can upload this folder to any web server, including basic cPanel shared hosting without Node.js support.
How to Configure Static Export
Open your next.config.js and add this one line:
1/** @type {import('next').NextConfig} */
2const nextConfig = {
3 output: 'export',
4}
5
6module.exports = nextConfig
Then build your project:
1npm run build
This generates an out/ directory. Upload its contents to your cPanel public\_html folder, create an .htaccess file with the rewrite rules below, and your site is live with no Node.js required.
The .htaccess File for Static Next.js Export
1RewriteEngine On
2RewriteBase /
3RewriteRule ^index\.html$ - [L]
4RewriteCond %{REQUEST_FILENAME} !-f
5RewriteCond %{REQUEST_FILENAME} !-d
6RewriteRule . /index.html [L]
Static Export Limitations to Know
| Feature | Works with Static Export |
|---|---|
| API routes (/api/*) | No |
| getServerSideProps | No, use getStaticProps instead |
| Server Actions | No |
| Dynamic routes with runtime data | Only with generateStaticParams |
| next/image optimization | No, images serve unoptimized |
| Middleware | No |
| ISR (Incremental Static Regeneration) | No |
If you're building a purely content-driven site, static export removes all the cPanel Node.js configuration overhead. For dynamic apps with user data, authentication, or server logic, you'll need Path 2.
Path 2: Node.js Server on cPanel (For Dynamic Apps)
For apps that need live server-side rendering, API routes, authentication, or database connections, you need cPanel's Node.js Selector and a custom server file.
A note from the official Next.js deployment docs before you begin: the custom server approach opts your app out of certain automatic optimizations. Specifically, automatic static page optimization and some caching behaviors are disabled when you run a custom server. It's the right call for cPanel, but it's worth knowing the tradeoff.
What You Need Before Starting
Check these off locally before touching cPanel:
-
Node.js 18.17 or higher installed (for Next.js 14+)
-
Your app locally builds without errors, run
npm run build and verify
-
A cPanel hosting plan with Node.js Selector in the software section
-
Your domain pointed to the hosting account
Version compatibility reference:
| Next.js Version | Minimum Node.js | Notes |
|---|---|---|
| 15.x | 18.18+ | Latest stable; App Router fully supported |
| 14.x | 18.17 | Most widely deployed version |
| 13.x | 16.14 | Custom server works, some App Router limits |
| 12.x | 12.22 | Pages Router only; avoid on new projects |
Step 1: Create server.js in Your Project Root
cPanel's Node.js Selector needs a single startup file. Create server.js at the root of your project. This pattern is based on the Next.js official deployment docs:
1const { createServer } = require('http')
2const { parse } = require('url')
3const next = require('next')
4
5const dev = process.env.NODE_ENV !== 'production'
6const hostname = 'localhost'
7const port = process.env.PORT || 3000
8const app = next({ dev, hostname, port })
9const handle = app.getRequestHandler()
10
11app.prepare().then(() => {
12 createServer(async (req, res) => {
13 try {
14 const parsedUrl = parse(req.url, true)
15 await handle(req, res, parsedUrl)
16 } catch (err) {
17 console.error('Error occurred handling', req.url, err)
18 res.statusCode = 500
19 res.end('internal server error')
20 }
21 }).listen(port, (err) => {
22 if (err) throw err
23 console.log(`> Ready on http://${hostname}:${port}`)
24 })
25})
The await handle(req, res, parsedUrl) call passes every request into the Next.js router. For both App Router and Pages Router projects, this is sufficient.
Step 2: Update package.json
Your production start script should call server.js , not the default next start :
1{
2 "scripts": {
3 "dev": "next dev",
4 "build": "next build",
5 "start": "NODE_ENV=production node server.js"
6 }
7}
Step 3: Build Locally
Always build on your local machine. Shared hosting does not have the CPU or memory needed to build a Next.js project:
1npm run build
Confirm that the .next folder appears and that no build errors show. Never run npm run dev on the server, it runs in development mode, rebuilds on every request, and will corrupt your production output.
Step 4: Configure the cPanel Node.js App
Log into cPanel, scroll to the Software section, and open Setup Node.js App. Then:
-
Click Create Application
-
Set Node.js version to match your local build
-
Set Application mode to
production4. Set Application root to your app's folder path (never use
public\_html for Node.js apps)
-
Set Application URL to your domain
-
Set the application startup file to
server.js7. Click Create
cPanel auto-generates an .htaccess file that routes incoming web traffic to your Node.js process. Stop the app, navigate to the detected configuration files section, click Run NPM Install, then start the app again.
Configuration reference:
| Field | Correct Value |
|---|---|
| Application mode | production |
| Application startup file | server.js |
| Application root | /home/username/yourapp/ |
| Application URL | your domain name |
| Node.js version | 18.17 or higher |
Step 5: Prepare and Upload Project Files
Before compressing, remove these unnecessary files to bring your project from ~800MB down to under 5MB:
node\_modules
: installed server-side after upload via npm install
.git
: not needed for production; can expose commit history
.next/cache
: temporary build data; keep .next/static and .next/server
README.md
and .gitignore ZIP the remaining files, upload via File Manager, extract, and confirm server.js sits at the same level as package.json in the application root. Run npm install from the cPanel panel, then start the application.

Strip unnecessary files before uploading — this reduces your project from ~800MB to under 5MB
Handling Environment Variables on cPanel
Your .env.local file should never be uploaded to the server, but your application still needs those values to run. cPanel's Node.js Selector has an environment variable section built in. After creating your Node.js application, scroll down to the Environment Variables panel and add each key-value pair from your local .env.local file there.
Variables prefixed with NEXT\_PUBLIC\_ are embedded into the client-side bundle at build time. These need to be set before you run npm run build locally — they are baked into the .next folder and cannot be changed server-side after the build.
Variables without NEXT\_PUBLIC\_ are server-only. These are read at runtime and can be safely set in cPanel's environment variable panel after upload. Keep a .env.production file locally for reference (never commit it to git) and copy its values manually into cPanel's panel during each deployment.
For teams managing environment variables and deployment workflows at scale, the application deployment automation best practices guide covers repeatable patterns beyond the manual upload cycle.
The next/image Problem on Shared Hosting
Next.js's built-in image optimization ( next/image ) runs as a server-side process that resizes and serves images on demand. On shared hosting, this is CPU-intensive and can hit resource limits quickly, often causing your Node.js app to crash under real traffic load.
Your options:
- Disable optimization: add
unoptimized: true to your image config. Images serve as-is, slightly larger files but no server crashes.
- Use an external CDN: Cloudinary, Imgix, or Bunny.net can handle optimization. Configure
remotePatterns in next.config.js to point to your CDN domain.
- Static export: if you went with Path 1, optimization is already disabled by default.
For most shared hosting scenarios, the simplest fix is:
1module.exports = {
2 images: {
3 unoptimized: true,
4 },
5}
If you're building a full-stack app and want to avoid these infrastructure constraints entirely, Rocket.new generates production-ready Next.js web apps that are structured for modern deployment targets from the start.
What Errors Might You Run Into After Deployment?
Even a correctly configured Next.js app can throw errors after going live. These are the issues developers encounter most and what to do about each one. Avoid running npm run dev on the server at any point during debugging — it overwrites your production build.
"Make sure NOT to issue npm run dev on the server, since it may affect the built files. If you have already done so, you may have to upload the locally built files again." — Saad Alkentar, DEV Community
These six errors cover 90% of what developers hit after deploying Next.js on cPanel
| Error | Likely Cause | Fix |
|---|---|---|
| Blank page on domain | Wrong application root path | Correct the path in Setup Node.js App; restart |
| 500 internal server error | server.js syntax issue or missing module | Check cPanel error logs; re-run npm install |
| App won't start | Wrong Node.js version selected | Change to match your local build version |
| "It works! Node.js" page showing | server.js not set as startup file | Set application startup file to server.js exactly |
| MODULE_NOT_FOUND | node_modules missing or corrupt | Delete node_modules folder; re-run npm install |
| Images not loading | next/image optimization crashing | Add unoptimized: true to image config |
| Environment variable undefined | Variable not set in cPanel panel | Add to cPanel's environment variable section and restart |
| App crashes after a few minutes | Shared hosting memory limit | Contact hosting provider or move to VPS |
If your shared hosting plan keeps killing the Node.js process after a few minutes of traffic, it's a memory limit issue, not a code issue. This is the point where most developers decide cPanel shared hosting isn't the right fit for their Node.js app.
If You're on a VPS: Add PM2
If your cPanel account is on a VPS or dedicated server rather than shared hosting, you have SSH access and much more control. The community-standard recommendation is to use PM2 alongside your custom server.
PM2 is a Node.js process manager. It keeps your application running after crashes, restarts it on server reboot, and provides log access. Without PM2, a single unhandled error shuts down your entire Node.js process with no recovery.
Install PM2 globally:
1npm install pm2 -g
Start your Next.js application through PM2:
1pm2 start server.js --name "nextjs-app"
2pm2 save
3pm2 startup
The pm2 startup command generates a command you run once to register PM2 as a system service that persists across server reboots. From this point, your application runs continuously and restarts automatically on crash.
For teams shipping updates frequently, understanding full-stack deployment automation can eliminate the manual ZIP-upload-restart cycle entirely.
What Are the Real Alternatives to cPanel for Next.js?
Here's the honest picture that community discussions reflect. cPanel shared hosting is a valid option for certain situations, but it's not what Next.js was optimized for. Studies show over 58% of Next.js developers deploy on Vercel, while shared hosting accounts for a small but real slice of production deployments.
Knowing the alternatives helps you make the right call.
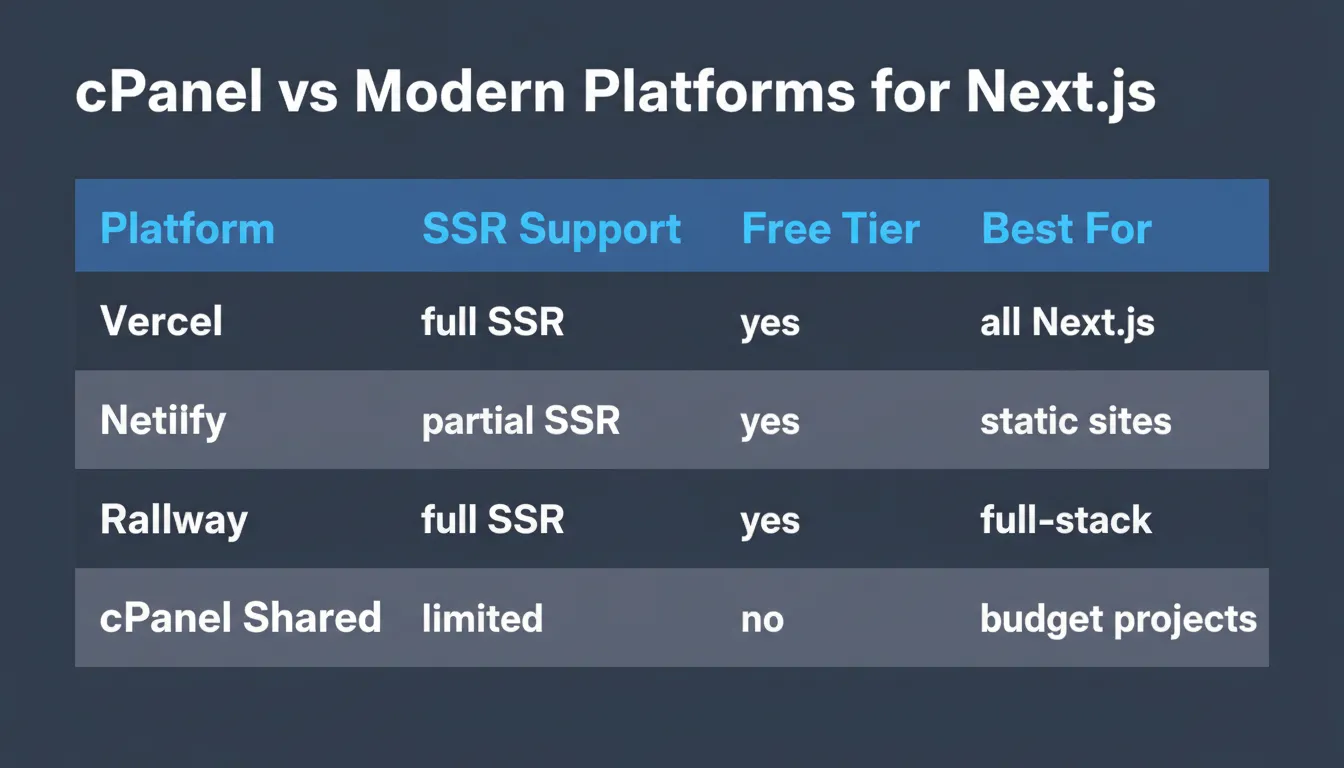
Vercel and Railway offer native Node.js support; cPanel shared hosting works but requires manual configuration
| Platform | Best For | Free Tier | Next.js Support |
|---|---|---|---|
| Vercel | Any Next.js project | Yes | Native, built by the same team |
| Netlify | Mostly static, some SSR | Yes | Good, with some limits |
| Railway | Full-stack apps | Yes | Excellent Node.js runtime |
| Render | APIs and full-stack apps | Yes | Good self-hosting support |
| DigitalOcean App Platform | Production apps needing scale | No | Strong Node.js runtime |
| VPS with PM2 | Full control, custom setups | No | Whatever you configure |
| cPanel shared hosting | Legacy client requirements, budget projects | No | Works, with setup overhead |
Vercel is the simplest choice for Next.js because Next.js was created by Vercel. The integration is seamless and features like ISR, Server Actions, and image optimization work out of the box. Their free tier supports personal projects and small production apps.
Railway and Render are worth knowing about for full-stack projects that need a persistent Node.js server without the cPanel configuration overhead. For a practical look at what modern deployment looks like compared to traditional file-based approaches, the Netlify deployment guide is a useful reference point.
When cPanel actually makes sense:
-
A client or agency already has a cPanel plan and budget doesn't allow a new platform
-
The project is mostly static and can use the
output: 'export' path
- You're maintaining an existing cPanel-hosted project and switching platforms isn't currently on the table
When to move away from cPanel:
-
You're starting a greenfield project and have platform choice
-
The site needs ISR, Server Actions, or heavy server-side processing
-
You expect meaningful traffic growth
-
Image optimization is important to performance
One dimension worth considering for new projects: Rocket.new generates Next.js codebases that are already production-structured, clean enough to deploy on Vercel, Railway, or any platform with a Node.js runtime, without having to retrofit a custom server or rework file structure after the fact.
The Deployment Decision Worth Making Once
Whether cPanel is the right call comes down to your actual constraints. For a client project on legacy hosting with a fixed budget, the Node.js path in this guide is your cleanest option. For a static marketing site or blog, output: 'export' removes most of the complexity.
The configuration overhead of cPanel Next.js hosting isn't a permanent part of web development. Most of it exists because shared hosting predates the Node.js era. Newer platforms were built with these runtimes in mind and handle the configuration layer for you.
For anything requiring real scale, persistent processes, or server-side features beyond basic SSR, Vercel, Railway, or a VPS with PM2 will serve you better. If you're evaluating the broader landscape of AI-powered app deployment tools, the options have expanded significantly beyond traditional hosting.
If you're starting a new project and want to skip the manual server setup, Rocket.new generates production-ready Next.js codebases that deploy cleanly to any modern platform. Developers exploring vibe coding workflows are increasingly choosing platforms that handle deployment infrastructure automatically rather than configuring it by hand.
If you're starting a new Next.js project and want to skip the cPanel configuration overhead entirely, Rocket.new generates production-ready Next.js codebases structured to deploy cleanly on Vercel, Railway, or any Node.js-capable platform from day one.
Start building with Rocket and ship your next project without the manual server setup.
Table of contents
- -App Router vs Pages Router: Why It Changes Your cPanel Setup
- -Path 1: Static Export (The Simpler cPanel Option)
- -How to Configure Static Export
- -The .htaccess File for Static Next.js Export
- -Static Export Limitations to Know
- -Path 2: Node.js Server on cPanel (For Dynamic Apps)
- -What You Need Before Starting
- -Step 1: Create server.js in Your Project Root
- -Step 2: Update package.json
- -Step 3: Build Locally
- -Step 4: Configure the cPanel Node.js App
- -Step 5: Prepare and Upload Project Files
- -Handling Environment Variables on cPanel
- -The next/image Problem on Shared Hosting
- -What Errors Might You Run Into After Deployment?
- -If You're on a VPS: Add PM2
- -What Are the Real Alternatives to cPanel for Next.js?
- -The Deployment Decision Worth Making Once