
The right AI iOS app builder turns a plain-language description into a production-ready iOS app, complete with screens, backend, navigation, and all, without a development team or a single line of code.
Can the right iOS app builder cut your development time in half?
Mobile apps generated $491 billion in revenue in 2024, and nearly 40% of new apps will rely on no-code or AI-assisted tools by 2025. With over 255 billion app downloads recorded globally, the window for getting a polished iOS app in front of users has never been wider or more competitive.
Not all "no-code" builders are the same tool wearing different branding. Some are visual-only. Some inject code. Some generate a full production app from a single sentence.
This blog covers all three categories, how to choose between them, and how to ship to the App Store.
What is an iOS App Builder? No-Code vs. Low-Code vs. AI-Powered
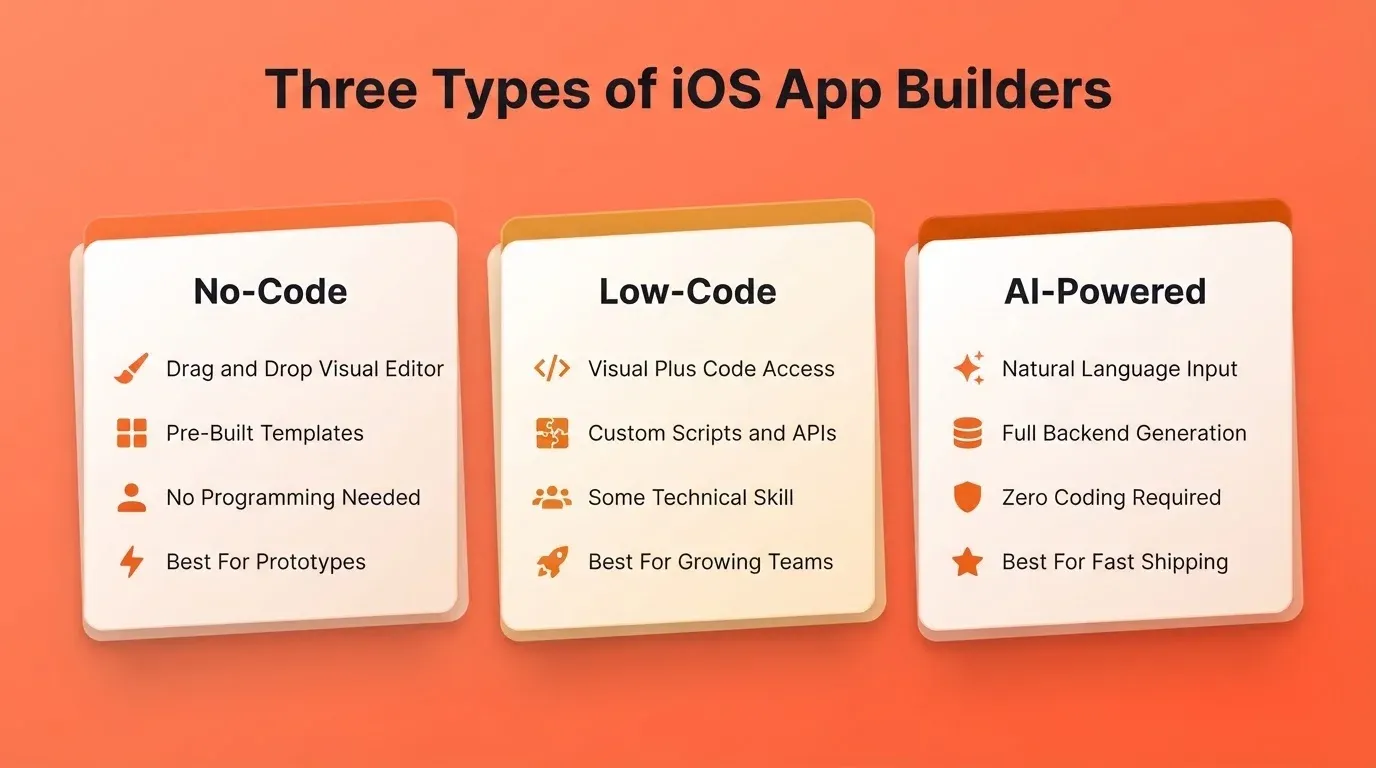
Understanding which category you are evaluating changes everything. The three types solve different problems for different builders.
No-code builders let you assemble apps visually using drag-and-drop components and pre-built templates. No programming knowledge is required. They work best for simple utility apps, internal tools, and first-time builders who need a working prototype quickly.
Low-code builders give you a visual interface plus access to code when you need it. You can extend behavior with scripts, custom APIs, or logic the visual layer cannot handle. They suit teams with some technical capacity who need more control than drag-and-drop allows.
AI-powered builders generate app structure, screens, navigation, and backend logic from a natural language description. The AI writes the code, and you review, iterate, and customize. They work best for founders and product teams who want a production-quality app fast.
Each category has a different ceiling. Knowing which one fits your situation before you start saves weeks of switching.
Why iOS App Builders Are Gaining Ground
The mobile market continues to expand, and competition remains fierce. Millions of apps already sit inside the App Store and Google Play Store. Standing out depends on speed, quality, and relevance.
AI-assisted coding can increase productivity by enabling developers to generate, test, and optimize code faster and more effectively. That same acceleration now reaches non-developers too. Small teams and solo founders can build iOS apps without a large budget. Growing businesses no longer need a dedicated engineering team to ship.
The barrier is no longer technical skill. It is product clarity. The builder handles the code. You handle the thinking.
What to Check Before You Choose a Builder
Most builders look impressive in demos. The gaps show up later. Before committing to any platform, run through this checklist:
- App Store publishing support: Does the builder generate the required IPA file, or do you need Xcode and a Mac to export?
- Custom code access: Can you inject Flutter/Dart or Swift when the visual layer runs out of room?
- Push notifications: Are they built in, or do you need a third-party service?
- In-app purchases (IAP): Does the builder support Apple's StoreKit natively?
- Template quality: Are templates genuinely production-ready, or just shallow starting points?
- Real device testing: Can you preview on an actual iPhone before submitting, or only in a simulator?
- Community and support: Is there active documentation, a forum, or responsive support?
- File and asset organization: Does the builder stay clean as your project grows?
- Apple Watch and widget support: If you need it now or later, check before you build.
- Team collaboration: Can multiple people work on the same project without conflicts?
A builder that fails three or more of these checks will cost you more time than it saves. For a broader look at platforms that meet these standards, the best AI mobile app builder tools guide covers the top options in detail.
Comparing Your Options: Feature Matrix
The table below maps the three builder categories against the criteria that matter most for shipping a real iOS app.
| Criterion | No-Code | Low-Code | AI-Powered |
|---|---|---|---|
| Setup time | Minutes | Hours | Minutes |
| Coding required | None | Optional | None |
| Customization depth | Low to Medium | High | High |
| App Store publishing | Varies | Yes (with effort) | Yes (automated) |
| Backend and database | Limited | Full | Full |
| Push notifications | Limited | Yes | Yes |
| In-app purchases | Rare | Yes | Yes |
| Real device preview | Sometimes | Yes | Yes |
| Figma import | Rare | Sometimes | Yes |
| Custom code injection | No | Yes | Yes |
| AI generation from prompt | No | No | Yes |
| Best for | Prototypes, simple tools | Teams with dev capacity | Founders, fast shipping |
Traditional development gives you full control but costs 10 to 20 times more in time and money. AI-powered builders close most of that gap while keeping the speed of no-code.
What Makes a Strong No-Code Builder
If you are evaluating the no-code category specifically, four qualities separate strong tools from weak ones.
Short setup time. You should see a working first screen in under five minutes. If onboarding takes longer, the tool is not built for speed.
Data flexibility. The builder should connect to external databases, not just its own locked data layer. Apps that cannot move data in and out of external systems hit a ceiling fast.
Smart conditional logic. Real apps need if/then rules, user roles, and state management. A builder that only handles linear flows will force you to rebuild elsewhere.
Multi-screen support. A production app needs navigation, deep linking, and screen transitions that feel native on iOS.
What You Can Build With an iOS App Builder
The range of apps continues to grow. Many creators start with business apps, including booking tools, service platforms, and internal dashboards. Others focus on community or content-based apps that rely on user engagement.
Common app types include:
- Business apps for services, field teams, and client management
- Content apps with articles, videos, and subscription paywalls
- eCommerce stores with product listings, cart, and checkout
- Event and booking apps with calendar and payment flows
- Utility tools for tracking, productivity, and data entry
- Social apps with user profiles, feeds, and messaging
- Health and wellness trackers with habit loops and notifications
- SaaS dashboards with multi-tenant data and role-based access
Most apps support push notifications, user accounts, and basic analytics. AI-powered builders also support advanced features such as subscriptions and payment flows from day one.
How to Build an iOS App: The Step-by-Step Process
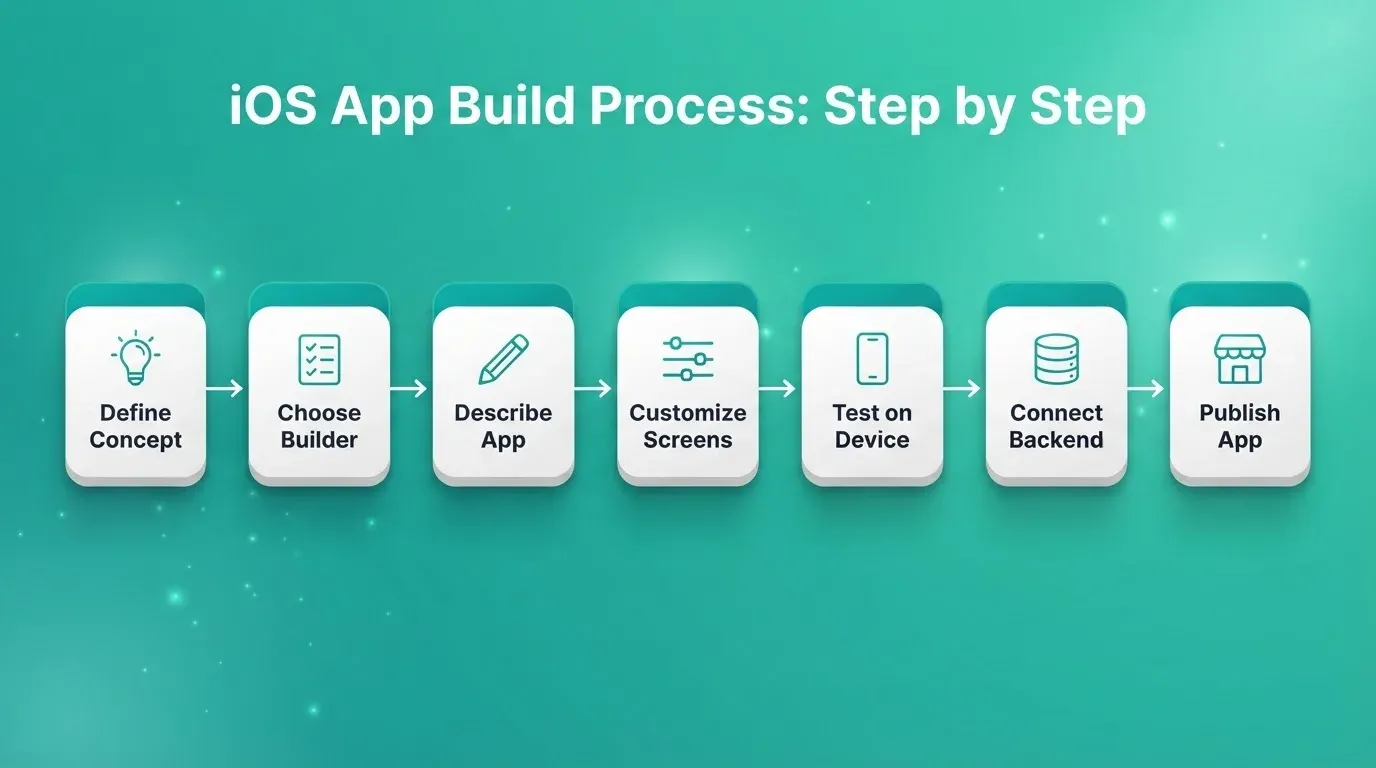
Step 1: Define your app concept. Write down the core purpose, the target user, and three to five must-have features. Vague prompts produce vague apps. The more specific your input, the better the output.
Step 2: Choose your builder category. Use the three-category framework and comparison table above. If you need a working app in days and do not have a developer, AI-powered is the right category.
Step 3: Describe or design your app. In a no-code builder, select a template and fill in screens. In a low-code builder, import a Figma design or start from a component library. In an AI-powered builder, type a description. The system then generates screens, navigation, and a backend schema for you.
Step 4: Customize screens, navigation, and features. Adjust layouts, colors, fonts, and icons. Set up tab bars for main sections, side drawers for settings, and modal sheets for actions. Add deep linking if users will arrive from notifications or external links. Iterate one feature at a time.
Step 5: Preview and test on real iOS devices. Simulators catch layout issues. Real devices catch performance issues, gesture conflicts, and anything the simulator misses. Test on at least two iPhone models before submitting.
Step 6: Connect your developer account and backend. You need an Apple Developer account ($99/year) to publish to the App Store. Connect your backend to handle user data, authentication, and storage. Enable row-level security on your database before launch.
Step 7: Prepare store assets and publish. You need screenshots for every supported device size. You also need an app icon at 1024 x 1024 px, a privacy policy URL, and a completed App Store Connect listing. Submit for review. Apple's process typically takes a few days but can extend to several weeks for first submissions.
For a detailed walkthrough of each step, the how to build apps for iOS guide covers the full process with examples.
Handling Data, Navigation, and Media
These three areas trip up most first-time app builders after launch. Addressing them before you submit saves significant time and frustration.
Data Safety
Connect to a backend that supports row-level security (RLS). Supabase lets you write policies that ensure users can only read and write their own data. If your app handles personal information, you need GDPR and CCPA compliance. That means a privacy policy, data deletion on request, and no third-party data sharing without consent.
Supabase's free tier includes two active projects, 500 MB of database storage, and 1 GB of file storage. That is enough to validate most app ideas before you need to upgrade.
Navigation Patterns
iOS has established conventions. Tab bars belong at the bottom for primary navigation. Side drawers work for secondary settings, while modal sheets handle actions that interrupt the main flow.
Breaking these conventions can trigger App Store rejection for poor UX. Deep linking matters more than most builders advertise. Build it in before launch, not as an afterthought.
Media Handling
Images should be served in WebP or HEIC format and sized to the display resolution, not the original upload size. Video should stream from a CDN, not load from a local file.
File storage at scale requires a bucket-based service with signed URLs for private content. Unoptimized media is the single most common cause of slow app performance after launch.
Native Apps vs. Web Apps: Performance Considerations
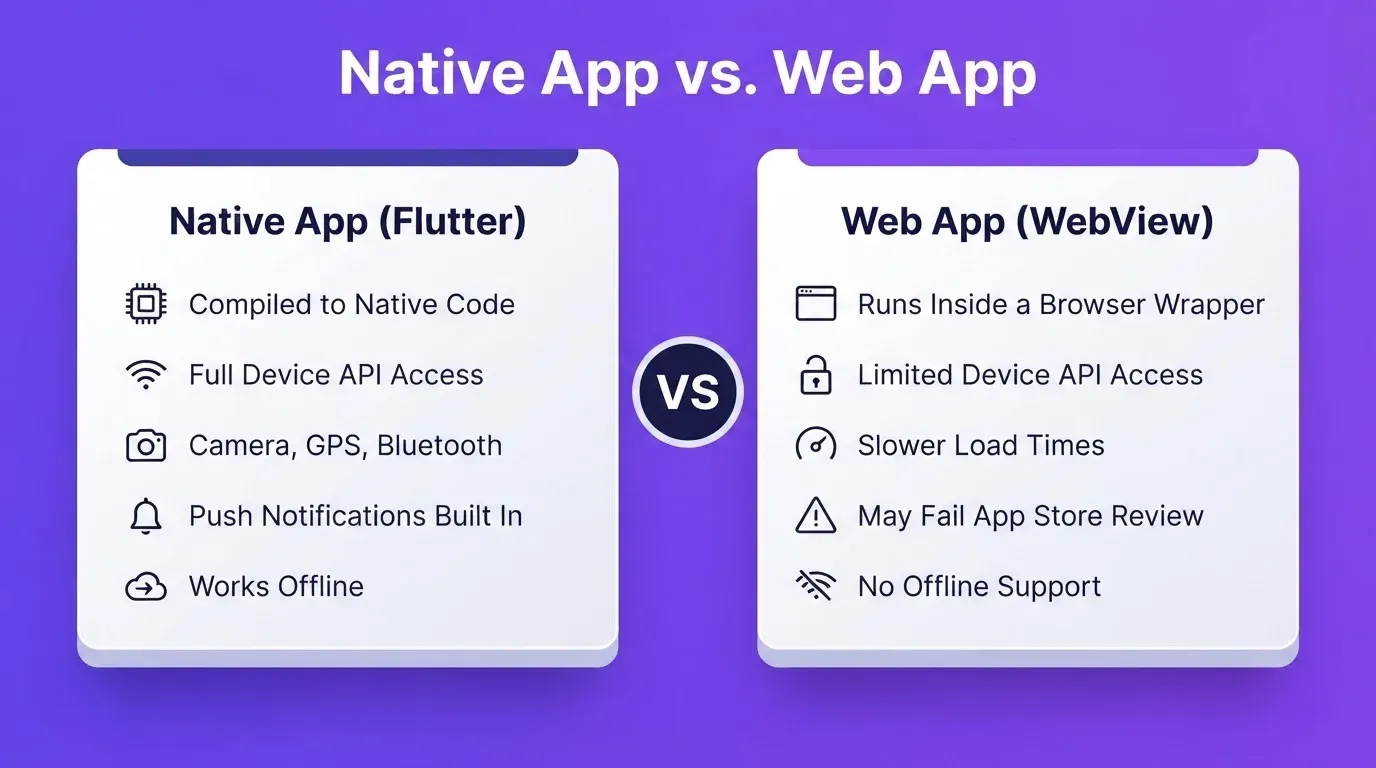
An AI-powered builder that generates Flutter code produces a true native app. It is compiled, fast, and capable of accessing device hardware like the camera, GPS, and push notification system.
A web app wrapped in a WebView looks like a native app but runs differently. It loads slower and cannot access all device APIs. It may also fail App Store review if Apple determines the experience is not sufficiently native. Apple's guidelines specifically flag apps that are "thin wrappers around a website."
If your app needs offline access, hardware integration, or smooth animations, native is the right choice. Test on a real device before committing to either approach.
For a deeper look at how Flutter powers native iOS and Android apps from a single codebase, the Flutter mobile app guide covers the technical details and build considerations.
Understanding Subscriptions and Pricing
Most AI iOS app builder platforms offer a free tier for testing and paid tiers for publishing. Higher tiers typically unlock App Store and Google Play publishing, custom domains, advanced integrations, team collaboration seats, and priority support.
Test on the free tier first. Confirm the builder passes your pre-commitment checklist before upgrading. Annual plans typically cost 20 to 30 percent less than monthly billing.
Fixed costs that apply regardless of which builder you use:
| Cost Item | Amount | Notes |
|---|---|---|
| Apple Developer Program | $99/year | Required to publish to App Store |
| Google Play Developer | $25 one-time | Required to publish to Google Play |
| Supabase free tier | $0 | 2 projects, 500 MB DB, 1 GB storage |
| Supabase Pro tier | $25/month | 8 GB DB, 100 GB storage, daily backups |
| Stripe | 2.9% + $0.30/transaction | No monthly fee; test mode is free |
Budget for both developer accounts if you plan to publish cross-platform. The Apple fee recurs annually, while the Google fee is paid once.
When You Might Need Custom Code
Most apps built with an AI-powered builder stay within the platform's capabilities. However, some situations call for code:
- Complex business logic the visual layer cannot express cleanly
- Custom data flows between multiple external APIs
- Performance-critical features like real-time updates or heavy animation
- Hardware access beyond standard device APIs, such as Bluetooth LE, NFC, or ARKit
- Features the platform has not yet shipped
When you reach this point, a builder that generates Flutter/Dart code gives you the most flexibility. Flutter is Google's open-source UI framework that compiles to native iOS and Android from a single Dart codebase. You can export the codebase and extend it like any other Flutter project.
Builders that lock you into a proprietary format make this transition painful or impossible. So check the export policy before you commit.
Common Challenges and Red Flags
Challenges every builder faces:
- Understanding App Store guidelines before you build, not after rejection
- Managing updates and bug fixes without breaking existing users
- Supporting multiple device sizes and iOS versions at the same time
- Handling user feedback and feature requests at scale
Red flags that signal a builder is the wrong tool:
- Preview loading takes more than 10 seconds to reflect a change
- No file or screen organization system
- No export or code ownership option
- Support response time exceeds 48 hours
- No real device testing before submission
If you hit two or more red flags during a trial, switch before you invest more time.
What the Community Says
Builders who have shipped real apps share a common observation. The initial build feels fast. Post-launch maintenance is where the platform's real quality shows up.
"Most builders look the same at the start. The differences show up when you try to test on a real device or push an update. Pay attention to how the tool handles testing and updates. That is where you will spend most of your time after launch."
Builders with strong version control, rollback support, and clear update workflows save hours of debugging after every release.
Publishing to the App Store and Google Play
After building comes publishing. This step requires more preparation than most builders advertise.
For the App Store:
- Enroll in the Apple Developer Program ($99/year)
- Create your app record in App Store Connect
- Upload screenshots for all required device sizes, including iPhone 6.7", 6.5", and 5.5" at minimum
- Write your app name, subtitle, description, keywords, and support URL
- Submit the build via your builder's publishing tool or Xcode
- Wait for Apple's review, which typically takes a few days but can take longer for first submissions
For Google Play:
- Create a Google Play Developer account ($25 one-time fee)
- Set up your store listing with screenshots and a feature graphic (1024 x 500 px)
- Upload your APK or AAB file
- Complete the content rating questionnaire and data safety form
- Submit for review, which is typically faster than Apple
Read Apple's App Store Review Guidelines before you build. Common rejection reasons include crashes on launch, misleading screenshots, a missing privacy policy, and thin content.
Distribution options before full launch:
| Method | Best For | Speed | Cost |
|---|---|---|---|
| Web preview link | Demos, stakeholder reviews | Instant | Included |
| APK download | Android device testing | Minutes | Paid plan required |
| App Store and Google Play | Public release | Days to weeks | Developer account fees |
Use the web preview link during development. Download an APK to test the full native experience on Android. Submit to the stores only when the app is ready for public users.
Building Your iOS App with Rocket
You describe your app in plain language. Rocket reads the prompt, generates Flutter screens for mobile, and builds the backend logic. It also generates Next.js for web apps. Most apps generate in one to three minutes.
1.5 million people have tried Rocket across 180 countries.
Six ways to start a build:
- From an idea: describe what you want in plain language
- From an attachment: upload a screenshot, wireframe, PDF, or spreadsheet
- From Figma: import a Figma design and convert it to working code
- From GitHub: import an existing Next.js TypeScript codebase and continue building
- From a template: start from a pre-built template (zero credits consumed)
- Redesign: provide a URL and transform an existing website into a new design
Three ways to iterate after the first generation:
- Chat: natural language instructions with no change limit
- Visual Edit: click any element in the live preview to change text, style, spacing, or layout directly
- Code: browse and modify the full Flutter or Next.js source code directly
Rocket connects Stripe, Supabase, OpenAI, Anthropic, Gemini, Google Analytics, Mailchimp, Airtable, Notion, Linear, Mixpanel, Twilio, Resend, and more. That is 25+ integrations in total. You authenticate once and they flow into every build automatically.
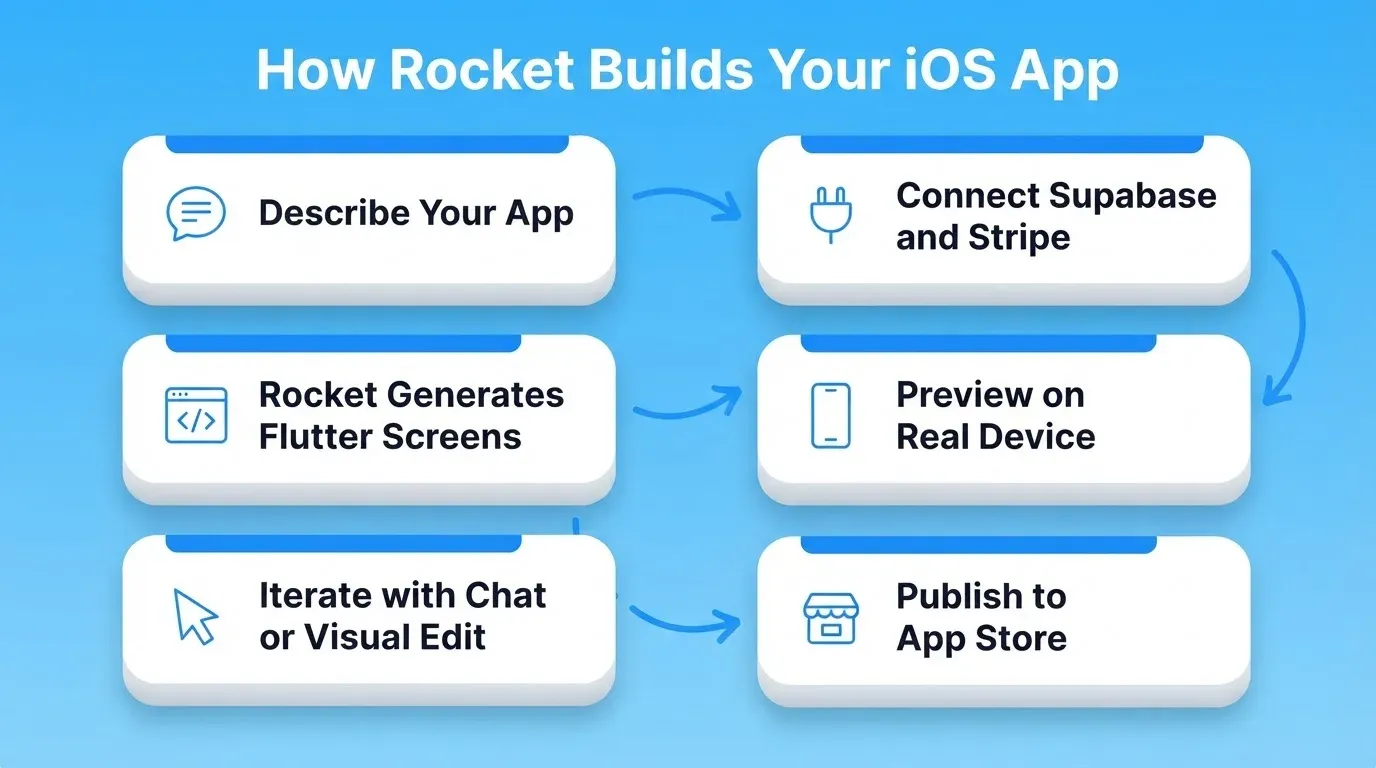
For a complete walkthrough of building an iOS app with Rocket's Build feature, the iOS app builder guide covers the full process from prompt to App Store submission.
Rocket feature overview:
| Feature | Rocket |
|---|---|
| AI app generation from prompt | Yes, Flutter (mobile) and Next.js (web) |
| Visual drag-and-drop editor | Yes |
| Chat-based iteration | Yes |
| Direct code view and editing | Yes |
| Custom code injection | Yes |
| Supabase backend (OAuth) | Yes |
| Stripe payments | Yes |
| Real device preview (web link) | Yes |
| APK download for Android testing | Yes, paid plan required |
| App Store publishing | Yes |
| Google Play publishing | Yes |
| Figma import | Yes |
| GitHub sync | Yes |
| Mobile editing (build from iPhone) | Yes |
| Version history and rollback | Yes |
| 25+ integrations | Yes |
Choosing the Right iOS App Builder
The decision comes down to four key questions. First, what category do you need? No-code works for simple tools. Low-code suits teams with dev capacity. AI-powered delivers fast, production-quality builds.
Second, does it pass the pre-commitment checklist? Run all ten checks before investing time. Third, does the comparison table show the features you need? App Store publishing, backend integration, push notifications, and real device testing are non-negotiable for a production app.
Fourth, can it handle what comes after launch? Updates, bug fixes, version rollback, and data safety reveal a platform's real quality. The right ai ios app builder accelerates every stage, from first prompt to published app.
The Future of iOS App Development Starts Here
The ai ios app builder category is still accelerating. AI models are getting better at understanding product intent and generating production-grade code. The gap between "idea" and "shipped app" will keep shrinking.
You have a product idea. Type it. Rocket reads the prompt, generates the screens, builds the backend, and prepares everything for App Store submission. The architecture, the code, and the deployment all follow from a single description.
Start building on Rocket.new and go from prompt to production-ready iOS app today.
Table of contents
- -What is an iOS App Builder? No-Code vs. Low-Code vs. AI-Powered
- -Why iOS App Builders Are Gaining Ground
- -What to Check Before You Choose a Builder
- -Comparing Your Options: Feature Matrix
- -What Makes a Strong No-Code Builder
- -What You Can Build With an iOS App Builder
- -How to Build an iOS App: The Step-by-Step Process
- -Handling Data, Navigation, and Media
- -Data Safety
- -Navigation Patterns
- -Media Handling
- -Native Apps vs. Web Apps: Performance Considerations
- -Understanding Subscriptions and Pricing
- -When You Might Need Custom Code
- -Common Challenges and Red Flags
- -What the Community Says
- -Publishing to the App Store and Google Play
- -Building Your iOS App with Rocket
- -Choosing the Right iOS App Builder
- -The Future of iOS App Development Starts Here