Adding payments to your app is faster than most founders expect. Use pre-built providers like Stripe or PayPal, connect them through an AI-powered build platform, and ship a working checkout in hours, not months.
Why does the payment step take longer than building the rest of the product?
For most founders, the answer is familiar. Screens, features, and user flows are ready. But the moment you need to charge someone, everything slows down. According to the 2025 McKinsey Global Payments Report, the global payments industry generated $2.5 trillion in revenue from over 3.6 trillion transactions worldwide. That scale reflects just how layered and regulated money movement has become.
The good news is you don't need to build any of that infrastructure yourself. Pre-built payment providers handle the hard parts. Modern app-building platforms make connecting them take minutes, not months.
Why Payment Flows Become the Longest Chapter in App Development
A payment flow sounds simple on the surface. Accept a card, move money, confirm the purchase. In practice, though, the scope expands fast.
-
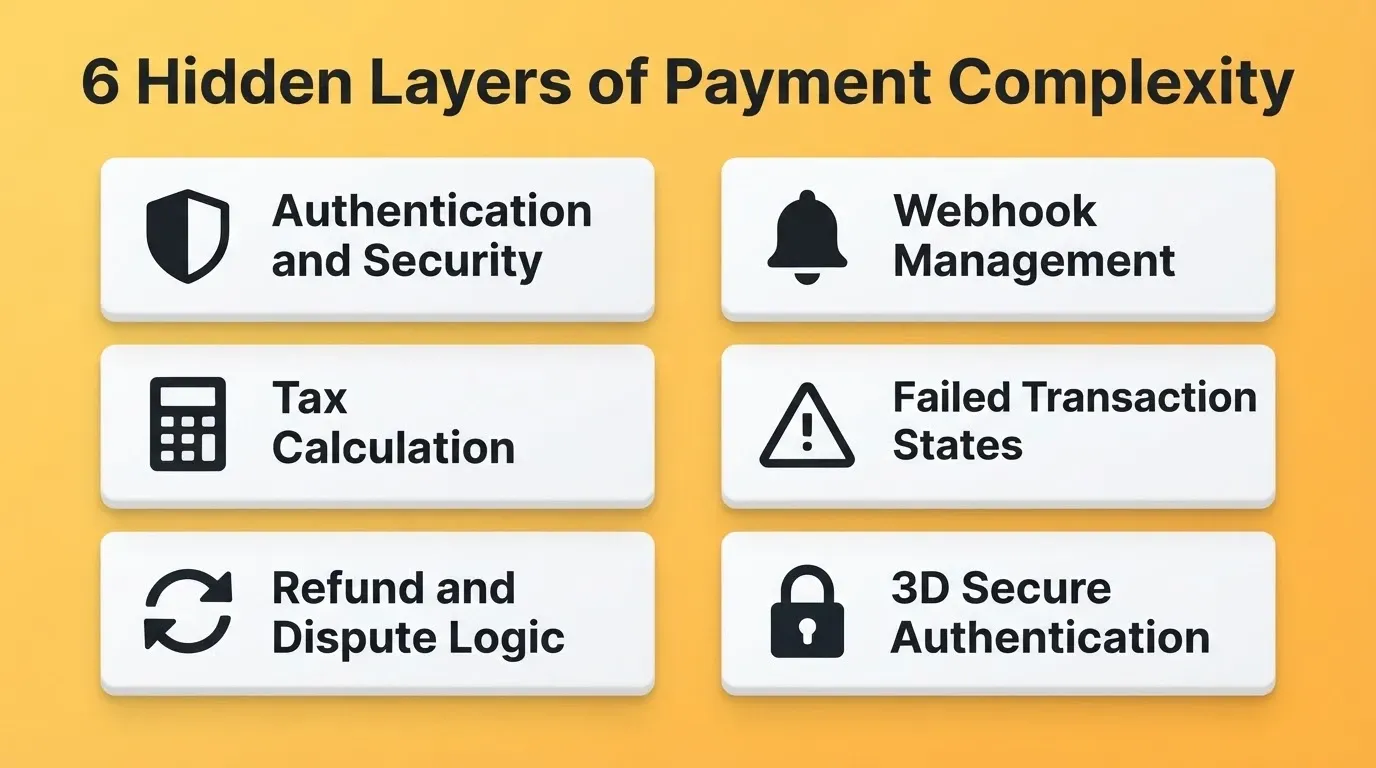
Authentication and security sit at the foundation. PCI DSS compliance requires encrypted data handling, tokenization, and strict access controls for any app that touches card details.
-
Tax calculation varies by region, product type, and customer location. Getting this wrong creates legal exposure, not just accounting headaches.
-
Refund and dispute logic handles partial refunds, chargebacks, and time-limited reversal windows. Each of these requires its own API calls and status tracking.
-
Webhook management keeps your app in sync with the payment provider. Failed webhooks mean missed status updates, which leads to customers who paid but never received their product.
-
Failed transaction states require retry logic, user-facing error messages, and fallback flows. Most teams do not plan for these until something breaks in production.
-
3D Secure (3DS) authentication is now mandatory in the EU and increasingly expected globally. It adds a verification step for high-risk transactions.
Teams building subscription-based products often discover this complexity the hard way. As a result, the payment layer quietly becomes the longest chapter in the development timeline.
What Exactly Goes Into a Payment Flow?
Before choosing a tool, it helps to see the full picture. A payment flow is a chain of connected processes that must all work together without gaps.
End-to-End Payment Flow: From Product Selection to Order Fulfillment
Each node carries its own failure modes. Tokenization protects sensitive card data so your servers never store raw numbers. The gateway handles communication with card networks. Tax calculation happens after approval but before final confirmation. Meanwhile, webhooks notify your system about status changes that occur outside your app.
Most apps need every single one of these steps. Almost none of them need to be built by hand. That is exactly where pre-built payment providers come in.
Which Pre-Built Payment Options Work for Modern Apps?
The payment provider market has matured significantly over the past decade. So today, you no longer need to negotiate directly with banks or build custom connections with card networks.
-
Stripe offers the most developer-friendly payment API available. Their API refinement reduced what was once months of work into a few configuration steps, with support for 135+ currencies and dozens of payment methods.
-
PayPal brings brand trust and a large existing user base. For apps targeting consumers who already have PayPal accounts, the reduced friction at checkout can meaningfully lift conversion rates.
-
Square works well for businesses that bridge physical and digital transactions. It combines in-person terminals with online payment processing.
-
Razorpay covers the Indian market with deep local payment method support, including UPI, net banking, and EMI options.
-
Braintree (owned by PayPal) suits marketplaces and platforms that need to split payments between multiple parties or pay out to sellers.
For teams evaluating AI-powered builders with built-in payment support, the question is not which provider is best overall. It is which one fits your specific app, audience, and revenue model.
How Do Stripe and PayPal Compare for App Builders?
| Feature | Stripe | PayPal |
|---|---|---|
| Setup complexity | Low (API-first, well-documented) | Low (SDK and buttons available) |
| Supported payment methods | 135+ including cards, wallets, bank transfers | Cards, PayPal balance, Venmo, Pay Later |
| Subscription billing | Built-in with Stripe Billing | Available through PayPal Subscriptions |
| Transaction fees (US) | 2.9% + $0.30 per transaction | 3.49% + $0.49 per transaction |
| Customization depth | High (full UI control with Elements) | Moderate (branded buttons, limited UI) |
| Global reach | 47 countries | 200+ countries |
| 3DS support | Native (Stripe Radar) | Available |
| Best for | SaaS, subscriptions, developer-led teams | Consumer apps, high PayPal user base |
One builder on LinkedIn shared this observation about payment setups in AI tools: "Every autonomous dev assistant I've used makes one silent assumption: Payments = Stripe. No discussion. No config. Just done. With Stripe, I had a sandbox and live test running in 5 minutes."
Both providers work with modern AI platforms that handle payment configurations out of the box. Ultimately, your choice depends more on your user base than on technical capability.
What Decisions Need to Be Made Before Connecting a Provider?
Choosing a payment provider is only half the equation. In fact, several product-level decisions shape how the payment experience works for your users.
Pricing model selection is the first fork in the road. Each model requires a different technical implementation.
| Pricing Model | What It Requires | Best Provider Feature |
|---|---|---|
| One-time purchase | Single charge, order confirmation | Stripe Payment Intents / PayPal Orders |
| Monthly subscription | Recurring billing, dunning management | Stripe Billing / PayPal Subscriptions |
| Usage-based billing | Metering, variable invoices | Stripe Meters |
| Freemium to paid | Trial periods, card capture without charge | Stripe SetupIntents |
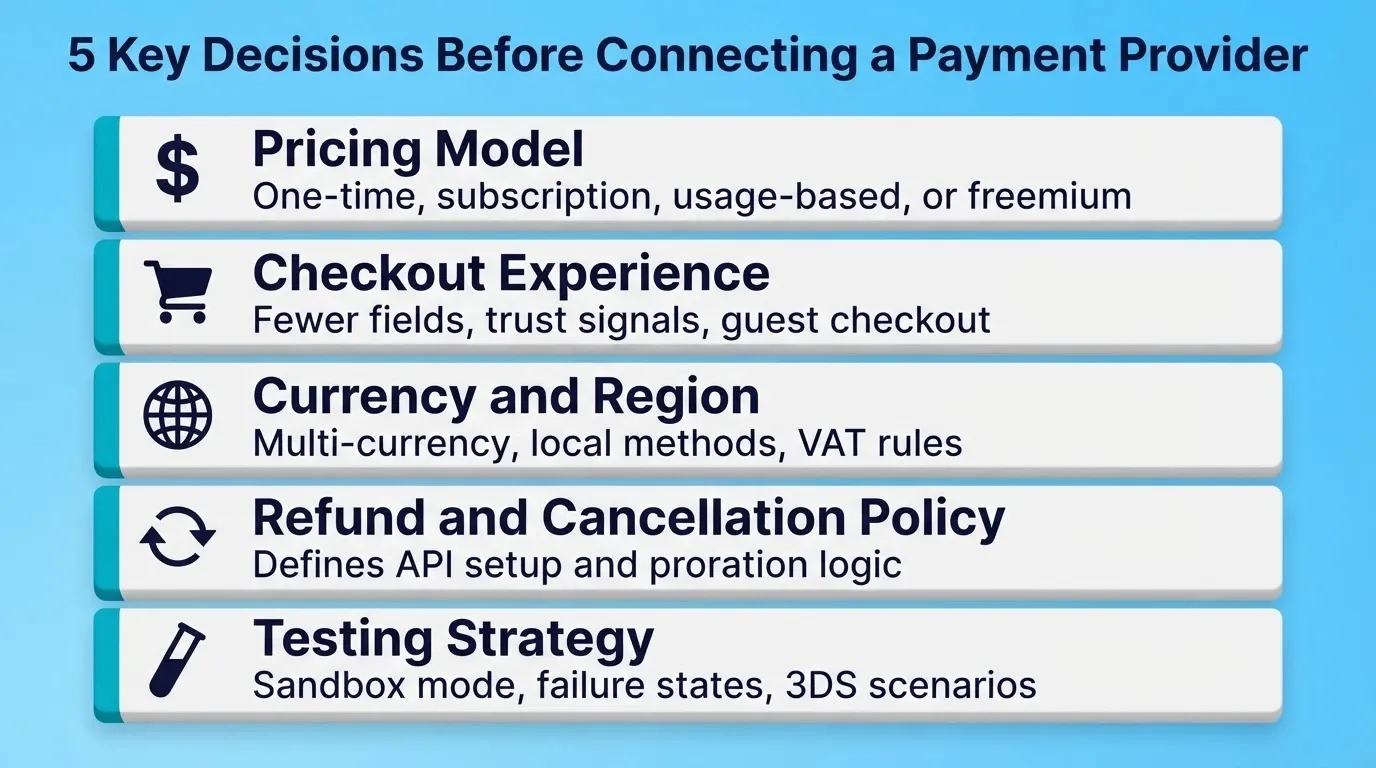
Checkout experience design directly affects conversion. Research from the Baymard Institute shows the average online cart abandonment rate sits at 70.22%. Specifically, 17% of shoppers leave because the checkout process is too long or complicated.
Currency and regional considerations matter if your app serves users outside a single country. Multi-currency support, localized payment methods, and tax jurisdiction handling all add complexity that many teams underestimate. For example, if you sell digital goods to EU customers, VAT collection is legally required.
Refund and cancellation policies need to be defined before you write any code. These policies dictate your refund API setup, subscription pause logic, and how your app handles pro-rated credits.
Testing strategy often gets overlooked. Each payment provider offers a sandbox or test mode environment. Skipping thorough testing leads to real-money bugs that erode user trust fast.
How Rocket's Build Turns a Payment Idea Into a Working Checkout
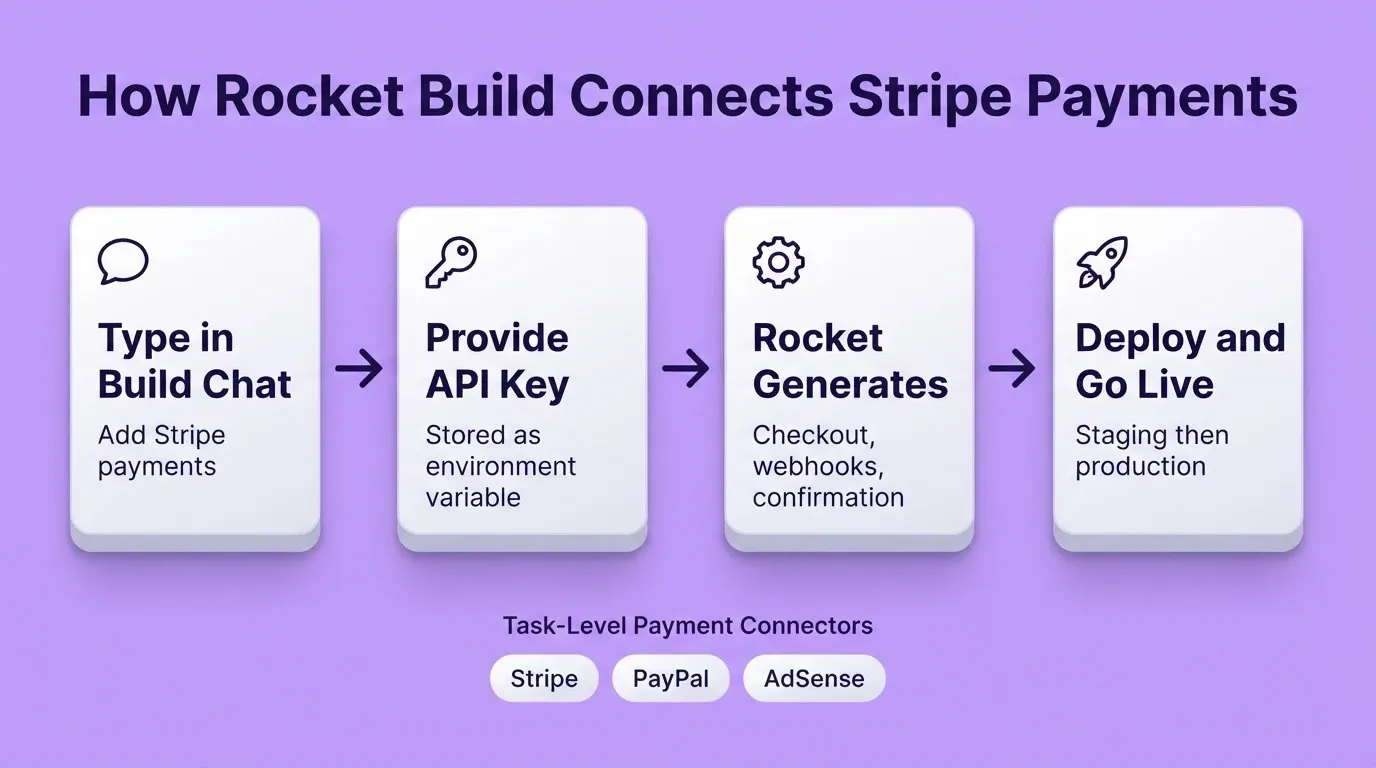
Rocket's Build generates production-grade web apps in Next.js and mobile apps in Flutter. Payment integration works through task-level connectors. Stripe and PayPal connect per Build task using your API keys, which Rocket stores as environment variables at the server level. They are never exposed in client-side code.
To connect a payment provider in Rocket's Build, follow these steps.
-
Start or open a Build task.
-
Type "Add Stripe payments" (or PayPal) in the chat.
-
Provide your API key when prompted.
-
Rocket then wires the complete checkout flow into your app automatically.
This is not just a payment button. Rocket generates the full connected system: product selection screen, checkout page, order confirmation, receipt handling, and webhook listeners, all as one integrated build. Teams who want a step-by-step walkthrough can follow the guide to building a Stripe payment gateway.
What Rocket's Build Generates for Payment-Enabled Apps
-
Full checkout flow: product listing, pricing display, checkout form, payment confirmation, and receipt screen
-
Webhook handlers: listeners for payment success, failure, subscription renewal, and dispute events
-
Subscription and one-time payment logic: billing logic generated alongside the UI, not bolted on afterward
-
Secure credential management: API keys stored as environment variables and handled at server level
-
Post-purchase integrations: connect Mailchimp for receipt emails, Google Analytics for conversion tracking, and Supabase for order data, all through the same chat interface
Rocket also builds Flutter mobile apps for iOS and Android from a single codebase. So payment integration works on mobile too. Stripe and PayPal both provide mobile SDKs, and Rocket wires these into your Flutter app alongside the web checkout flow.
After your payment flow is built, Rocket deploys to a staging URL for testing before you go live. Once you are ready, switch to production with a custom domain. Full version history and one-click rollback mean you can iterate on your checkout flow without any risk.
From Zero to Working Transaction: A Practical Walkthrough
Here is exactly what the process looks like when you connect a payment provider to your app.
-
Describe your payment need in plain language. Tell the builder what your app charges for: one-time purchase, monthly subscription, or pay-per-use. Be specific about what happens after payment.
-
Connect your Stripe account. Create a Stripe account at stripe.com if you do not have one. Copy your publishable and secret API keys from the Stripe dashboard. Then, in Rocket, type "Add Stripe payments" in the Build chat and paste your keys when prompted.
-
Generate the checkout flow. Rocket creates your product listing, pricing display, checkout form, and payment confirmation screens. Review each screen in the live preview and interact with it as a real user would.
-
Configure webhooks for async events. Stripe sends webhook notifications for successful payments, failed charges, subscription renewals, and disputes. Rocket auto-generates webhook handlers, but verify they catch the specific events your app needs.
-
Test in sandbox mode. Use Stripe's test card numbers to simulate successful payments (4242 4242 4242 4242), declined cards (4000 0000 0000 0002), and 3DS challenges (4000 0025 0000 3155). Check that your app responds correctly to each scenario.
-
Switch to live mode and deploy. Swap your test API keys for live keys and confirm your Stripe account is fully activated. Then deploy to your production URL and monitor the first few real transactions closely in the Stripe dashboard.
The entire process, from describing the payment need to processing a live test transaction, takes hours rather than weeks when you work with the right tools.
Common Mistakes When Adding Payments to an App
These are the errors that cost teams the most time and money. Knowing them in advance saves you from rebuilding your payment layer later.
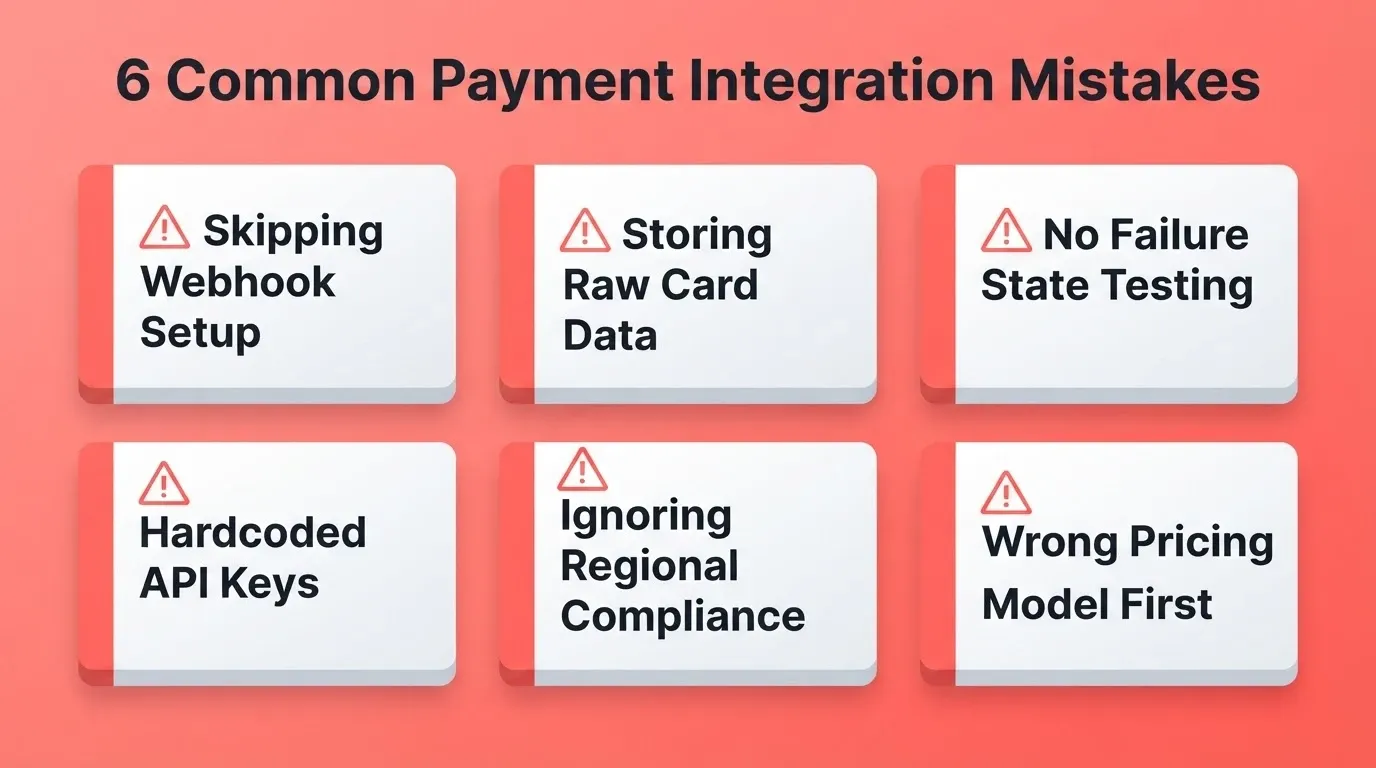
Skipping the webhook setup. Many developers test the happy path and skip webhook testing. In production, however, payments fail, subscriptions lapse, and disputes happen. If your app is not listening for these events, customers who paid will not get access and customers who cancelled will keep it.
Storing card data directly. Never store raw card numbers in your database. Use tokenization instead. Stripe and PayPal handle this by design. Your app should only ever handle tokens that reference the actual card data stored on the provider's secure servers.
Launching without testing failure states. Test declined cards, expired cards, insufficient funds, and 3DS challenges before going live. Each failure state needs a specific user-facing response and a specific backend action.
Hardcoding API keys in client-side code. Payment credentials in your frontend code are visible to anyone who inspects your source. Always use environment variables stored at the server level. Rocket handles this automatically. If you are managing the backend wiring yourself, this step is non-negotiable.
Ignoring regional compliance. If your app accepts payments from EU customers, you need 3DS support and GDPR-compliant data handling. Additionally, if you sell digital goods in the EU, you need to charge and remit VAT. These are not optional.
Building the wrong pricing model first. A subscription billing system is architecturally different from a one-time purchase flow. Switching models after launch requires rebuilding significant backend logic. So validate your pricing model before you build.
Ship Your Payment Layer This Week
The gap between "app that works" and "app that collects money" keeps shrinking. Pre-built providers like Stripe and PayPal have already solved the hard engineering problems, from tokenization to tax calculation to global compliance. Your job is to connect them, not rebuild them.
Knowing how to add payments to your app is no longer a technical barrier. It is a decision. As AI-powered build platforms continue to mature, the time from payment idea to live transaction will keep compressing. The teams that ship revenue-ready apps fastest are the ones who treat the payment layer as a standard build task, not a special project.
Describe the checkout you need at Rocket.new and go from idea to live transactions without touching payment infrastructure.
Table of contents
- -Why Payment Flows Become the Longest Chapter in App Development
- -What Exactly Goes Into a Payment Flow?
- -Which Pre-Built Payment Options Work for Modern Apps?
- -How Do Stripe and PayPal Compare for App Builders?
- -What Decisions Need to Be Made Before Connecting a Provider?
- -How Rocket's Build Turns a Payment Idea Into a Working Checkout
- -What Rocket's Build Generates for Payment-Enabled Apps
- -From Zero to Working Transaction: A Practical Walkthrough
- -Common Mistakes When Adding Payments to an App
- -Ship Your Payment Layer This Week